Tombs of Terror is the solo PvE adventure content for the Saviors of Uldum expansion. It picks up on the story from last expansion’s The Dalaran Heist. After League of E.V.I.L. has stolen the Dalaran city, they headed towards Uldum and unleashed plagues (which took the form of powerful Plague Lords). But completing their plan might not be as easy as they thought, because this time the League of Explorers is there to stop them. You will play as one of them, trying to stop plagues from spreading across the world.
In the third chapter, players will visit the Khartut’s Tomb and fight against Plague Lord of Death – Xatma.
Check Out Our Other Guides!
- Tombs of Terror General Guide
- Chapter 1 Guide – Vesh, Plague Lord of Murlocs
- Chapter 2 Guide – K’zrath, Plague Lord of Madness
- Chapter 4 Guide – Icarax, Plague Lord of Wrath
- Chapter 5 (Finale) Guide – Tekahn, Plague Lord of Flames
- Reno Jackson Hero Guide – Mage / Rogue
- Sir Finley Hero Guide – Paladin / Shaman
- Elise Starseeker Hero Guide – Druid / Priest
- Brann Bronzebeard Hero Guide – Hunter / Warrior
Twist: Entombed Minions
The twist is somewhat similar to the Dalaran Heist’s Violet Hold. However, in my opinion, it’s much more interesting and less random. When it comes to Violet Hold, you could just ignore it for the most part. Here it might actually be worth building towards, because you can influence heavily how fast you’re getting those minions out.
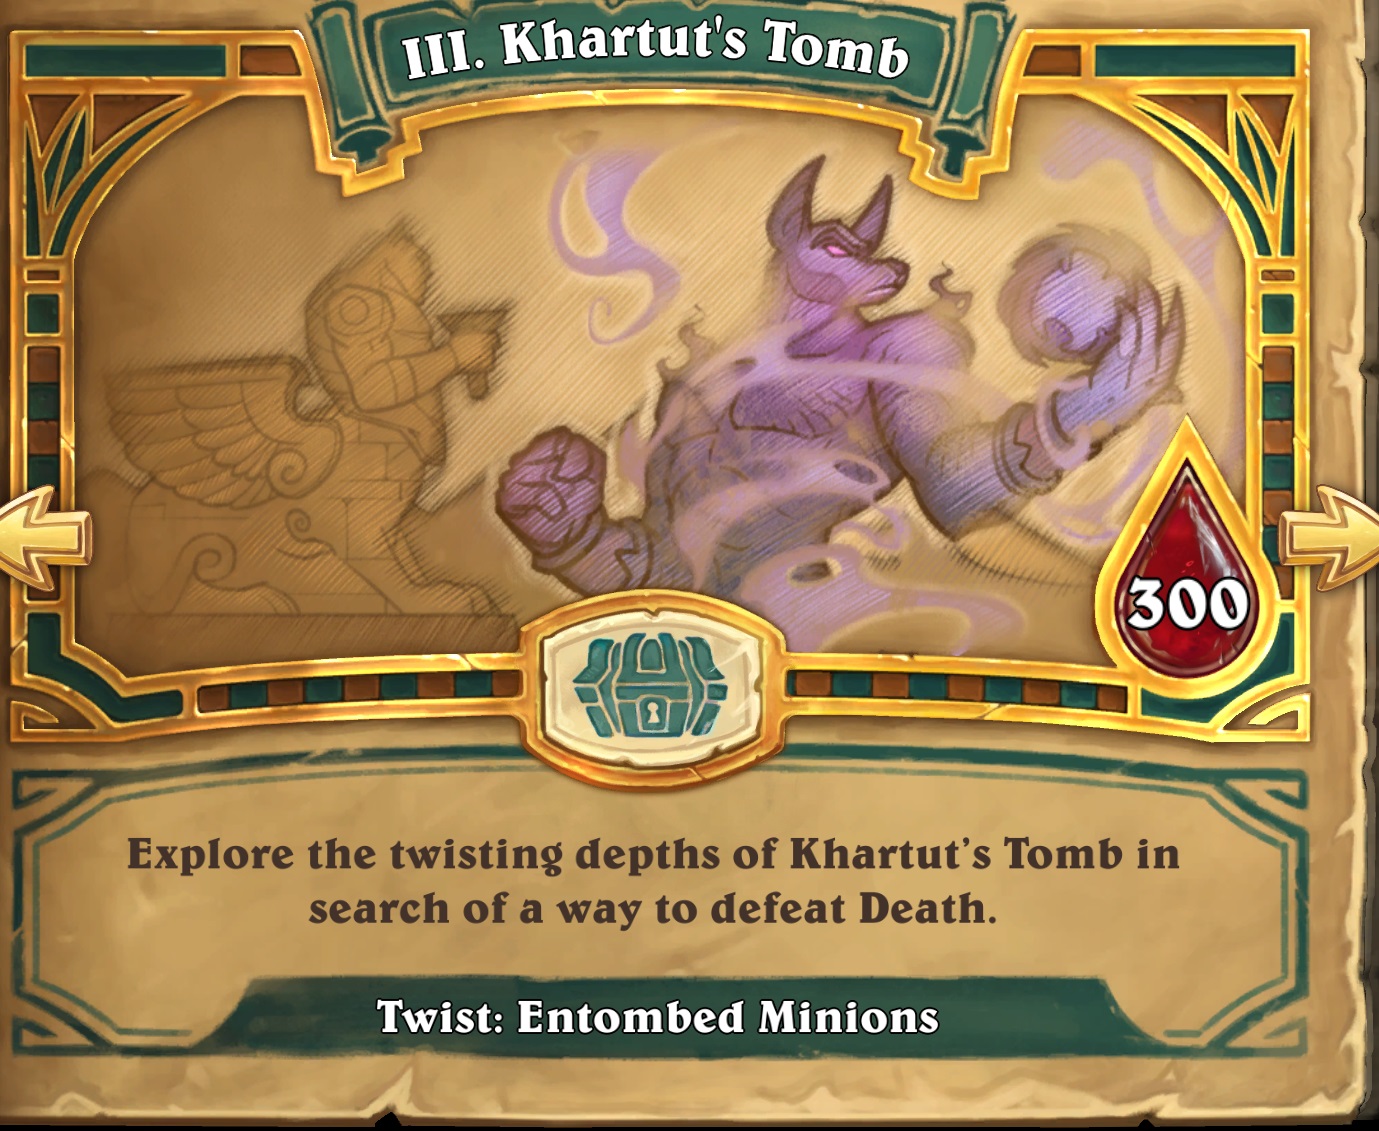
But first things first. Each player starts with Eternal Tomb on the board – it does not disappear, so you’re basically playing with 6 board slots (but it’s still much less annoying than Heist’s Streets of Dalaran). The Tomb starts with a random “dormant” minion inside. The minion is ALWAYS a Deathrattle minion and it ALWAYS costs 5 or more mana, so you will never get low cost minions. Minions can be from any class or Neutral. In order to get the minion out, X friendly minions need to die, where X is equal to the dormant minion’s mana cost. So, for example, if the dormant minion is Tirion Fordring, it will “wake up” after 8 friendly minions die. The same thing goes for your opponent – his dormant minion will wake up after X minions die on his side of the board.
After the minion wakes up, it is summoned on the right side of the Tomb and now there’s another dormant, Deathrattle minion in the tomb. That’s probably the biggest difference between this and Violet Hold – new minions will spawn indefinitely as long as you have enough minions to “sacrifice”.
Chapter 3 Strategy
The best strategy in Chapter 3 would be to abuse Twist as much as you can in order to get as many free, big minions. Most of the Deathrattles dropped from Eternal Tomb are good – you will commonly get minions that can possibly swing the game on their own. That’s why, most importantly, any kind of “spell” strategy is pretty bad in this chapter. Going heavy on spell synergies is bad, because you will play much less minions than your opponent, which means that he will get his Deathrattles more often than you do. If you run a minion-light deck, it might be hard to even get the first one out in many encounters. Of course, if your deck is strong enough, you might be able to deal with both whatever your opponent plays AND their free Deathrattles, but especially in Heroic that might be difficult (and it’s definitely counter-productive).
The best way to get through the initial seven bosses are tokens. For example, Finley’s Call in the Finishers not only summons 4x 1/1, but also progresses your Tomb heavily after they all die. Unleash the Hounds, BEEEES!!!, Spreading Plague etc. are amazing, because they can all progress your Tomb by a lot, often without progressing your opponent’s one by nearly that much. Talking about tokens, minions that summon tokens are also good ones to get – e.g. Infested Wolf, Replicating Menace or Eggnapper. That obviously includes Reborn minions (Finley has a whole bucket related to Reborn cards, Elise has some too). The Token strategy can also be combined with AoE buff passives (such as +1/+1 to all minions or +1 Health and Taunt), they’re often an easy way to win against lots of bosses.
All of that said, you want to go for a full token strategy ONLY if you pick one of those health buffing passives. While tokens do indeed help you crack open the Tombs much quicker, they might be a hindrance against Xatma’s 2nd and 3rd Hero Powers, especially against the final one. When you face Death’s Gaze, you can’t really afford to play 1 health minions, because they will just die and give your opponent a powerful spell (Untimely Demise). Having some token cards is still not a bad strategy – it will let you get to the boss much easier and they will serve you well through a big part of the fight. And cards like BEEES or Unleash the Hounds are great even in the last phase, since you can kill them off immediately. However, “summon X 1-health minions” is not great unless – like I’ve already said – you combo them with one of the passives. That’s why instead of a full Token-based strategy, what I would suggest is a Midrange/Big minions strategy with some Token cards weaved in – especially ones that gain Charge or Rush. For the same reason, you might want to avoid using Finley’s New Recruits Hero Power – 2/1 tokens will be useless in the last stage.
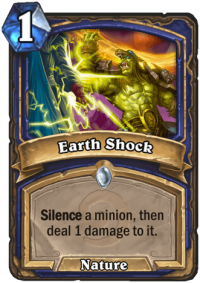
Silence cards get more value in this chapter than they did in previous two. Given that your opponent will eventually get big Deathrattle minions out, most of them are great Silence target and you can deny A LOT of value (e.g. silencing Sylvanas Windrunner means that they’re not stealing your minion and silencing Anubisath Warbringer means that minions in their hand won’t get too powerful). Silence cards aren’t common, but some card bundles do contain them.
On the other hand, any Deathrattle synergies you can pick will be much more useful. For example, Reno’s Deathrattle bucket gets significantly better with cards like Necrium Blade or Unearthed Raptor getting tons of value on your big Deathrattles.
Outside of deck building, the best advice is to plan ahead. You can see what Deathrattle minion you and your opponent will get ever since Turn 1. Be aware of both counters and try to play around them. For example, if you see that you have only 2 minion left to die to summon something good, you can decide to play 2 smaller minions instead of one bigger one. And if you already have minions on the board, you can go for a slightly worse trades to force your minions to die and get the big minion. Similarly for your opponent – you can decide when to force the minion out and kill it “on your terms”. But, for example, if they’re only missing one minion from summoning it and you have no way or intention to kill it, you can ignore their board and go face instead. Summoning it on your turn without dealing with it essentially gives it Charge, since opponent can attack with it immediately. If he will get it out on his own turn, he won’t be able to do anything with the minion yet. You also want to play around specific effects, such as Taunts. Let’s say that you want to kill 3 minions on your opponent’s side, but a Deathrattle Taunt will spawn after killing 2. You might not be able to get past it, so you need to adjust your strategy accordingly.
Xatma, Plague Lord of Death Guide
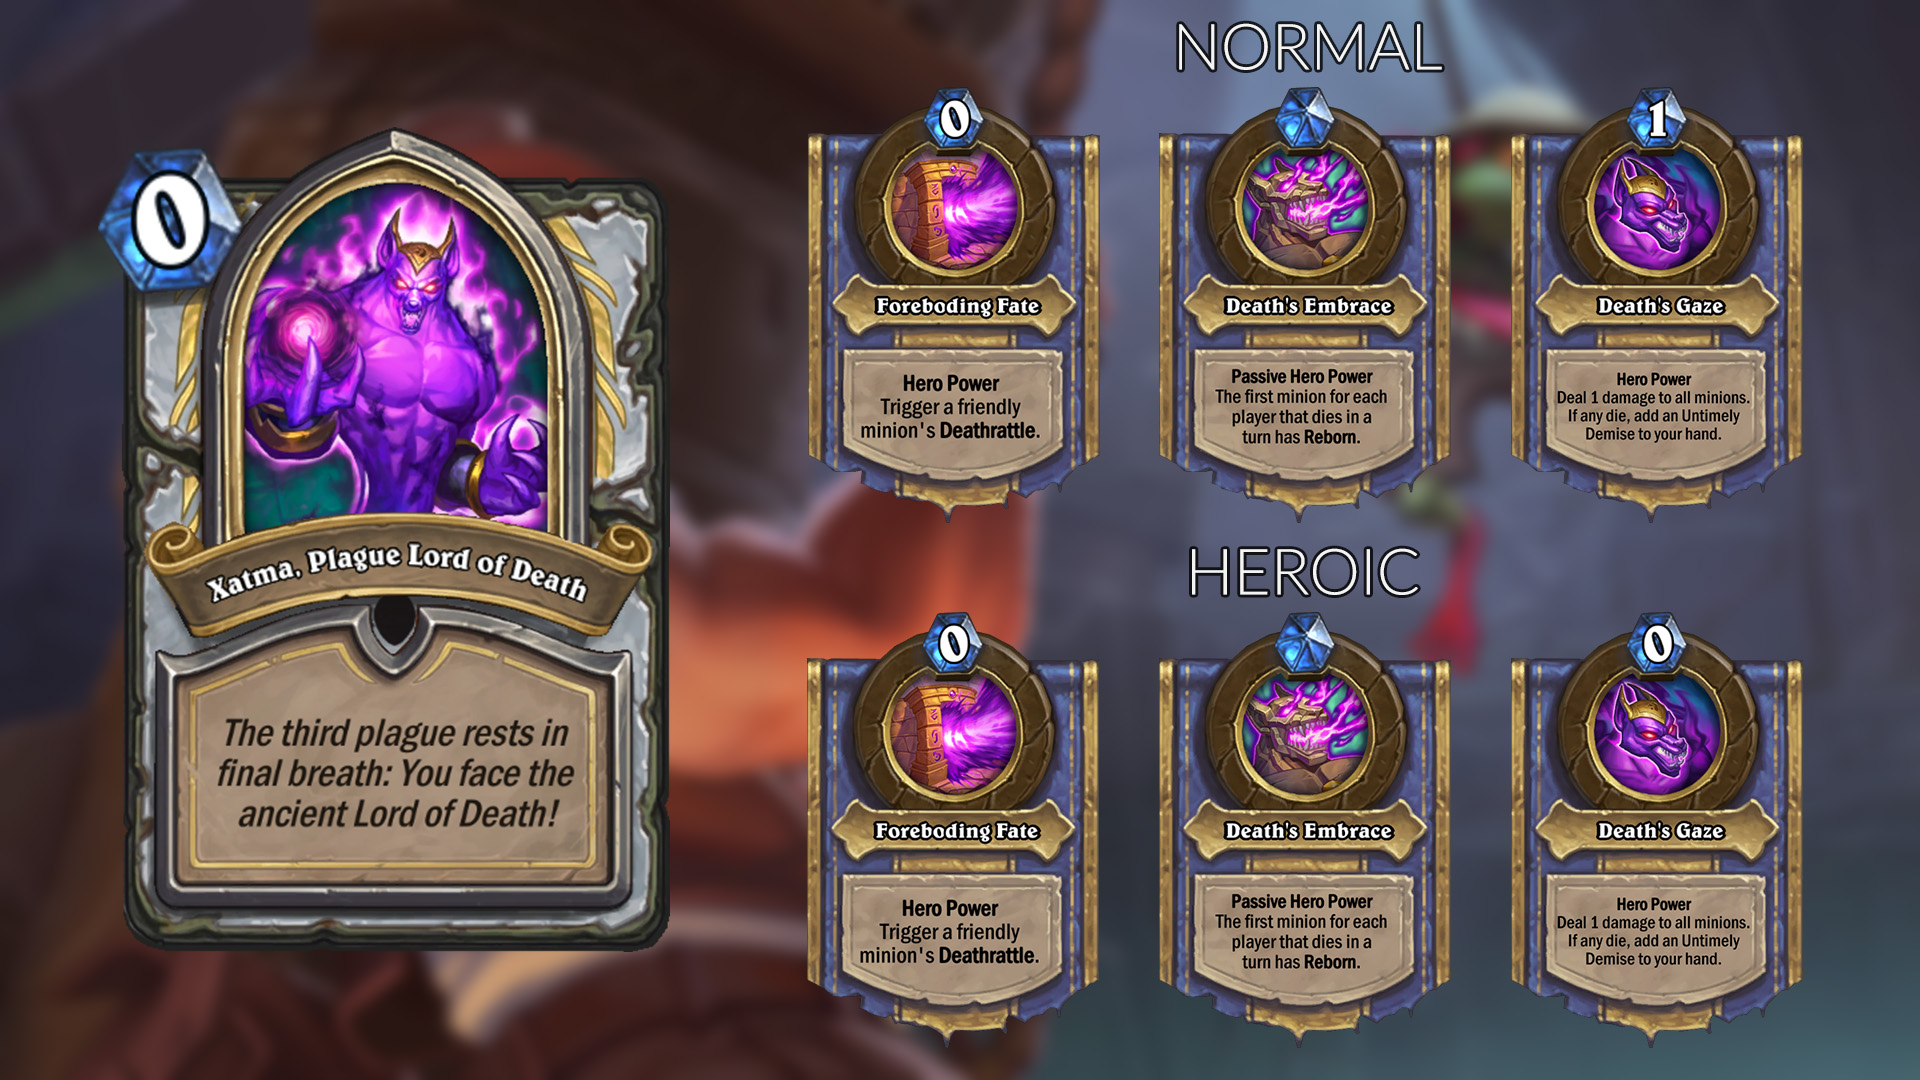
Phase 1 – Foreboding Fate
Let me start by saying that I think that this is the strongest Plague Lord so far – it’s significantly better than the ones we had to face before. While the later phases are probably comparable, this one takes off really quickly in most of the games, often snowballing as early as few turns into the match, before you can do much.
First Chapter has the same Hero Power in both Normal and Heroic (but Heroic is still much harder, mostly because Xatma has a better deck to take advantage of the Hero Power). The Hero Power itself is, of course, very powerful. Unlike Chapter 1 (where the first HP was neutral) and Chapter 2 (where both sides could benefit from it), this one is always going to benefit the boss. As you can imagine, triggering a friendly Deathrattle is strong (Play Dead), especially when it costs 0 mana and you can do that every turn. Given that it’s NOT on auto-cast, opponent can play his Deathrattle minion first and then trigger it, with no counterplay from your side. Of course, there’s no telling whether opponent actually has a strong Deathrattle minion in his hand to do it, so your best bet is to still get rid of powerful Deathrattles present on the board.
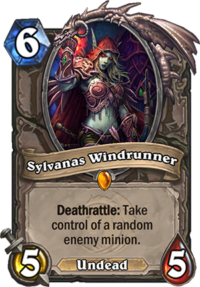
It’s hard to write a deep strategy for this phase, because Hero Power’s effect changes depending on what minion he targets. Xatma plays a huge variety of Deathrattles – the ones that give more value, summon minions, buff other minions or even ones with more unique effects (such as Sylvanas Windrunner, which is particularly powerful). You will need to adapt your strategy depending on whatever he drops on the board.
I recommend getting through this chapter quickly – just go for the aggressive plays. Xatma doesn’t have a good way to clear the board early and during the first turns his Hero Power is still pretty weak (compared to what it will be later), since he won’t drop any really powerful Deathrattle minions until a few turns in. That’s why you have some time to develop the board and overwhelm him.
Phase 2 – Death’s Embrace
Just like in Phase 1, this Hero Power is also the same in Normal and Heroic version. And this is the part with some deeper strategy (other than “just kill him”). Every turn the first minion that dies gets Reborn, which means that it revives at one Health. It means that your strategy here is to get as much value out of this Hero Power while lowering the value your opponent will get.
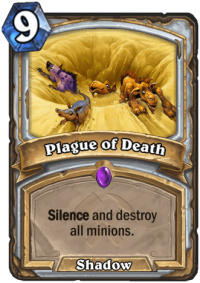
Xatma has one board wipe – Plague of Death. Just like other Plague Lords, he will ALWAYS draw it when phases change, so be careful about that. Try not to overextend between phases. The good news is that he has to spend his entire turn casting this. The bad news is that you have to start building your board from scratch.
The ideal scenario is that your opponent triggers it on some small, irrelevant minion, while you trigger it on your big guy, preferably one with Deathrattle. Because of that, ordering of attacks, what you leave on the board etc. is very important. First of all, let’s talk your turn. In order to get as much as you can from this Hero Power, you first want to kill the least powerful minion on their side of the board BUT without killing one of your small minions at the same time. This way that minion will get reborn, which is not that much value. The second thing you want to do is to kill off one of your own minions to also take advantage of that Hero Power. You preferably want to kill off a Deathrattle minion, so you can double-dip on that Deathrattle. If not that, then kill the highest attack minion you have – Reborn will summon it back at 1 Health anyway, so that part doesn’t matter much (unless you have some healing cards, then play accordingly). Then, finally, you want to kill off whatever your opponent might want to give Reborn on his turn. Let’s say that he has some powerful Deathrattle – get rid of it after you’ve already triggered the Hero Power on some weaker minion of his. You can combine 2nd and 3rd step and use your best minions to trade into their best minion.
Now, you can’t really control how your opponent will trade, but what you CAN do is to give them no good options. Ideally, when going into your opponent’s turn, leave no small minions on your side of the board. Try to get rid of all tokens and stuff that you don’t want to get resummoned. Like I’ve mentioned previously, kill the minion HE would like to trigger Hero Power with too. This way you’re reducing the value he might get, while increasing the potential value you will get if he trades.
This is a very tricky chapter and I advise that you think every turn through. If you trade correctly, you should be able to take decent advantage of this Hero Power – maybe even more than the opponent, despite his deck being designed for it. If you, however, make trades in bad order or just mess something up, that Hero Power can easily snowball the game for Xatma very quickly.
Phase 3 – Death’s Gaze
Finally, the last phase is different in Normal and in Heroic, but to be honest, it’s seems to be the easiest one in both of those modes. This phase is also the reason why I can’t truly recommend a full token strategy. Or rather – it’s a solid way to get all the way here and then lose (which might not be the WORST strategy on Heroic – getting the boss down to below 100 Health in one run is not the worst thing ever). A full token strategy without a passive that buffs their health means that the boss will just clear your tokens every turn and get free Untimely Demise. Of course, it’s very difficult to prevent him from getting some copies even if you don’t play any tokens, but it’s just much more manageable.
The goal of this phase is simple – don’t leave any minions at 1 health. Hero Power is on auto-cast at the beginning of each turn, so it’s quite simple, because your opponent can’t trade first and then Hero Power. Basically, trade of all of your 1 health minions – preferably into their 1 health minions. Hero Power is board-wide, so it also damages his own minions.
Opponent will get only a single Untimely Demise no matter how many minions die. Which means that if you can’t remove all of them, you might as well leave them be sometimes. There are certain situations in which opponent will have multiple 1/1’s that will be hard to get through – just ignoring them and giving him one Untimely Demise is not the worst thing ever. While 3 AoE damage hurts, a single one is not going to win him the game, and you often would have to put much more resources into clearing the 1 health stuff than it’s worth.
The final deck is basically full of generic, powerful Deathrattle cards and synergies. There are some revives, some Shadow of Death etc. The only card you really need to be really careful about is N'Zoth, The Corruptor. It can really swing the board in opponent’s favor, giving him back all of the Deathrattles. Luckily for you, he will probably have some small ones from the first phase, and because of Tomb on the board his space is limited to max 5 revives. Still, most of the time he will get at least 2-3 bigger bodies, so if you’re holding some AoE clear, that might be the right time to drop it.
One other notable minion he can drop (and also get from Tomb) is Hakkar the Corruptor. The problem is that while Plague Lord’s deck changes every phase, yours stays the same. It’s especially apparent in this final chapter, when you should be running out of cards while your opponent will have 20, 30 or however many left. In this case, Hakkar’s Deathrattle going off is really deadly for you, while it doesn’t do much for your opponent. Once Hakkar is down, if you have no way to Silence/Transform it, you need to remember that you’re on a very quick clock. So don’t play around stuff, just go all in and try to kill him or at least deal as much damage as you can before you inevitably die.
My first compete win was with the perk enabled, when a minion dies, put it back in your deck.. so unlimited cards and you can just keep milling through them.
special power that also helped, put a minion into play every time you use a spell.
all this was stacked on Elise’s, plus two health, if full draw a card. and minion that returns 2 copies of the spell you put on her.
I managed to win by taking advantage of his strongest play.. he keeps stealing my cards.. Lucentbark was my life saver.. I eventually got both his and my side covered with them. his were all flipped and useless, mine eventually all active because i kept healing! so at some point he could do nothing in his turn and I just kept the attacks coming 😀
almost forgot, the other perk i had was. give all minions +1 health and taunt. so he had to attack my minions.
In this boss, milling through weak ones have me free minions (from the token) very quickly and useful.
Is using Elise good? Are any of the other heros better?
I think other heroes have the potential to be easier. it took me many tries before I had the winning combination above to beat him 🙂
I managed to kill the third plague lord in my first try in one run, using:
1) Elise’s Might Hero Power: Choose one: +2 dmg or +2 armor
2) Alchemist’s Stone Passive: After you play an Odd-Cost card discounts all cards in your hand by (1)
3) Darklight Torch Passive: After you play an Even-Cost Card, Refresh your Hero Power, it cost 0 this turn
4) Mystical Mirage Treasure :Twin Spell: Refresh your mana cristals and give you a new hand this turn. *This card is amazing when running out of resources. and thanks to the alchemist stone, i usually got to play 6-7 cards both times i used it.
5) A lot of “Inspire” Cards: The Nexus guy that give you spells when you use the HP was amazing as well as the guy that gets +2/+2 every time you use the HP… but i only had 1 of those =(.
With this, i always got control of the board, only the sylvannas were very VERY annoying. and got to deal absurds ammount of damage just from HP (the most i did in a turn was 20 i think)
The first phase was the hardest by far. the second one worked in my favor usually. and in the third i was disrupted a lot by “Plague of death” but i still managed to kill him with a few cards left in my deck.
I just cheesed him in heroic with the 100 hp anomaly lol.
I used Finley with Bubble Blower and Truesilver lance, and got double battlecries as my first passive ability. Then I mostly went with a healing deck and relied on hero power to get the late game value. I also picked Runaway Gyrocopter as anti-fatigue. The other treasure was tracking device and glyph of warding but those were the last 2 and didn’t greatly affect the rest of my strategy. Then I just played the value game, since I could always heal back health I lost after stabilizing.
And then I one shot the Plague Lord of Death.
Whats the best hero to use for this
I would say Finley paired with Truesilver Lance and Bubble Blower, since the boss has a lot of board-focused removal, with stuff like Sylvannas spam and Plague of Death. Use Truesilver Lance and Bubble Blower as heal and removal, as well as some other card as anti fatigue.
Of course, thats my opinion and strategy, so there’s no guaruntees.
I beat the plague lord in my first try because she wasted like 6 turns using her first hero power on Anubarak and I got a Rin, the first disciple that let me destroy her deck on the final phase. Also, the boss got pretty unlucky because she got an Octosari from the tomb.
Using it on Anub’arak is… a bit counter-productive to say the least, lol. But let’s just say that bosses aren’t always making the most optimal plays (otherwise some of the encounters would be VERY hard to win).
Anyway, congratulations on getting it down on your first try!
Thanks!
I was about to give up because I didn’t damage her in the first 12 turns.