Tombs of Terror is the solo PvE adventure content for the Saviors of Uldum expansion. It picks up on the story from last expansion’s The Dalaran Heist. After League of E.V.I.L. has stolen the Dalaran city, they headed towards Uldum and unleashed plagues (which took the form of powerful Plague Lords). But completing their plan might not be as easy as they thought, because this time the League of Explorers is there to stop them. You will play as one of them, trying to stop plagues from spreading across the world.
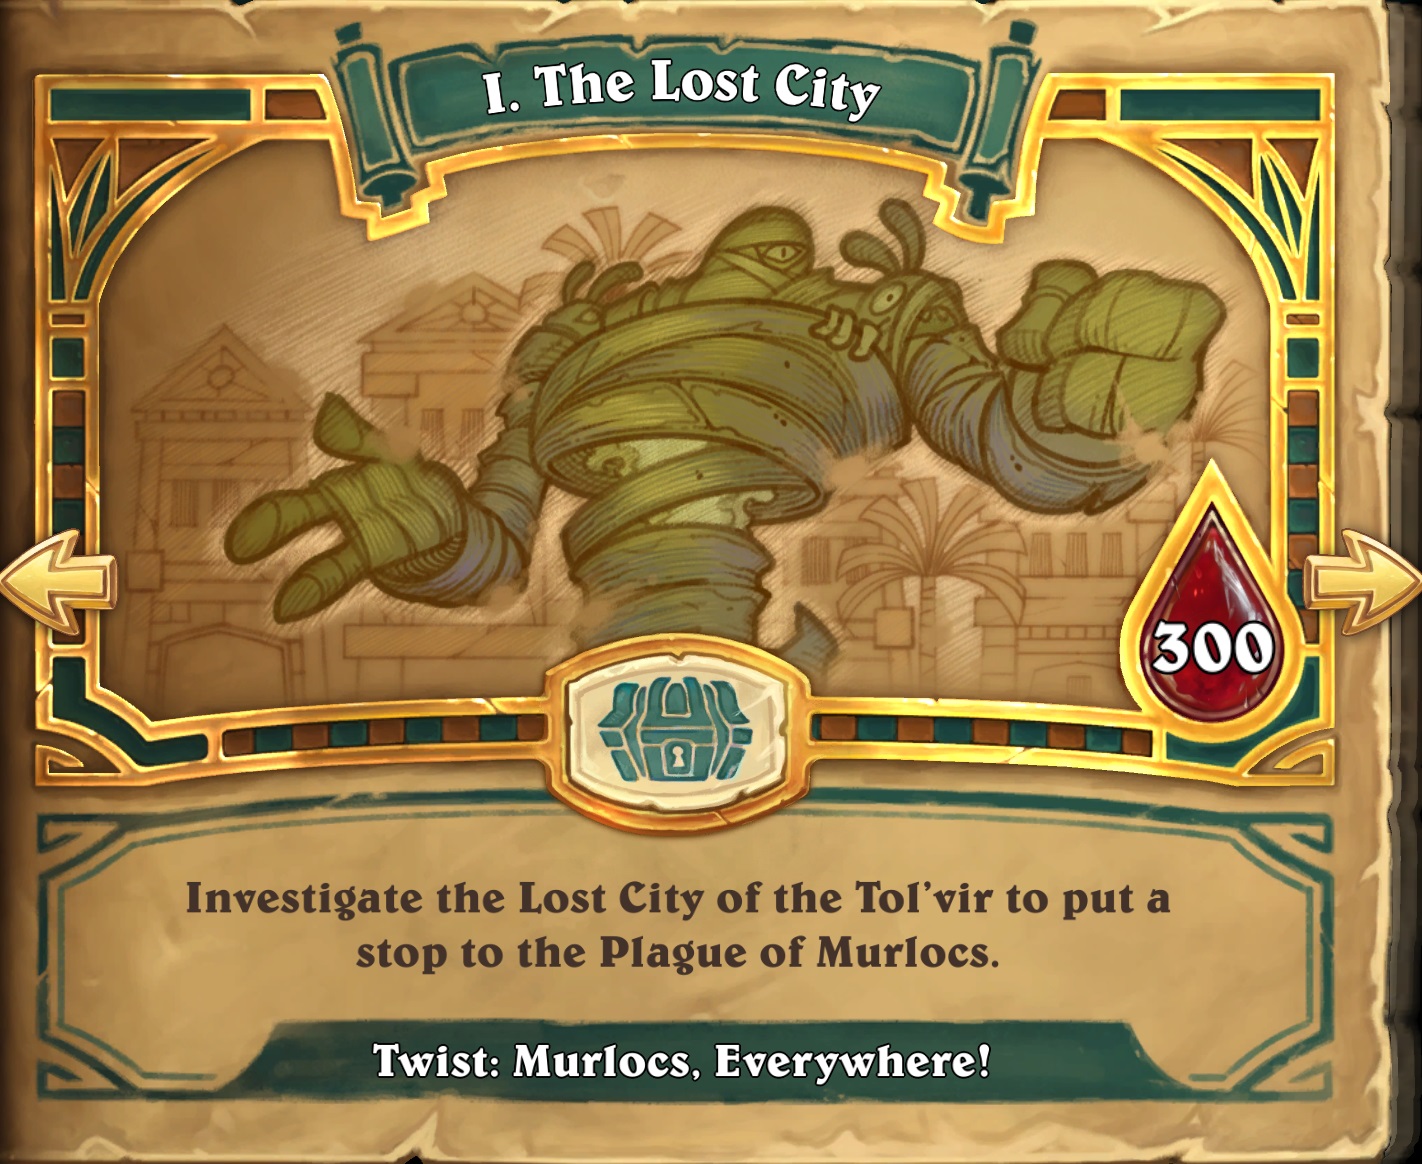
In the first chapter, players will visit The Lost City of Tol’vir and fight against Plague Lord of Murlocs – Vesh.
Check Out Our Other Guides!
- Tombs of Terror General Guide
- Chapter 2 Guide – K’Zrath, Plague Lord of Madness
- Chapter 3 Guide – Xatma, Plague Lord of Death
- Chapter 4 Guide – Icarax, Plague Lord of Wrath
- Chapter 5 (Finale) Guide – Tekahn, Plague Lord of Flames
- Reno Jackson Hero Guide – Mage / Rogue
- Sir Finley Hero Guide – Paladin / Shaman
- Elise Starseeker Hero Guide – Druid / Priest
- Brann Bronzebeard Hero Guide – Hunter / Warrior
Twist: Murlocs, Everywhere!
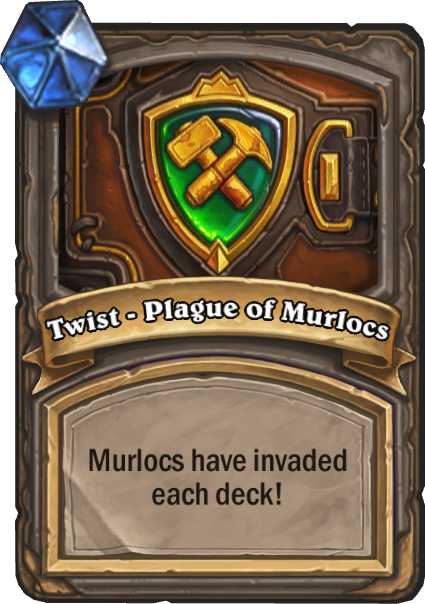
Each of the chapters has its own so-called “Twist”. To put it simply, it’s a mechanic, which makes the chapter stand out and bring part of the story into actual gameplay. It’s also something you need to take into account when building your deck and playing it – especially when we’re talking about Heroic format. In Tombs of Terror, Twists are related to the Plague Lord you’re going to fight against in the given chapter.
Since Plague Lord you’re going to face at the end of Lost City is Murl0cs-related, so is the Twist. At the start of the game, you get a bunch of Surprise! Murlocs! cards shuffled into your deck – and so does your opponent. They’re cast when drawn, meaning that you draw them, their effect triggers, and you draw another card instead. When you draw the card, a random Murloc is summoned on your side. In the early game, you will always get weak Murlocs like Murloc Tinyfin or Murloc Raider, but as the game goes by, there’s a chance to summon something stronger. Later in the game besides summoning bigger Murlocs, you also summon more of them. At one point in the mid game you start summoning 2 every time you draw it, and eventually you end up summoning 3.
The amount of Surprise! Murlocs! cards shuffled into your deck depends on how far you’re into the chapter. Against the first boss, I think that only a single one is shuffled into your deck. In later encounters, you get multiple shuffled, which means that you will see it a lot throughout the entire match.
Chapter 1 Strategy
When it comes to chapter strategy, it’s mostly about taking advantage of the Twist as well as you can. Of course – an absolutely best you could build would be a Murloc deck, but only Sir Finley Mrrgglton has access to Murloc card buckets. If you play Finley – try to pick as many Murloc synergies as possible. But even if you don’t play him, there are other ways to utilize random Murlocs.
Thanks to the “Murlocs, Everywhere!” Twist, your board will often be flooded for free – especially later in the chapter, when you often end up hitting 2-3 Surprise! Murlocs! in the row. It means that any kind of Token strategy is the best way to build your decks here. AoE buffs will be the easiest way to take advantage of the extra bodies. Since you’re getting them for free, cards like Power of the Wild or Blessing of the Ancients get way more value and are easier to play. Other kinds of buffs, especially that add Deathrattles to your minions, are also high priority picks. Soul of the Murloc or Soul of the Forest are really amazing. Brann’s Infest or Cybertech Chip are also good picks, as they usually result in lots of value, although picking too many of those is an overkill. As for the finishers, Elise’s Savage Roar and Finely’s Bloodlust are solid picks, although you would still rather get stat buffs. Summoned Murlocs can’t attack right away (unless you roll one with Charge), so they need to survive a turn before you get value out of those attack buffs. However, since you will most likely be building towards a token deck anyway, getting one or two of those finishers certainly isn’t bad.
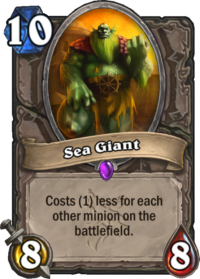
On top of those spells, any minions that synergize well with big boards are welcome. Sea Giant is the best example (especially since BOTH sides summon Murlocs, so in the late game you will often get him for cheap/free), but things like Raid Leader or Stormwind Champion are also better picks than in other chapters.
One thing to keep in mind when playing throughout the chapter is that having a full board is not really a great idea. When your board is full, you will still draw the cards that summon Murloc, but they will be wasted, doing nothing. Try to keep at least 1-2 slots open so you can get some free Murlocs in there. Of course, if you’re absolutely dominating the opponent, burning some free Murlocs is irrelevant, but in some closer matches, it’s really important to get as much as you can out of it.
All in all, two best Heroes for this chapter are definitely Finley and Elise. Brann is the third, while Reno can’t really utilize the Twist very well.
Another thing that you want to take into account is the final fight. AoE board clears (especially ones that only damage your opponent’s minions and not yours) are amazing against Vesh, since he constantly floods the board with Murlocs.
Vesh, Plague Lord of Murlocs Guide
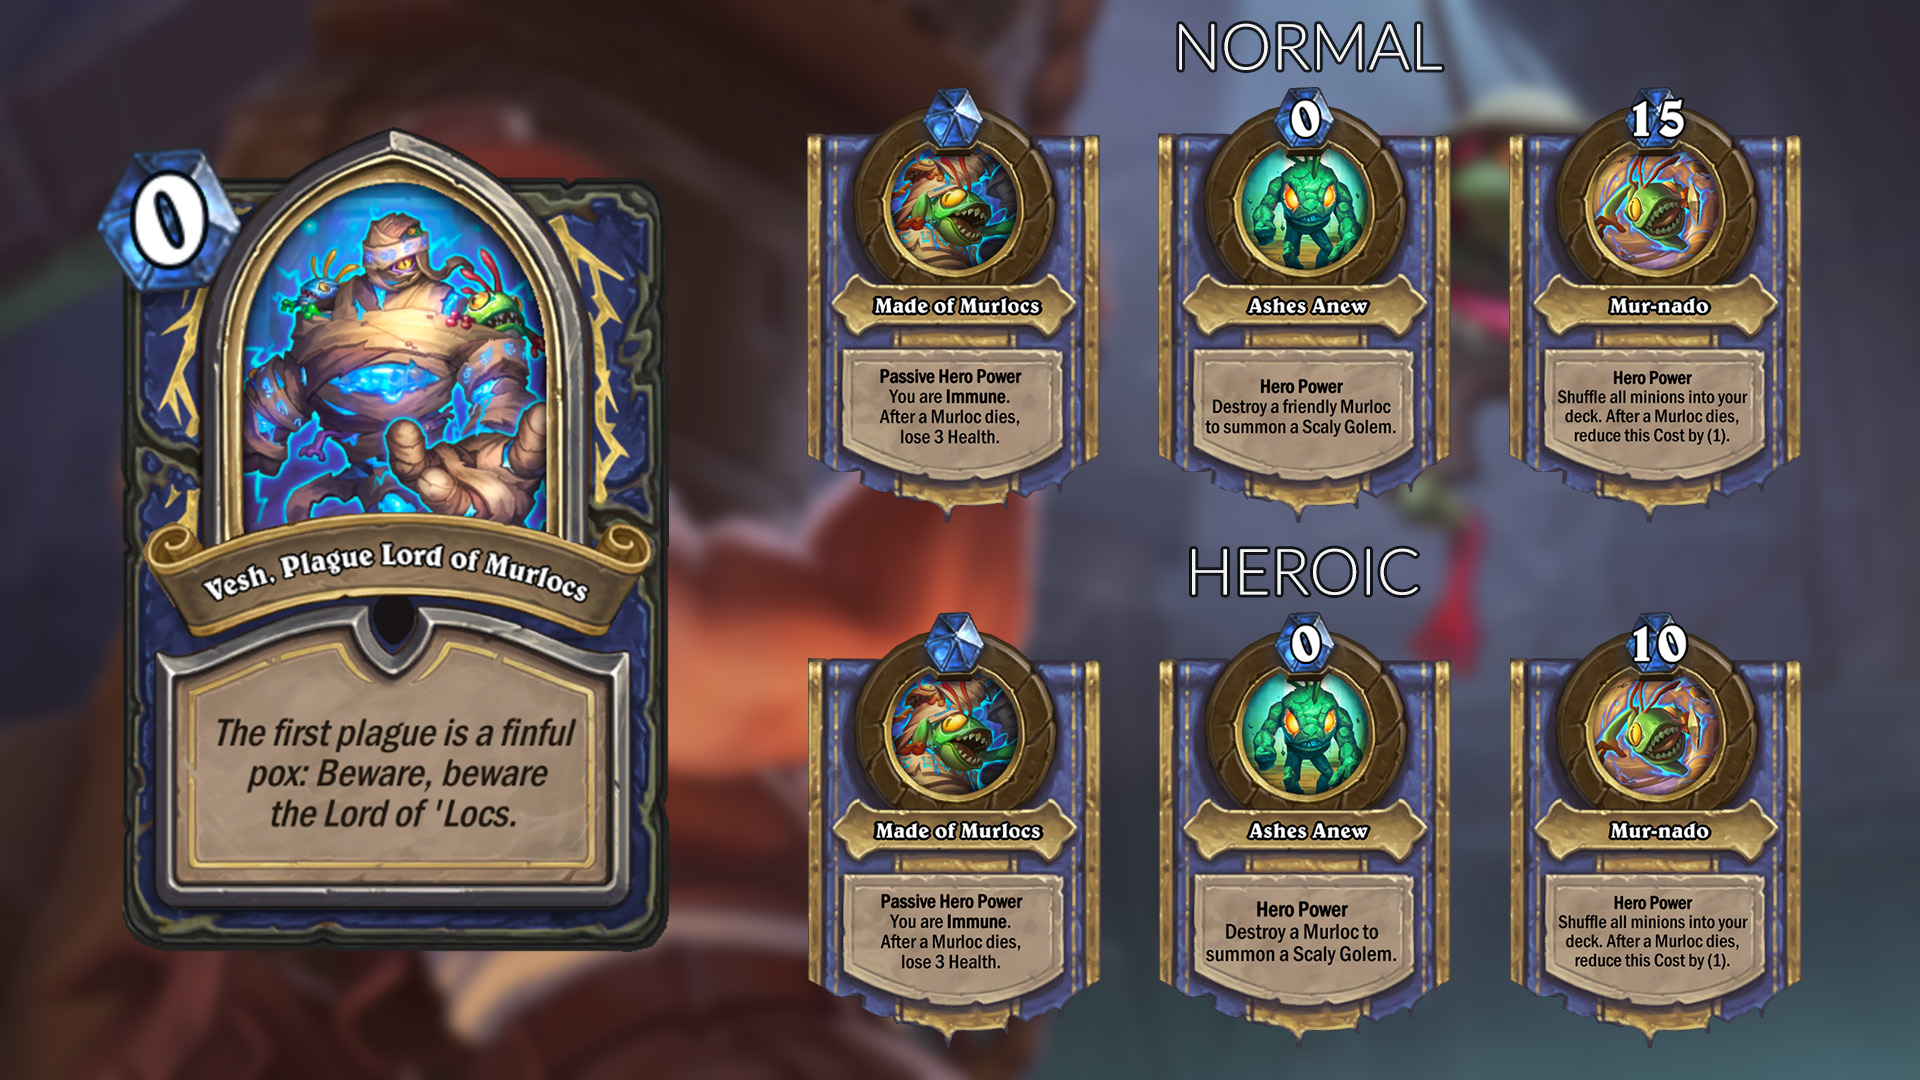
Phase 1 – Made of Murlocs
First phase of the fight is relatively easy. As you can probably imagine, most of Vesh’s deck are Murlocs – not only he will play a lot of them from the hand, but he’ll also get free ones from the Twist. The goal here is to establish a solid board and remove all of his minions. Just clear everything he plays – you can’t attack him directly anyway, and you can’t let him stack too many Murlocs given the tribe synergies. Every time you kill a Murloc, you deal 3 damage to him. Given that you need to get him down to 200, 34 Murlocs need to die in total. It seems like a lot, but it goes pretty quickly.
Note that opponent loses health any time ANY Murloc dies, including the ones on your side of the board. So if you by any chance have a Murloc deck, it his health will drop down very quickly. But even without it, you should still get a bunch of Murlocs from Twist, so trading with them damages the opponent.
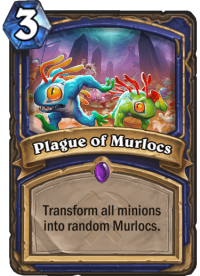
Don’t overcommit on the board, because he runs Plague of Murlocs (obviously). That’s another reason why you prefer a wide board over a tall board in this chapter – going for a few big minions means that his Plague gets immense value. With a wide board, it won’t matter that much – if you roll some good Murlocs it might result in a similar board to the one you had. And that’s more Murlocs for the sake of Hero Powers.
Overall it’s an easy part, you can slowly build the board and gather value while you get him down low. When the phases change, you want to have a solid board ready to fight.
Phase 2 – Ashes Anew
This is where the things get fishy. While the part is still relatively easy on normal difficulty, it gets pretty hard on Heroic. His Hero Power is free and destroys a Murloc – that’s the first time when the Twist is an actual downside. Not only he gets to destroy one of your minions every turn, but he also gets a Scaly Golem for his trouble. Scaly Golems are 0/4 Taunts that buff ALL of the Murlocs on board on Deathrattle. Yes, this includes your Murlocs – but on Heroic you can’t really stack them, since opponent will destroy your strongest Murlocs with Hero Power. Scaly Golem himself is not a Murloc, but since it has a Taunt, you will most likely have to kill it anyway.
The biggest problem is that opponent’s board is basically flooded with Murlocs every single turn, which means that the board-wide buff will be very powerful. Between the Twist, a spell that resurrects a bunch of Murlocs that died this game as well as regular Murlocs in hand, you will face a board full or Murlocs all the time in the later turns.
If you have any Silences in your deck, Scaly Golem is a good target. If you can kill any of the Murlocs before killing it, it’s also a good strategy. For example, if you have some 2-3 damage AoE that will get rid of a bunch of Murlocs without killing Scaly Golem, do it first and then kill the Golem, so his effect won’t be as severe.
Remember that killing Murlocs no longer damages the opponent – you will need to deal the damage yourself. That’s where it gets difficult – you can’t ignore the growing board of the opponent but you also need to sneak in some damage. The ideal scenario is to damage during your AoE turns. Instead of trading, you just AoE down their board and hit face with everything. Hopefully your board is big enough to push at least 20-30 damage. If you don’t have any AoEs, things get much more difficult. If that’s the case, you might want to ignore a part of their board, like small Murlocs. Yes, he might get some value by buffing them etc. but you can’t help that, because you need ot push the damage somehow.
Phase 3 – Mur-nado
The final Hero Power is incredibly strong and very difficult to play around. In fact, it will wreck you no matter what you do. The thing is that this Hero Power WILL get cheap and it WILL deal with your entire board no matter what you do. If you clear the opponent’s board – it will be faster. If you don’t and ignore it – he might snowball it and you might lose this way. I think that ignoring the board and clearing only key minions is the best strategy here. Given that the Hero Power shuffles an ENTIRE board into his deck, it means that his minions will be affected too.

The ideal scenario is to play your powerful minions and put pressure right after the phase changes (or right after he uses his Hero Power). This is still difficult, because in Heroic mode, his Hero Power will cost 10 – it means that if it’s late game, he can still play it even if for 10 mana. It will make dealing any damage very difficult, because any time you drop some serious board, you will get it shuffled back. If you have some burn cards in your deck, you might want to keep them for this phase. Same goes for Charge minions or weapons – basically any way you can deal damage without having to use minions is very helpful. As for the minions, try to go for any face damage you can. The problem is that he starts dropping some big bombs in this phase, for example Megafin, and your health might already be pretty low after the previous two phases.
Remember to kill any Murlocs you want to kill BEFORE you get him down below 100. This way you won’t unnecessarily discount his Hero Power.
Good news is that if you die in this phase, when you come back it will take a while before his Hero Power becomes really strong. In the early game he won’t summon nearly as many Murlocs or won’t have enough mana to play the Hero Power often. You might have some turns of damage before he really takes off, hopefully you will be able to finish him in time. Even if not – again, try to deal as much damage as possible and go for another attempt. 2-3 should be enough most of the time, but a good thing is that with enough patience, you can beat him even if you only deal 10 damage per run.
I think the guide should also mention that the boss’s deck refreshes with each hero power. Even if you deck him out in the second round, in the third round he has full 30 cards. I took too long to beat him and ended up dying to my own lack of cards.
Sorry, if i missed it at some point in the guide already.
Just defeated the plague lord in my first run in the first chapter itself. Wow. Hope could share screenshot here.