
Our Togwaggle Druid deck guide goes through the ins-and-outs of this popular deck from the Rastakhan’s Rumble expansion! This guide will teach you how to mulligan, pilot, and substitute cards for this archetype!
Introduction to Togwaggle Druid
In Year of the Raven, Blizzard has rotated out Coldlight Oracle to the Hall of Fame, thus “killing” pretty much every Mill deck. Oracle was always the main way to mill – forcing two cards down your opponent, then either using other mill options or replaying Oracle multiple times.
But thankfully, one mill deck remained: Togwaggle Mill Druid. Togwaggle Mill Druid? What may sound like the memest of meme decks actually has a relatively high win rate in the current meta game, and that is not a joke. The archetype is unique and unlike other Mill decks, because the main idea behind it is not to get the opponent to fatigue as quickly as possible through normal ways. It is to get YOURSELF to fatigue as quickly as possible, and then swap your decks, taking your opponent’s cards for yourself and leaving them with a gaping hole on the right side of the battlefield.
In Boomsday Project, Togwaggle Druid has got some nice tools to work with. While the meta is no longer as good for it as it was in The Witchwood, it’s still a deck you need to be aware of when laddering, and something you can play yourself, even to Legend.
Togwaggle Druid Deck List
Check out alternative versions of this deck on our Togwaggle Druid archetype page!
Togwaggle Druid Mulligan Guide
Do NOT keep your combo pieces in starting hand. I’ve seen some players doing it and it’s a huge mistake. By the time you want to pull off the combo, you will have your deck nearly or even fully drawn, keeping them in your opening hand is a huge waste!
VS Fast Decks
Higher Priority (Keep every time)
- Lesser Jasper Spellstone – It’s good to have some sort of removal vs Aggro, it’s okay at the base level and great if you manage to upgrade it even once.
- Wild Growth – Always a keep, no matter the matchup. The best card in your deck, and possibly the best Druid card in general. Ramping is super important.
- Nourish – While Nourish might not seem like a great keep, you will need that ramp or card draw in the mid game, so it’s a good keep.
Lower Priority (Keep only if certain conditions are met)
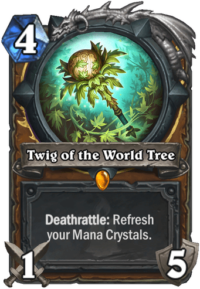
- Twig of the World Tree – Keep only with a solid hand, like if you have Wild Growth already. Fast matchups are rarely won thanks to the Twig.
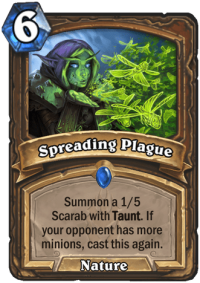
- Spreading Plague – Keep vs board flood matchups like Odd Paladin.
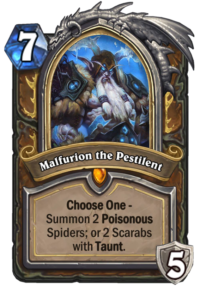
- Malfurion the Pestilent – Keep with ramp cards, you want to get out Malfurion as quickly as possible, the defensive capabilities of the card are amazing.
VS Slow Decks
Higher Priority (Keep every time)
- Wild Growth – Ramp is very important, the best keep in your deck.
- Twig of the World Tree – While it’s not that great before you get your entire combo anyway, I’d say that it’s worth to keep it – gives you some pings throughout the game and lets you set it up early – it’s better to have it in starting hand than it being stuck at the bottom of your deck.
- Nourish – More ramp, great keep.
Lower Priority (Keep only if certain conditions are met)
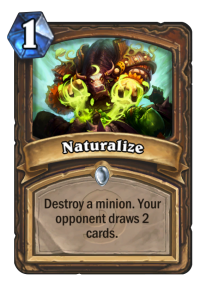
- Naturalize – If you’re sure that you face an Even Warlock. Naturalize is AMAZING vs an early Giant/Drake, not only it clears it, but also mills a card or two most of the time. The deck also commonly runs Geist, so you often want to play them before T6.
- Malfurion the Pestilent – With ramp, just against Aggro, it’s an amazing card to get out as soon as possible. You’re aiming at the longer game, so having Malf on T7 will give you LOTS of value throughout the game.
- Ultimate Infestation – Keep with a heavy ramp hand. Playing UI when your opponent is still at 6-7 mana is amazing.
Togwaggle Druid Win Rates
Winrate stats are currently unavailable for this deck at the moment!
Togwaggle Druid Play Strategy
The most important thing every mill deck has to achieve is to survive. And yes, this may sound trivial, but that very often means to take bad and ineffective trades, a lot of face damage and what players would call “hard decisions”. But what comes after the “surviving part” may be the most complex and rewarding decision-based deck to play throughout all ranks. Let’s take a look at the multiple ways to win with this deck:
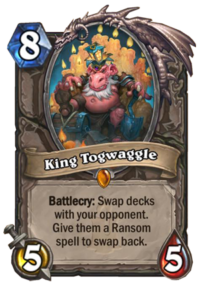
There are are a few ways to actually pull off the combo. While it’s obvious that King Togwaggle switches decks with your opponents, just switching is rarely enough to accomplish anything – after all, they can just switch it back and you’re back to square one. But there are some ways to either prevent your opponent from doing it, or have a way to counter that. First one is Twig of the World Tree. Druid’s Legendary weapon allows you to gain 10 extra mana with the last hit, allowing some combos that would be impossible otherwise. In this case, you play King Togwaggle (and possibly spend 2 more mana, in the worst case scenario you can just Hero Power), then drop Azalina Soulthief to copy your opponent’s hand, including the Ransom card, which lets you switch decks back in case your opponent does that first.
The same thing can be accomplished with Dreampetal Florist instead of the Twig – you just need Togwaggle & Azalina to be the only two minions left in your hand. Now, no matter which one you hit with the discount, you’ll be able to play both in the same turn, resulting in Ransom card in your hand again to switch back in case your opponent does.
And finally, if your opponent is at 6 or 8 cards (or more), you can play respectively two or one Naturalizes to fill your opponent’s hand and THEN drop Togwaggle. The ransom card will be burned, and he will no longer be able to switch back. That’s not the optimal way, however, because you prefer to save Naturalizes for after Togwaggle most of the time, to force them to fatigue quicker.
No matter which option you choose, this procedure works best if you have drawn your entire deck while your opponent still has a good portion of theirs left. This way they immediately land in fatigue, and you can even speed it up significantly with Naturalize (especially if you went for plan A or B, not C). 2x Naturalize after Togwaggle with empty deck results in a total of 10 fatigue damage and another 5 after you have ended your turn, making it 15 damage in total. Then it’s 21 and 28 after 1 and 2 more turns, meaning that even if they’re ahead on the board, all you need to do is survive.
The ramp package including Wild Growth and Nourish does what it does best: It accelerates the game on your end, and we want to hit the crucial late game turns as fast as possible.
Board removal spells like Swipe, Lesser Jasper Spellstone Wrath help against early threats. Don’t be afraid to use all of those spells early and aggressively to keep the board clean; early game greed when you hold board removal in hand is the last thing you should do.
Naturalize in particular fulfills a very special role, especially in control matchups where you face early threats: You either hope to be able to remove something like a Mountain Giant later, or you accept the fact that one part of your combo will eventually not be available. That is where the aforementioned “bad trades” come in; you will regularly get into a situation where you have to sacrifice one or two cards to be able to survive. But despite all hard decisions in the early and mid game, it is more important than anything to remember that you don’t need Naturalize to win the game as a whole even against other control archetypes!
The “armor package” helps to provide a backup plan if we don’t draw into removal early. Ferocious Howl can buy you one or two turns while powering up your Spellstones at the same time. The same goes for Malfurion the Pestilent. This card buys so much time and provides decent reach if you want to kill your opponent before fatigue hits.
Branching Paths serves as the jack-of-all-trades card in this list. The choose-twice mechanic can serve as a great last-minute healing tool, aggressive card draw to cycle through your deck, or a lethal threat if you have a solid board state that won’t be removed until next turn.
Spreading Plague is one of or if not the best way to deal with early board states. That is why it’s a great keep essentially against all aggro decks. As already said before, greed generally doesn’t get rewarded while playing this deck, especially against aggro lists, so don’t be afraid to buy yourself time by playing this on curve even against two or three minions. Giggling Inventor is generally worse against Aggro, but more proactive. You can drop it on curve even vs an empty board and you will be happy with it – it will provide some defense and trading potential. It will never be as good as 4+ minions Spreading Plague, but it will also never be a dead card in your hand.
Arcane Tyrant is a great mid-late game tempo play. Since your deck is full of spells, and a bunch of them cost quite a lot of mana (2x Nourish, 2x Spreading Plague, 2x UI), you will usually play those for free. 0 mana 4/4 minion can be amazing – you can use it to get some trades or just to push damage.
Flobbidinous Floop is an interesting card. Normally you’d want to use him with some combo card, or a big minion with powerful effect, but in this case, you just don’t need him for the combo. In case of this deck, he’s usually used as an extra Arcane Tyrant or extra Giggling Inventor. Depending on the matchup and situation, you might be able to drop it as a 0 mana 3/4, which is slightly weaker than a 0 mana 4/4, but still a nice tempo move. In other scenarios, you can play it as a 4 mana version of Giggling with a 3/4 body instead of a 2/1 body – that one is really powerful. Not only you get Giggling with a discount, but the main body is way more powerful. It also lets you drop a Dreampetal Florist even if you have more minions in your hand – if you high-roll and hit Togwaggle or Azalina, that’s great. And if you don’t, you can just play it again (possibly for 0 mana if Florist hits Floop).
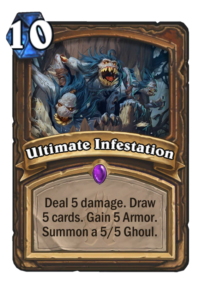
Ultimate Infestation serves as the keyholder for this late game combo-based deck. We ramp to play this card as fast as possible. Remember that this is a combo deck, so you want to cycle as fast as possible. However, using UI is often much more complicated than just playing it. In a deck with so much card draw, especially if you had a slower start without lots of ramp, overdrawing is a serious concern. Ideally, you want to set up your UI turn in a way that you end up with 5 cards in the hand including UI. This will put you at 9 cards after you play it, resulting in no overdraw. Try to do some high tempo, even if inefficient plays before your UI turn. Especially try to get rid of all the clunky cards in your hand. Spreading Plague just to summon a 1/5 Taunt vs Control might be a thing, and you definitely don’t want to cycle Wrath (but rather play it for 3 damage) when you’re getting into UI turn.
Additionally, overdrawing is not always the worst thing possible. Most importantly, if you have 6 cards in your hand (which would leave you at 10 after UI), it’s not always the most scary thing ever – if you haven’t played your Arcane Tyrants yet, there is a serious chance that you will draw at least one of them, and you will be able to play it. Even if you overdraw one card, you need to look at the risk vs reward. The risk is milling a combo piece – milling Togwaggle or Azalina is often a loss in the slow matchup, but you need to calculate the odds. If you have 15 cards left in your deck and one of the pair in your hand already, then the chances to burn that specific card is only 1 in 15 (ASSUMING you won’t get Tyrants). Delaying your UI by even one turn also hurts your chance to win, and probably by even more than 1 in 15. So it’s often a risk worth taking. The less Tyrants you have left in your deck and the more cards you’re going to burn, the worse the play becomes. However, there’s another scenario in which milling doesn’t really matter. In case you have all of your combo pieces in your hand already, and you want to get rid of your deck as quickly as possible to get to fatigue. Then you can play UI even if you have let’s say 8 cards in your hand, because you can’t burn any key card. Epsecially if you’re close to fatigue and want to set up the combo in 2-3 turns, then you probably wouldn’t have time to play most of those cards anyway, and remember that Azalina will make you switch the hands with your opponent, meaning that on your combo turn, it doesn’t matter how many resources you have left in your hand.
Last but not least it should be mentioned that this deck can win plenty of games without the mill and combo portion. The solid Druid core cards in combination with powerhouses like Ultimate Infestation and Malfurion can swing the board like nothing else, and Spreading Plague can hold off copious amounts of early aggression over multiple turns. To be completely fair, most of the Aggro matchups finish way before you want or even can play your combo. For example, getting a great Spreading Plague and then following it up with UI + Arcane Tyrant is usually enough to crush a faster deck. Even if they don’t concede, a huge wall of Taunts combined with 10+ damage per turn will end the game in no time. Even in slower matchups, Malfurion the Pestilent can be used to deal 3 damage per turn (4 with Twig), and if your opponent doesn’t happen to have any form of healing available, you might be able to win the game that way. Sometimes a Plague of Giggling Inventor they don’t answer can be combined with Branching Paths for some nice extra damage too.
Togwaggle Druid Card Replacements
In general, Togwaggle Druid is a really expensive deck, but you can’t do much about it. A lot of the Epic & Legendary cards you run are simply necessary, or so good that replacing them would result in a massive drop of win rate. Still, I will go through all of them and try to offer some replacements wherever it’s possible.
- Flobbidinous Floop – Floop adds a bit more flexibility into the deck – it can be dropped with a 5+ mana spell for free alongside Arcane Tyrant, or it can be used as an extra defense with Giggling Inventor. Still, it’s not necessary in the deck, you can replace it.
- Twig of the World Tree – You absolutely need EITHER Twig or Florist to run this deck. If you don’t have one of them, you can use the deck only with the other. However, the reason it runs two is because redundancy is important in a deck like that in case one of the cards is stuck at the bottom of your deck or countered (e.g. by weapon destruction or Demonic Project).
- Azalina Soulthief – Part of your main combo, irreplaceable.
- Malfurion the Pestilent – While Malfurion is not a necessary, key card that activates a certain Druid archetype, it’s also great in each one of them. If you’re playing Druid, Malfurion should be high on your crafting priority list. You can play the deck without it, but it will get significantly worse.
- King Togwaggle – Just like Azalina, part of your main combo, irreplaceable.
- Branching Paths – It’s similar to Malfurion – while the card is not absolutely necessary, I can’t imagine playing a slower Druid deck without it. It gives you cycle, Armor gain or an alternative win condition with +2 Damage on e.g. Spreading Plague. You CAN replace it, but your deck will suffer heavily.
- Arcane Tyrant – It serves two purposes – first it’s a great tempo play (which is necessary especially after you ramp with Nourish, which is a really slow play) and lets you dump a card from your hand, especially after UI. The deck can be played without it, but I wouldn’t recommend.
- Dreampetal Florist – See Twig of the World Tree.
- Ultimate Infestation – Absolutely necessary, one of the best Druid cards and one of the best cards in Hearthstone right now. It gives you everything the deck needs – removal, survival, board presence and massive cycle. You COULD run a deck with one UI, because the second one is often dead anyway because you have full hand, but it would decrease the consistency by a lot – it’s easier to draw card when you have 2 copies over 1. But cutting two is never an option.
And here is the list of potential replacements you can use. Keep in mind that basically all of the cards above serve some purpose and removing them will definitely decrease your win rate.
- 2x Oaken Summons + 2x Ironwood Golem – It’s a package that always takes 4 card slots, so use it if you have a few cards to replace. That said, you don’t want to run Oaken Summons with Floop, since it can be pulled by it, so you either use it when you’re replacing Floop or you cut Floop too.
- Biology Project – Can speed up the game quite nicely, it was used in lots of the early Togwaggle builds, but pros have decided to cut it. It’s not a bad card, but it’s just not good in the current meta.
- Mind Control Tech – Solid tech card in the current meta. It’s a pseudo-removal vs Aggro, great in the mirrors vs Spreading Plague, and it’s a soft counter to Giggling Inventor – even with just a single more minion on their side of the board you will be able to use it after they drop Giggling. Do not mix with Oaken Summons package.
- Doomsayer – Not the worst option, can be used to stall the game a bit more. However, Void Ripper is a pretty popular tech, making it significantly riskier to run. Do not mix with Oaken Summons package.
- Starfall – Since this deck suffers from the lack of AoE board clears, Starfall may be an answer for that problem. It’s not a great card in general, but Druid doesn’t really have better AoEs (funnily enough, Spreading Plague is the best one, but right now it gets countered by Void Ripper or Mossy Horror pretty often). You can also use it as a single target removal, although again, 5 damage for 5 mana is not amazing.
- Bloodmage Thalnos – It’s Legendary, but since it’s Classic one, lots of players already have it. It’s especially good if you also run Starfall, but even without it, can be combo’d with Swipe for 5+2 board clear (which is way better than 4+1), as well as Wrath (especially the cycle part, 2 damage and cycle for 2 mana is nice) and Spellstone (3 damage on the first upgrade or 5 on the second are often useful).
Leave a Reply
You must be logged in to post a comment.
whats a substitute for twig? biology project?
Try Starfall, works great in current meta.
Idk if the people who run this site have realised, but the guides and the top standard decks lead to different links, Aka clicking on control warlock as recently updated guides lead to a different control warlock link than when I click on the one which is on the top decks list.
They are supposed to do this, the links listed in the top standard area are for showing the most recently successful decks. There’s a link to our deck guides at the top of this page.
I don’t know if it’s an overkill, but I saw Toglewaggle-Malygos Hybrid Druid in action. Anyone tested it? Since both decks run almost the same cards it should work. Can’t test it right know because I lack Togwaggle, but the list is as above with few alterations:
-2 biology project
-2 wrath
– 1 starfall
– bloodmage
+ malygos
+2 moonfire
+ 1 psychemelon
+ floop
+ twig
That should give you two super solid finishers without altering your game plan.
Interesting idea!
Its not overkill because it makes your deck much more reliable, because its almost impossible to not get at least one of both combos. And maly can also be used for removal (with moonfires) which helps you against big minions.