
Our Control Warlock guide for The Boomsday Project expansion features the best deck list for this archetype. This Warlock guide includes Mulligans, Gameplay Strategy, Card Substitutions, and Combos/Synergies!
Introduction to Control Warlock
Demon Control Warlock is a deck first created in Kobolds & Catacombs, which shares a lot of similarities with Cube Warlock. Both decks rely on cheating out bigger minions early (thanks to the Possessed Lackey or Skull of the Man'ari, depending on the list), as well as the massive late game tempo swing with Bloodreaver Gul'dan. However, unlike Cube Warlock, which tends to be more proactive, Control builds take the reactive route.
Between running more removal spells, not including Doomguard, which means that Lackey/Skull always pulls out a Voidlord (massive defensive option) and adding extra win conditions/value generators such as Gnomeferatu, Stonehill Defender or Rin, the First Disciple, despite all of the similarities, Control Warlock is a different archetype with a significantly different game plan.
While both of the decks were kind of niche in The Witchwood, so far they made a slight comeback in Boomsday Project, mainly thanks to the Combo-heavy meta and Demonic Project.
Check out our List of the Best Standard Decks for Hearthstone Ladder
Boomsday Project Control Warlock Deck List


Check out alternative versions of this deck on our Control Warlock archetype page!
Control Warlock Mulligan Strategy & Guide
Vs Everything
Higher Priority (Keep every time)
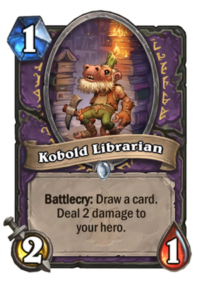
- Kobold Librarian – This card is a Life Tap at half the cost that also gives you a 2/1 body, which is pretty high value. One of the most important aspects of this card is that it activates Lesser Amethyst Spellstone, but it also gives Controlling Warlock decks a 1-health minion to activate Defile.
- Skull of the Man'ari – Voidlord is the star of this deck, but he wouldn’t be if you always had to play it on Turn 5. Since Voidlord is the only Demon in the deck, if you draw it with Skull, you will pull it every time. A turn 5 or 6 Voidlord is probably enough to win you the game against most aggro decks right there, and accelerates your Bloodreaver Gul'dan plan against midrange.
Lower Priority (Keep only if certain conditions are met)
- Lesser Amethyst Spellstone – Keep with Kobold Librarian or Hellfire. After just one upgrade, it’s a great card, but it’s pretty weak at the base.
- Voidlord – You can keep one but ONLY if you already have Skull. While you will get some taps in, you might still not find your Voidlords, making skull not that great. But keeping it guarantees that you will have something to pull out, not to mention that it increases your chances of getting the second one.
VS Fast Decks
Higher Priority (Keep every time)
- Defile – One of the best board clear tools in the game, its low cost makes it an extremely safe keep against aggro decks.
- Stonehill Defender – As far as the early game Taunts go, Stonehill Defender is actually pretty weak. However, since most of the Aggro decks run some 1 health minions, the 1 Attack is often not a problem + it can set up a better Defile + you can pull a bigger Taunt for the mid/late game.
- Giggling Inventor – It might seem weird to keep it in your opening hand, but in this build, it’s one of the best cards against Aggro. Not only it puts a solid wall between their board and your life total (which is important), but it usually sets up a great AoE clear for the turn after.
Lower Priority (Keep only if certain conditions are met)
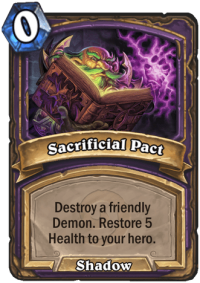
- Sacrificial Pact – Keep against Zoo, even destroying a Flame Imp for 0 mana and healing for 5 is massive swing in your favor, not to mention getting rid of something bigger like Despicable Dreadlord or Doomguard.
- Hellfire – Hellfire is a good keep in the board flood matchups. Given how many board refills they have, you want all of the AoEs you can get. For example, it’s great against Paladin as a counter to their mid game board floods. Also good keep with Lesser Amethyst Spellstone – upping Spellstone to 5 damage/healing is great in the mid game, as it can now answer most of the threats.
VS Slow Decks
Higher Priority (Keep every time)
- Stonehill Defender – Having T3 play is nice, since Turn 3 is pretty weird – tapping means that you’re left with one mana, and you can’t Tap if you go second, because it often means you would overdraw. Stonehill can grap something useful, even including Rin if you don’t have her already.
Lower Priority (Keep only if certain conditions are met)
- Sacrificial Pact – Against slower Warlock decks. While it might be quite useless in the early/mid game, it can give you a massive advantage in the late game. Clearing a Dread Infernal vs Even Warlock, Doomguard vs Cube or Voidlord in the mirror for 0 mana is amazing.
- Demonic Project – Keep one copy if you’re sure that you face a Combo deck, you will need it and you don’t want them to be stuck at the bottom of your deck. DON’T keep it against anything else than combo decks like Mill Druid or Shudderwock Shaman (and if you are not sure if your opponent plays combo deck or not, don’t keep it).
Control Warlock Play Strategy
This deck aims to do one of three different things, depending on the matchup: set up an unbreakable Taunt wall, destroy the opponent’s deck / win condition, or outlast the opponent.
Vs Aggro
Your main goal of playing vs Aggro is simple – you need to survive. Generally, if you get into the late game while still at a reasonable health total (or with a wall of Taunts against decks without burn), it’s a victory for you, as you will slowly outvalue your opponent and he won’t stand a chance while in top deck mode.
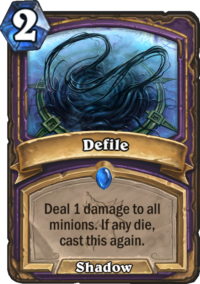
But surviving doesn’t come easily when your opponent is pumping more and more minions onto the board. The most important part of your game plan are AoE board clears. Your deck runs plenty of them. Starting with probably your best early/mid game board clear (and one of the better clears in the entire game) – Defile. The card is often more of a math puzzle than a classic card game board clear, as you need to be absolutely sure that there are no gaps in minions’ health – if there is no 3 health minion on the board, then anything 4 and above won’t get cleared. Given that Aggro decks play a plethora of different early game minions, against big board, Defile is usually a full clear. And if it’s not, you can always set it up. Your opponent played around it by not putting a specific health minion on the board? You can often do it yourself thanks to the Kobold Librarian, Gnomeferatu or Stonehill Defender. You can also Spellstone something first to bring everything into the Defile range (while you obviously want to upgrade your Spellstone, the basic one is often good at setting up Defile). Defile is also a very high tempo clear – since you’re only using 2 mana to do everything, so the best time to use it would be having another play in your hand. For example, on Turn 7 you can clear the board with Defile and play your Skull of the Man'ari, which basically wins you the game vs Aggro if they have no weapon removal and you have Voidlord in your hand.
Lord Godfrey is like a bigger version of the Defile. It would probably be the best board clear against Aggro, if not for the fact that it costs 7 mana, so often comes in too late. However, since a lot of the Aggro decks have a longer game plan right now, you will still be able to get it to work quite often. It’s way, way easier to set up than Defile – you need to hit a 1 OR 2 health minion, then a 3 OR 4 health minion etc. So even against a board with, for example, 1, 4 health and 6 health minions, which normally would be way out of the Defile range, Godfrey can do the trick.
Hellfire and Twisting Nether are more generic AoEs. Hellfire just deals 3 damage to everything, which is often enough to clear the board vs Aggro. So you do that if you can. Twisting Nether isn’t really there for those matchups, as most of the time it simply comes too late, but if you play against an Even Paladin, who refills the board for 5th time, it might still do some work.

Another important part of the matches vs Aggro is getting the Voidlords out. Those are your best cards vs Aggro, because unless Silenced, they will often put them in an unwinnable position. The best way to get them is through Skull of the Man'ari – Aggro decks rarely run weapon destruction, so if you play Skull with Voidlord in your hand, it should land on the board next turn. Ideally, you might get out TWO of them for just 5 mana – that’s massive advantage. Aggro decks usually have a very hard time dealing with your Voidlords – it’s 18 health to go through, but that’s assuming they have a perfect way to kill all the Taunts. Even killing it with e.g. Vilespine Slayer, while bad, is not the end of the world, as you still end up with 9 health worth of Taunts. Silence is probably your worst enemy, but at the very least you still end up with a 3/9 minion you can trade with, and it will get revived by Gul’dan later. Funnily, if you would die to Silence, you can actually use Sacrificial Pact on your own Voidlord once it hits the board. Your opponent won’t be able to Silence all 3 Taunts (most likely), and you gain 5 health. Can be a good way to play around Silence in a scenario in which you would die to it. Stonehill Defender is also useful, because it can discover extra copies of Voidlords, or possibly other Demons with Taunts. If you have Skull up, even something like Felguard is pretty good pick, because it’s a free 3/5 Taunt.
After that, all you need to do is survive until Turn 10 and Bloodreaver Gul'dan. This swing is usually too much for an Aggro deck to handle, and they just give up (or drag the game for a few more turns before you in turn kill them). However, in order to survive that long, you run another interesting stall card – Giggling Inventor. It’s like a defensive board in one card – putting two Annoy-o-Trons on the board definitely does make things annoying for your opponent. They’re very hard to get through, and will usually buy you a turn or even two. The best thing about the card is that it can usually set up a great Defile – your opponent will have to damage his own minions to get through it, and then you still have 2/1 (which is often ignored) to either start the Defile chain or trade into something and set it up.
Healing is also important – this deck runs quite a lot of it. Between 2x Sacrificial Pact (works best vs other Warlocks, but sometimes sacrificing your own Voidwalker to heal for 5 is also good), 2x Lesser Amethyst Spellstone (let’s assume that they’re upgraded once) and 2x Shroom Brewer, that’s 28 life gain in total. Then if we add Bloodreaver Gul'dan to the mix with 5 immediate life gain + 3 more per turn, the numbers are getting pretty crazy. But that’s for a good reason, as surviving is very important, and the deck has quite a lot of self-damage through Hero Power, Librarians and Hellfires (15+ self damage during the whole game isn’t anything unusual). Don’t be afraid to heal up when you think that you will die, even if it’s not optimal. It might seem completely counter-intuitive, but sometimes even Spellstoning your own minion to get 3-7 health is worth it – do it if your opponent put you into the lethal range (e.g. you play against a deck running Leeroy Jenkins and you’re at 6).
While Demonic Project is generally a pretty bad card vs Aggro, it still has some uses. First of all – you can try to target an important card they might be holding, such as Leeroy Jenkins or Vilespine Slayer. You generally prefer them having a random Demon than one of those. Then, you can use it when you have Skull of the Man'ari out to turn one of your minions into Demon and then pull it out for free. Unless you get something really small, it should be worth it. And finally, you can use it when you’re holding a Sacrificial Pact in your hand – then even if you low-roll and they get something big, you can still immediately remove it if they play it, putting you even further ahead. And if they decide to not play it at all – then you just removed one card from their hand.
Vs Control
Your game plan vs Control decks is quite different. Surviving is often not enough, because you also need to kill your opponent, or at least outlast him. Remember that as much as the 3/9 Taunts are usually enough to win against Aggro, they often aren’t as strong in slow matchups. 3 damage per turn isn’t really threatening, while slow decks have multiple ways to answer them anyway.
First of all, mulligan is very important. You can, and should be, much more greedy. Instead of looking for all the board clears, look aggressively for your cycle (Librarians) and Skull of the Man'ari. You want to get those Voidlords out as soon as possible in order to get a smooth ride through the mid game – a very slow start and nothing to do in the mid game can often lose you a slow matchup.
Games vs Control are way longer, and less straightforward. Depending on your hand, situation and the matchup, you can either try to rush them (rarely happens, but it might be your strategy in 1 out of 50 games), outvalue them or destroy their win conditions / deck. Rushing strategy works if you get some early minion damage, then a quick Voidlord to protect them, then, again, an on-curve Gul’dan. I suppose that strategy that revolves around 10 mana card is not really “rushing down”, but my point is that after reviving a solid board with Gul’dan, if your opponent has no big AoE to answer, you might be able to put them on 2-3 turns clock. If you’re doing that, do not trade. Your Voidlords should be big enough wall, and clear minions only if you need to (e.g. if they drop a Doomsayer, don’t just stare at it, but save your board). However, mind you that it is rarely your game plan. Your opponent needs to have a really bad draws, and you need to get a big Gul’dan on the curve.
A slightly more common way to win is through outvaluing your opponent. For this, you need to utilize your big board clears – Twisting Nethers and Lord Godfrey. Your opponent will want to kill you as quickly as possible, because once you get Gul’dan out, the game will be much harder, not to mention that Rin often puts him on the clock. Given that, he will often drop multiple minions onto the board at once, which you can punish by a well-timed Nether. Getting 2 or 3 for 1 with Nether is not uncommon. Given that a lot of the slow decks don’t really run card draw, it’s actually not that uncommon for them to run out of steam after constantly trying to rush you down. If you face a deck that cycles more through the deck, you can also try to remove all of their threats and then win the fatigue war – if you’re on a similar fatigue level (you’re not deeper into your deck), your Hero Power is often going to give you a huge edge over your opponent. After all, that’s a 6 health swing – you deal 3 and gain 3. Compared to a Priest, which will gain 2 life per turn, or Mage, who will deal 1 damage per turn, your Hero Power is quite impressive.
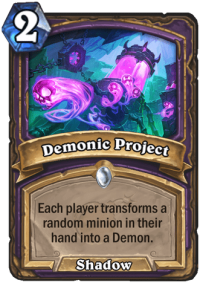
However, the most common way to win in the slow matchups is probably by destroying their win conditions or deck, thanks to Demonic Project, Gnomeferatu and Rin, the First Disciple. Demonic Project works really well vs Combo decks. Once you identify what kind of combo they are playing, wait for the perfect moment (e.g. after they drop a few minions from their hand, play a set-up card such as Dreampetal Florist etc.) and play your Demonic Project. Hopefully, you hit their Malygos, King Togwaggle, Shudderwock, Mecha'thun, similarly to how Dirty Rat was used to deal with the combo decks before. Demonic Project also works quite well vs Control decks – in the late game, you have a significant chance to get rid of their big minions such as The Lich King or Ysera, and replace them with a random Demon instead. While they can sometimes high-roll let’s say a Voidlord, generally it’s going to be much worse.
Then, you have ways to outright destroy a card / deck. First, Gnomeferatu, is rather random, but she does help you with the fatigue game plan. Against combo decks, you can sometimes get lucky and heavily increase your chances to win (or just win the game straight away) by destroying their combo piece. On the other hand, she can destroy a useless card and get them one card closer to their win condition, so it’s not always great. However, it’s most important against decks which you want to take into fatigue – them having 2 less cards is pretty important in the grand scheme of things. And finally, Rin, the First Disciple – there are two reason she’s in the deck. First is obviously trying to destroy your opponent’s deck, but to be honest, that rarely works. She can get Silenced, transformed, you can get rushed down before you will be able to play all of the Seals, and most importantly, if you have Skull of the Man'ari equipped, Azari will just get pulled onto the board. However, it’s not all that bad. Even if you don’t destroy their deck, all of the Seals + a free 10/10 is actually lots of extra resources, which is very useful in control matchups. Especially if you, again, get to the fatigue scenario, where both of you are struggling to squeeze as much value from each card – a 3/6 Taunt, 2/2, 3/3, 4/4, 5/5, 6/6 and 10/10, all in a SINGLE card, is amazing in let’s say mirror matchups.
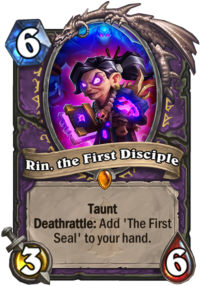
But if you manage to get her out, she dies without getting Silenced and you don’t have a weapon equipped, it’s still not an easy way to destroy your opponent’s deck. After you already have Seals in your hand, you need to balance carefully between playing them and doing other stuff. Your opponent will play much more aggressively to force you into board clears instead of playing seals, and that’s what you do. Don’t be greedy – if you stare at a huge board, just Nether it instead of playing 2x Seal. The best routine is usually one seal + some other card like Defile, Spellstone, or Hero Power after you’re Gul’dan already. After you get to 5/5, the minions you summon from seals will no longer be a big tempo loss, which is great. However, the main prize comes at the end – Azari is a 10 mana 10/10 that destroys your opponent’s entire deck. With this, your opponent will only be able to work with what they have in their hand, which is obviously great for you – you win most of the games after you drop Azari (even though it rarely happens). But honestly, even getting a free 10/10 from Skull is often good enough.
One important extra note about Rin & her Seals is that you want to keep your hand quite empty. Seals replace themselves – so if you have 10 cards in your hand (very common), you can’t just play 2x Seal and pass, because you will burn your next card. I mean, you CAN do that and you sometimes will have to, but it’s better to not risk burning a Gul’dan or something by trying to empty your hand before.
Control Warlock Card Substitutions
The deck runs quite a lot of expensive cards and, sadly, most of them simply can’t be replaced.
Let’s start with the Epics:
- Gnomeferatu – Replace it with another 2-drop, such as Doomsayer (also Epic), or Plated Beetle (budget option).
- Gluttonous Ooze – You can just run the 2 mana Ooze instead (Acidic Swamp Ooze), although the Armor gain is quite useful in the deck.
- Twisting Nether – Can’t really be replaced, it’s your main late game board clear. You will lose most of the slow matchups without it. You could replace one if you have Lord Godfrey, use one of the cards above.
- Voidlord – Absolutely can’t be replaced, it’s the #1 reason why you run the deck in the first place.
And now onto the Legendaries:
- Skull of the Man'ari – Given that there are almost no weapon removals in this meta, especially from Aggro decks (against which the Skull is most important), I’d say that it’s a very difficult card to replace. You can run 2x Possessed Lackey instead, but Lackeys are worse after the nerf.
- Rin, the First Disciple is pretty key in some matchups, like the mirror, but you CAN play this deck without her. You can either add another Demon to pull from your hand (such as Despicable Dreadlord), or a tech card such as Spellbreaker.
- Lord Godfrey – Good board clear, it’s often a “I win” card vs Aggro if you get to Turn 7, but you CAN play the deck without it. Probably should put Doomsayer instead, but if you don’t have it too, then Despicable Dreadlord.
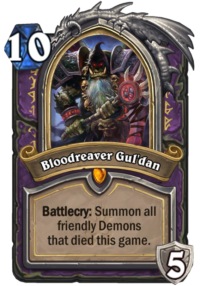
- Bloodreaver Gul'dan can’t be replaced. It’s the main reason why this deck’s late game is so powerful. Reviving huge Taunts and upgrading your Hero Power is a massive swing.
Leave a Reply
You must be logged in to post a comment.
Lots of silence and weapon removal rn. So: -1 Sac Pac -1 Nether / +1 Lackey +1 Dark Pact = Guarantee Rin in matchups where you need it OR helps cheating out a Voidlord when u need it. I had much more success with these changes
Enjoy
Nice that people finally see the value of Sac Pact in control. I ran two in my control Warlock back in KnC. It was far better then because (1) tempo mage was all over and you needed the extra heal/counterspell trash, (2) dude paladin would trash you with spellbreaker on your Void Lord and decimate your Gul’Dan turn unless you killed it with Sac Pact, and (3) spiteful priest and control priest would mind control your Void Lords and/or steal/copy them from your deck.
Now we justify running Sac Pact because of Demonic Project and slightly more popular zoolock.
Almost forgot, Sac Pact also wrecked cubelock. They would often bring out a Doomguard on 5 and threaten to make two more on the following turn if you didn’t kill it, and being able to do so every time for 0 mana was insane.