High Priestess Jeklik is one of the nine bosses you will face in the Rumble Run! Learn some tips and tricks on how-to defeat her, a list of her shrines, and the cards she’ll be using to try and take you down!
How Rumble Run Bosses Work
In the Rumble Run, you will face eight different bosses out of a total of nine. Why is it eight? Because once you pick a shrine, you will not fight against that team/class. So, if you pick a Shaman Shrine, you will not face off against the leader of the Krag’wa’s Frogs, Zentimo.
These bosses will be thrown at you at random. Each time you play, you will face a different order of bosses. That means the difficulty of each boss varies depending on what position you face them. If you fight them early on in the Rumble, they will be a lot easier than they would be if you faced them last.
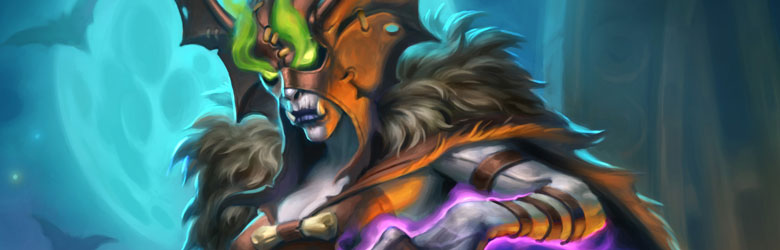
High Priestess Jeklik
High Priestess Jeklik is the leader of the Warlock team called Hir’eek’s Bats.
The Bad Guys. Nasty, shrieking bloodsuckers who’ll do anything from demon summoning to ritual sacrifice to win. They’re ruthless, they fight dirty, and they’re proud of it.
High Priestess Jeklik’s Shrines
Each time you face High Priestess Jeklik she will be using one of the following Shrines. These are the same Shrines you will get the option of using when you start up a new run.
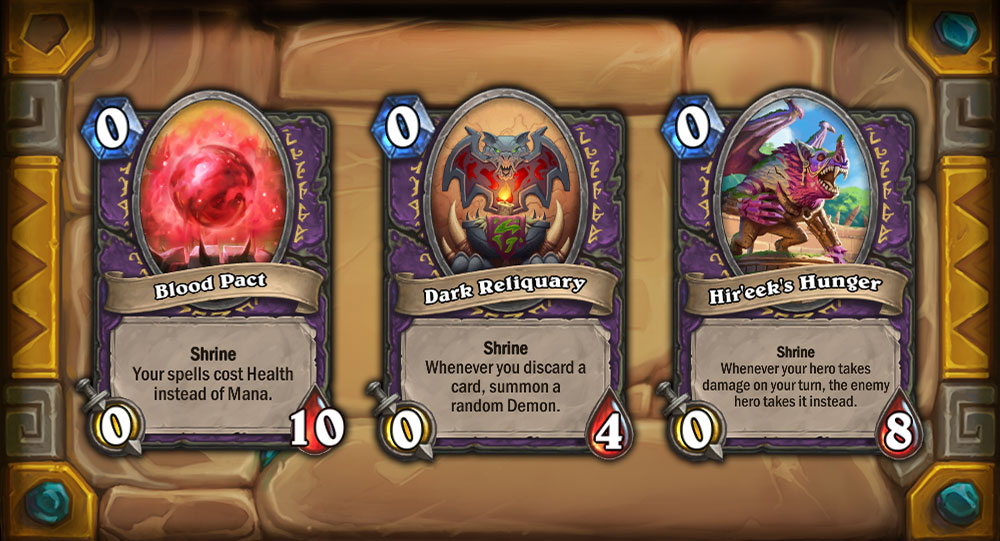
- Blood Pact: Your spells cost Health instead of Mana.
- Dark Reliquary: Whenever you discard a card, summon a random Demon.
- Hir'eek's Hunger: Whenever your hero takes damage on your turn, the enemy hero takes it instead.
High Priestess Jeklik’s Cards
We’ll add more possible cards in the future, but these are some the unique to Rumble Run cards you will be playing against!
- Blood Portal: Whenever your hero takes damage, add a random Warlock spell to your hand.
- Dark Diviner: Battlecry: Fill your hand with random spells.
- Leering Bat: Your hero is Immune on your turn. Start of Game: Draw this.
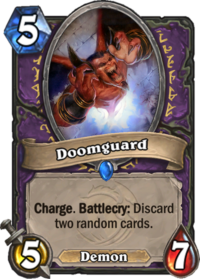
- Ravenous Familiar: Rush. Overkill: Discard your lowest Cost card and draw card.
- Vile Necrodoctor: Lifesteal. Battlecry: Deal 3 damage to all enemy minions.
- Warp Stalker: Stealth. You can use your Hero Power any number of times.
How-to Defeat High Priestess Jeklik – Tips & Tricks
Blood Pact
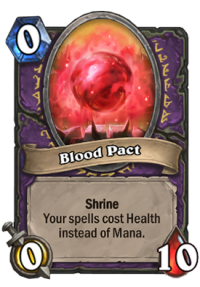
Facing the Blood Pact shrine can be extremely easy or difficult, depending on how late you get it. If it’s one of the first encounters, then it should be one of the easiest encounters, since your opponent will have very limited health and basically kill himself before he can do anything. However, facing it as one of the last encounters, where health doesn’t really matter until very late into the game – tempo is way more important.
Facing her early in your run, you can completely ignore the Shrine. It has 10 health, making it quite difficult to kill, and it can actually help you more than it harms you a lot of the time. It doesn’t help that AI is pretty bad and will often play spells when low on health or not getting a lot of value out of them. If you face her a bit later, try to kill it as quickly as possible. That said, once your opponent starts running out of cards, you can ignore the shrine. You see, the big tempo swings of playing spells for free is great if they have multiple spells in their hand, but when they’re topdecking, it no longer matters.
The deck itself is a mix of Control Spell deck with Demon synergies. Basically, it plays A LOT of different spells, removals etc. Be prepared for your early game board to be wiped a few times, try to play around cards like Defile or Demonwrath. Blood Pact Jeklik also runs Demonic Project, so don’t keep a single big threat in your hand – try to play it as quickly as possible, or keep some smaller stuff too to play around it.
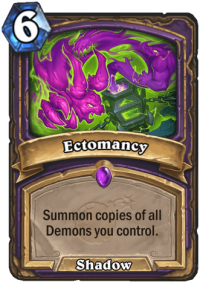
When it comes to the Demon package, it runs a bunch of different Demons – small, mid-sized and big. It can get pretty much any Demon thanks to the cards such as Call of the Void or Bane of Doom, so keep in mind that she can basically have anything. On top of that, she runs a great Demon synergy – Ectomancy. Don’t let her stack a big board of Demons, or else Ectomancy can get A LOT of tempo.
Another potentially big swing if it’s a later encounter is Dark Diviner. The card fills Jeklik’s hand with random spells. If you didn’t deal a lot of damage to her, she can get a massive swing turn by casting a lot of those spells for free. That’s why putting pressure is important – in this encounter, her health is a major resource.
Once you get her quite low, you can actually deliberately ignore the shrine. If she casts spells using life, she just kills herself.
Dark Reliquary
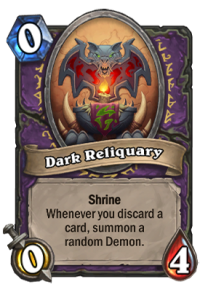
When you face Dark Reliquary Shrine, you need to prepare for a healthy dose of RNG. Whenever your opponent discards a card (and it will happen often), he summons a random Demon. That Demon can be a 0/1 Blood Imp, but it can also be a Mal'Ganis. Given that there are A LOT of small / mid-sized Demons, you won’t always face a bomb after bomb, but that’s a possibility – yon might lose to a turn 1 Soulfire that summons a big Demon.
While some of the Shrines can be ignored for the first few turns, this one absolutely can’t. Given that it only has 4 health, it shouldn’t be very hard to kill, but leaving it is not an option – even if that’s one of the first encounters when your opponent is low on health and it might be tempting to go for the face.
The deck runs a variety of Discard cards (e.g. Darkshire Librarian, Howlfiend, Reckless Diretroll, Doomguard) as well as a Quest – Lakkari Sacrifice. You don’t really have to worry about the Quest (random Demons are way more important, and there is actually a chance that Jeklik will discard the reward anyway – happened to me), but about the Discard stuff.
Dark Reliquary deck is kind of light on the early / mid game AoE. It runs Shriek (multiple copies), but no other regular Warlock AoEs. That said, if the game goes longer, there’s one card you might want to play around – Deathwing. You want to either have a way to clear it or kill your opponent before Turn 10. If you can’t, try to not overextend on the board – putting all of your resources to the board just to get Deathwinged can be a sure way to lose.
Howlfiend is something you can actually take advantage of. You can often kill off the Shrine (or maybe it’s already dead) and then force a bunch of discards. While there are some positive targets (such as Silverware Golem), hitting other Discard cards or Discard synergies like Soulwarden can be solid.
When it comes to unique Rumble Run cards, Dark Reliquary version of Jeklik definitely runs Ravenous Familiar. It can provide a massive early game tempo swing if Shrine is not down yet, which is another reason to destroy it as quickly as possible. Keep in mind that it’s an Overkill minion, so you need to have a 2 or lower health minion in order for it to work. Try to keep your minions above 2 health – you also play around Shriek the same way. Vile Necrodoctor is a massive mid game swing, not only it AoEs your side of the board, leaves a big body, but also heals Jeklik for a lot. It’s hard to play around, you can hope that they don’t have it or not have any small minions on the board.
Hir’eek’s Hunger
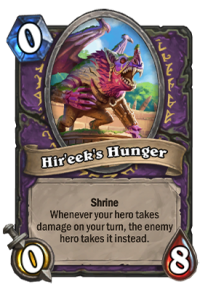
The final Jeklik’s Shrine – Hir’eek’s Hunger – is a deck based around self-damage effects. For as long as Shrine is up, every damage that she deals to herself on her own turn is transferred to you (which means that she does NOT take the damage, but you do).
When it comes to how quickly you should take the Shrine down – depends. Early in your run, you should try to do it as quickly as possible. You absolutely can’t afford to take so much extra damage per turn when your health is so low. Later in the run, you can relax a bit and take your time – you have a lot of health so taking some damage doesn’t matter that much – board control is more important.
The deck is actually amazing when the Shrine is up, but it absolutely sucks when it’s not. Jeklik will still play all of those self-damage cards (because what can she do when it’s her entire deck) but a lot of them are pretty bad and can be taken advantage of. For example, Wrathguard can be abused with a big minion on the board or a removal spell. Leaving Unlicensed Apothecary on the board when shrine is down can also be nice.
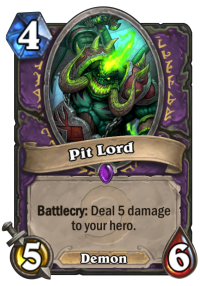
If you look over your collection to find cards that deal damage to your Hero, Jeklik basically runs most of them. Kobold Librarian, Flame Imp, Vulgar Homunculus, Pit Lord, Spirit Bomb, even more unconventional stuff like Ancient Shade or Bomb Squad. So as you can imagine, without Shrine she will kill herself very quickly.
Be careful in the mid game, because this build runs Vile Necrodoctor – not only it swing the board, but also heals the Warlock. That’s why rushing him down might not always be the best idea – just focus on getting rid of the Shrine and controlling the board. And it’s not the only way for the deck to heal – with so many self-damage cards, it obviously also plays Lesser Amethyst Spellstone (which will basically always be upgraded).
On top of Viledoctor, it also runs a bunch of other AoE cards – Hellfire, Abyssal Enforcer, Dread Infernal. Basically, play around 3 AoE damage, since she has multiple ways of dealing that much.