
A new contender in the OTK department has surfaced with the release of Boomsday – it’s the APM Combo Priest! We go over mulligans, play strategy, and card substitutions to get you up to speed on this new deck in The Boomsday Project expansion!
Introduction to APM Combo Priest
The Boomsday Project is one of the craziest expansions Hearthstone ever had, and this combo deck is here to prove it. Ever since the first days of the expansion, it was one of the commonly discussed decks, and even though its performance is not as high as some would like it to be, fans of OTK decks really love to take it to the ladder and Boar some opponents down. The deck was mostly popularized by Dog on the first day of Boomsday, but some players took it to quite high Legend ranks later.
While players haven’t decided on a name for it yet, I think that APM Combo Priest (or just APM Priest for short) would be the best one, as its probably the first deck after Patron Warrior where you take dozens of actions per turn and you gotta go fast.
The deck is also known for being one of the lowest win rate decks in the history of Hearthstone. However, not because it’s terrible – it’s because it’s so difficult to get a grasp of when you try it out first time. It was made a bit easier with the combo simulator (which I will talk about later), but it’s still pretty hard to play. Hence we’re making a guide for it!
Rastakhan’s Rumble APM Combo Priest Deck List
Check out alternative versions of this deck on our APM Priest archetype page!
APM Combo Priest Mulligan Strategy & Guide
Higher Priority (Keep every time)
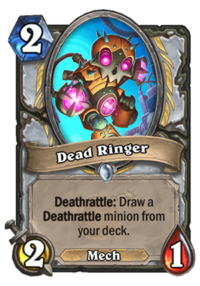
- Dead Ringer, Bloodmage Thalnos or Loot Hoarder – You want to cycle through your deck as quickly as you can, so you want to keep all of your early game card draw.
- Psychic Scream – I know that keeping literally the most expensive card in your deck might sound weird, but trust me, you WILL need it. You cast it on the curve in nearly every single game, because even the slowest decks will put pressure on you.
Lower Priority (Keep only if certain conditions are met)
- Power Word: Shield – Keep only with one of the early game card draw minions above, if you don’t have anything to play it on, then it will be a dead card, but if you do, then it’s a nice, cheap cycle.
- Doomsayer – Keep in faster matchups – you want to stall the game as much as possible. In the best case scenario, you clear 1-2 minions and buy yourself a turn. In the average scenario, it tanks 7 damage. In the worst case scenario, it eats a Silence or Void Ripper, but the average scenario is still well worth it.
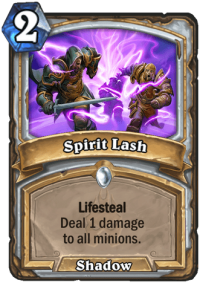
- Spirit Lash – Keep vs Aggro, especially with Bloodmage Thalnos. Can buy you a turn or two by clearing a small minion(s) and healing you for some.
- Twilight's Call – Keep with Dead Ringer (because it will Dethrattle into another Deathrattle, then you can play it and revive both) or 2x other early game Deathrattle minions (other than Test Subject, of course).
- Sandbinder, Witchwood Piper – Keep only in slow matchups. Card draw is great, but you’d rather have cheaper ones in faster matchups. In slower ones, you want to absolutely maximize card draw, so you keep everything you can.
APM Combo Priest Play Strategy
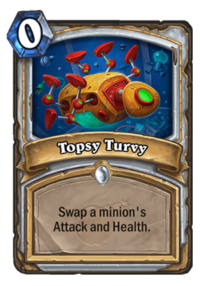
Maybe let’s start with listing the basic combo for those of you who still haven’t seen the deck. The combo revolves around a few different cards – Radiant Elemental, Stonetusk Boar, Test Subject, Vivid Nightmare, Divine Spirit and of course, Topsy Turvy. As you can see, that’s A LOT of combo pieces, although you don’t need all copies of each one of them to start the combo. You ALWAYS need one copy of Boar, one copy of Test Subject, one copy of Divine Spirit and one copy of Topsy Turvy. But then, depending on how much mana you have, you might need a different amount of Radiants/Vivid Nightmares. If you have either 2x Radiant + 1x Vivid Nightmare, or 1x Radiant + 2x Vivid Nightmare, you need 9 mana to perform the entire combo. If you have both copies of Radiants AND Vivid Nightmares (2 + 2), then you can do your combo with 7 mana, which sometimes actually happens.
Your 9 mana combo (the one you will be doing most commonly) looks like that: You drop your Test Subject, Boar and Radiant Elemental on the board. Then you either drop second Radiant Elemental or use Vivid Nightmare on the one you already have on the board (you can use Vivid on your Radiant ONLY if you start your combo with two). Now you use Divine Spirit on your Test Subject, Vivid Nightmare it and Topsy Turvy it (no matter which one, they share exactly the same buffs). That gives you 1 copy of Vivid Nightmare, Divine Spirit and Topsy Turvy. You play another Divine Spirit on your Test Subject (the one still on the board), Vivid Nightmare it again and Topsy Turvy it to kill it. Now you end up with two Divine Spirits and two Vivid Nightmares in your hand. Use one Vivid Nightmare on Radiant Elemental (you want to have 3 of them on the board), and then continue cloning and killing off your Test Subject. That said, you DON’T want to Divine Spirit your Test Subject too much – giving it 2 buffs (up to 8 health) is most optimal. Each time you kill him, you get MORE Vivid Nightmares in your hand, and Topsy Turvy is always the last card you get, so if your hand will be full, it will get burned, ruining your combo. Continue cloning and killing him off until you get enough buffs on Stonetusk Boar, then flip it and kill your opponent.
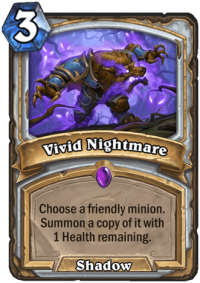
However, like I’ve said, you end up with LOTS of extra cards in your hand you need to get rid of. Assuming you started with only a single Divine Spirit and buff Test Subject to 8 health (2 Divine Spirits), you will get 3 cards after the first Topsy Turvy, 5 cards after the second one, 6 cards after the third one, 7 after fourth and 8 after fifth. You can go all the way to 10 (another repeat would mean burning Topsy), but every dead card in your hand limits you by one repeat. Basically, you DON’T want to start with more than 2 dead cards in your hand, and that’s only assuming that you can get rid of extra Vivid Nightmares, because your opponent has some minions on the board. In the 2 dead cards scenario, and getting rid of all of the extra Vivid Nightmares, you can buff your Boar up to 256 health, then flip it to 256 attack. And you can copy him 5 extra times with Vivid Nightmare too, making it very hard to dodge this OTK even with a bunch of Taunts. After getting Test Subject to 8 health, use all of the extra Divine Spirits on Stonetusk Boar. Then, you want to get rid of all extra Vivid Nightmares (you need only one per repetition, so the rest of them just clog your hand). The easiest way to do it is to use them on Stonetusk Boar, then sacrifice it into one of your opponent’s minions. If your opponent has no minions, you might still need to get rid of it by copying something, it means that you won’t be able to copy buffed Boars, but if your opponent has no minions, then he has no Taunts, so one should be enough anyway.
The 7 mana combo is easier, because you can play 2x Radiant, copy one with Vivid Nightmare and then focus on doing your combo, since you have one leftover Vivid Nightmare for your Test Subject.
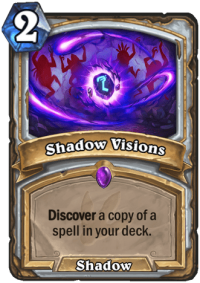
The situation gets even more complicated if you don’t have all of the combo pieces and you need to dig for them. The easiest way to do so is obviously Shadow Visions – after you set up two Radiants on the board, your Shadow Visions is free, so you can look for your Divine Spirit / Vivid Nightmare / Topsy Turvy. Another easy way to dig deeper is Power Word: Shield, although it’s not consistent, it can give you the card you need. Yet another way to dig on your combo turn is playing 2x Radiant, then dropping one of your cheap card draws (Loot Hoarder, Bloodmage Thalnos or Dead Ringer – the last one only if you dig for Test Subject) – and killing them off with Spirit Lash. In order to do it, you need to have the 7 mana combo AND 2 spare mana. If you have only the 9 mana combo, you can still go for 2x Radiant + Twilight's Call + Spirit Lash in a similar manner – but you need to be at 10 mana then.
I know that it all sounds pretty complicated, because it really is. You would need to play dozens of games to get a general grasp of the combo, but that would only be a beginning – you would possibly need to play hundreds of games to master the deck and all of the possible situations you’re in. However, that’s where this tool I’ve talked about in the introduction comes handy – Combo Priest Simulator – created by Patashu (Source). On this site, you can test all kinds of scenarios, adjust cards you have in your hand, pick the number of dead cards, your opponent’s health, number of Taunts etc. It’s an amazing way to test out the combo dozens of times in a matter of minutes instead of hours, because that’s how long doing it would take in real life scenario. However, it’s still not perfect – not only the actual in-game scenario includes animation times (so if you just barely manage to get it in the simulator, you WOULD rope out in a real game), but when you do it in game, you’re usually under much more “pressure”, which means that there is a higher chance to make a mistake. Even taking that into account, the simulator helps GREATLY. Out of the first 5 times I got to the combo turn in game, I got it right only 2 times. After I’ve played around in the simulator, I only messed up once (out of 15-20 times), because I missclicked.
So, that it is basically your combo turn. There are some more nuances to it, but you will learn them on the fly. To learn some abstract thinking, I would recommend trying out some difficult scenarios in the simulator above
However, while combo is the most important part of the deck, you first actually need to GET there and it’s not that easy. Most importantly, to save you some rage concedes, this deck is TERRIBLE against Aggro. No matter how well you play, no matter how well you draw, you probably won’t have more than ~20% win rate against Aggro decks. Odd Rogue is probably the worst matchup – you will be happy to have more than 10% win rate against them. You just don’t have enough defensive mechanics or removals, and your card draw minions are incredibly low tempo. While Psychic Scream can often save you against Aggro, you often die before you can even play it. And if you don’t – you’re usually so low on health that they kill you with Hero Power / weapons / charge minions / burn spells. Being one turn away from pulling off your combo and dying is a very common scenario, so keep that in mind.
Despite that, you want to do your best to survive against Aggro. Early minions and Spirit Lash are your best friends, especially if the latter is combined with Bloodmage Thalnos. It’s important to clear at least a few minions in the early game. For example, even a 2/1 minion that you didn’t manage to clear will deal 10 damage over 5 turns, and that’s not something you can afford to take. On top of that, against Aggro, you will need to take risks, playing safe just won’t cut it. For example, playing Doomsayer into 6 attack on your opponent’s board – it should be so easy to clear it for most of the decks, but if your opponent won’t have it, then you come up ahead by a huge margin. Another risk you might take against Aggro is playing out your combo without all of the combo pieces in your hand yet – sometimes going for a 1/10 Power Word: Shield draw to get the final piece is your best bet, for example.
On the other hand, the matchups in which you DO stand a chance are Control and other Combo decks. Basically, decks that don’t put enough pressure on you and let you draw some cards. Of course, it’s still not auto-win – even against slower decks, spending every turn drawing means that your opponent might drop something bigger that you can’t answer and you just die. However, in those matchups you absolutely want to focus on card draw. You have no real way to clear minions until Psychic Scream anyway, so before that, you want to maximize your draw each turn. Try to play on the curve, revive your card draw minions etc.

One advice, especially when it comes to slow matchups, is that you rarely want to play Shadow Visions on Turn 2, or in the early game in general. You simply don’t know what you want from it at this point. For example, if you need Psychic Scream, you can just play Shadow Visions on Turn 6 – you will even have a higher chance to get it since you might have drawn some spells already. If you’re looking for a specific combo piece, then you keep your Shadow Visions for the turn before your combo, or even until your COMBO TURN if you have only 3 spells left in your deck and one of them is combo piece (or 4 if one of them is Spirit Visions – so even if you miss you can pick it and try again).
Try to get rid of all of the unnecessary cards before your combo turn. You never want to have more than 2 dead cards in your hand, but ideally you’d want to have none. Generally, it might seem that setting your combo up with Doomsayer is the way to go, but I wouldn’t say that in this case. You actually prefer your opponent to have some minions. You don’t care about Taunts for the most part, and you want some minions to be able to sacrifice your Boars created by extra Vivid Nightmares. It’s ESPECIALLY important if you have dead cards in your hand – with dead cards in your hand and no way to get rid of extra Vivid Nightmares, you will run out of space in your hand and just lose.
All in all, the most difficult part of this combo is realizing what cards you still need, on which turn you will be able to pull it off (7 vs 9), how to optimize your card draws to get the necessary combo pieces as quickly as possible etc. Generally, it all boils down to having more experience with the deck. So my final advice would be – if you want to play this deck seriously, first spend at least a 30-60 minutes in the Combo Simulator, ramping up the difficulty of combo (start with the basic settings, and then add more dead cards to your hand, more Taunts etc.). And then get actual in-game experience. Like with any difficult deck, you can only learn from reading about it as much – you need to play it, play it A LOT to get everything right.
APM Combo Priest Card Substitutions
APM Combo Priest is a medium cost deck – most of the lists cost around 6,000 Arcane Dust. Keep in mind, though, that the deck is already rather weak in lots of matchup as it is – replacing cards might make it even worse. Still, I will get through the list of Epic & Legendaries and try to offer some replacements.
- Bloodmage Thalnos – The only card in the deck. Although it doesn’t play any vital role, it’s the best card in slot. Not only it’s a 2 mana draw, but you can combo it with Spirit Lash for 2 mana AoE + more healing, plus it gets revived by Twilight's Call so you can do it again later. However, if you don’t have it, play another card draw, such as Novice Engineer, Acolyte of Pain or Gnomish Inventor.
- Doomsayer – I’d say that it’s necessary card. You absolutely need to stall the early/mid game until you get to your combo turns, and it would be way harder without Doomsayers. If you want to play deck without them, you can try Wild Pyromancer or some healing instead (Binding Heal) – actually, you would probably want to play them both.
- Shadow Visions – Makes the deck much more consistent, allowing you to snatch a specific combo piece when you need it, Spirit Lash vs Aggro or Psychic Scream in general. If you don’t have it, play more card draw (see Thalnos).
- Vivid Nightmare – Combo piece, can’t be replaced.
- Sandbinder – A good way to draw your Radiant Elemental in particular, but not a crucial part of the deck. Can be replaced by other card draw (most likely Gnomish Inventor, but you can opt for any other cheap draw, see Thalnos).
- Psychic Scream – Can’t be replaced, your only way to survive in the late game. Against Aggro, your only way to clear big boards and possibly buy yourself another turn or two, while against Control it’s your only way to deal with big minions.
Leave a Reply
You must be logged in to post a comment.
Deck is fun but has a horrible win rate. I have a 5% win rate out of 200 matches, losing most of the time due to not having a piece of the combo. Its hard to have 6-7 pieces of the combo
So…5% is horrible…This decks has 36,72 % on hsreplay right now…But…that´s horrible too 🙂
Nice deck.. easy to draw combo card..
but boring when play againt taunt….
If you don’t plan to use them, go ahead. I dusted my rotface and shaman legendary spell to craft this deck and I have no regrets so far.
Should I dust Emeriss and Boommaster Flark to craft this deck for fun?