


/rating_1_off.png)
/rating_2_off.png)
Mulligans
General Mulligans
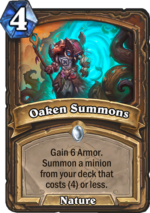
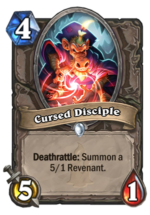
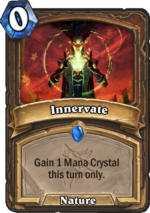
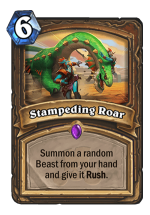
Mulligan: Keep Cursed Disciple and Oaken Summons. These are the basic tools to finish the quest quickly. There are no other low cost minions, so Oaken Summons always recruits Cursed Disciple. Keep Innervate only if you can combo it with Stampeding Roar.
Mulligan against aggro: Keep Spellstone and Wrath besides Oaken Summons and Cursed Disciple. Consider keeping Fatespinner.
Don't ever keep Gloop Sprayer, as it is your main combo enabler. Ideally you should draw it after you play Barnabus.


Quest midrange/combo druid deck that provides early pressure while finishing the quest in turns 6-9, then using UI to draw zero cost big rush/charge/taunt minions, and fill the board with them. The deck is strong against combo and control decks, as the win condition is usually reached by turn 10. It can maintain crazy board pressure for a few turns. The deck is resilient against combo disruptions, as the winning combo can be achieved in many ways, so removing/transforming a few minions or spells is not a problem. The deck is weak against aggro decks that overwhelm the board in the first few turns.
Early game: Keep your removals against tough snowballing minions like Scavenging Hyena. Don’t attack into secrets. Play Oaken Summons or Cursed Disciple as soon as you are able. Use your coin on OS/CD if you have a card to play next turn. You can take some damage, as you will rebuild your armor later. Use Fatespinner, Stampeding Roar, Amani War Bear to finish the quest. Be careful not to use Stampeding Roar or overkill with Oondasta if Barnabus is in your hand, as it ruins your quest Battlecry. Turn five Ooondasta or Tyrantus (or both, as Oondasta can summon Tyrantus) is a huge advantage!
Fatespinner strategy: while it is included to advance the quest and to remove early board threat (3 damage is ideal against hunter spellstone, and most other early minions), both deathrattles can be useful. After finishing the quest and playing Barnabus zero cost +2/+2 to ALL minions is useful to set up lethal. +2/+2 can be chosen to protect your big minions and disrupt defile chains too. It is pretty much GG if you manage to pull that off against a warlock. Both Wrath and Jasper Spellstone can be used to kill off your Fatespinner and buff your charge minions the same turn they are summoned. Fatespinner can also be sacrificed if Freezing Trap is suspected, and you want to make sure the 3 damage to board Deathrattle is triggered.
Late game and setting up lethal: Ideally the quest is finished, you played Barnabus by turn 10, and you have an Ultimate Infestation in hand. Your opponent already used some hard removals and board clears to clear the minions you summoned while questing. All your minions present serious threat so that’s normal. The idea is to draw a few 0 cost minions and play them right away for huge board presence with Taunt/Rush minions, or direct face damage with multiplied Leeroys and Charged Devilsaurs. Devilsaurs will skip their Battlecry when summoned with Oondasta or Stampeding Roar, so they can attack the hero right away. They can be summoned with Oaken Summons too after Barnabus, but you can ruin your Gloop Sprayer multiplication and Fatespinner buffs, so play it only when you know what’s left in your deck. I’ll list a few possibilities to maximize damage from hand.
Basic combo: If you have no other beasts in hand just Devilsaur(s), you have space for 5 minions on board, you have a 0 cost Gloop Sprayer, a 0 cost Leeroy (or an Innvervate/Coin), and a Stampeding Roar: 26 face damage for 6 (or 11) mana. 30/30 total stats on board.
Basic combo with Oondasta: same as above, just rush your Oondasta into a whelp summoned by Leeroy instead of playing Stampeding Roar.
If you buff these minions with Branching Paths or Fatespinner you can do 34 face damage from hand. You can do both with an Innervate or 0 cost Oondasta for 42 face damage.
Most of the time you don’t have to play the full combo to win. Your big minions will do enough damage that a simple Leeroy copy can finish your opponent. Against some enemies you shouldn’t even play all your aces in one turn. If you don’t have lethal, expect a board clear, so make sure you can present some threat in the next turn too. Priests will have multiple board clears with scream and hysteria. Warriors also have four very strong board clears (if you manage to keep their armor low, they won’t be able to use some of them though). The right strategy is to keep tempo, peel off some health from your enemy and wait until you have the right cards for lethal. Also, depending on the decks they are running, some classes, like priests, paladins can high damage combos, so play your armor cards. Having 40-50 total health may save you from the combo. You can use your combo defensively. If you multiply your Taunt/Rush minions, you can clear the board and keep a huge tempo.
Overall I achieved 53% winrate with this deck on ranks 5-10 in January. That’s across 230 games, so it is a consistent winrate. I reached Rank 5 with it for the first time in my life – I was a casual player on Ranks 15-25 before this attempt.
This is my first real attempt to build a ladder deck. I always wanted to make use of the druid quest, and this is the best one so far. If you have a tip how to improve it, or you iterate on it, or you find it useful, please leave a comment.