After Mysteries of Phoenix in The Barrens and Gift of Elune in Stormwind, it’s time for yet another Secret achievement. Those achievements tend to be quite difficult – you have to follow a series of puzzles and complete all of them, often with the help of entire community.
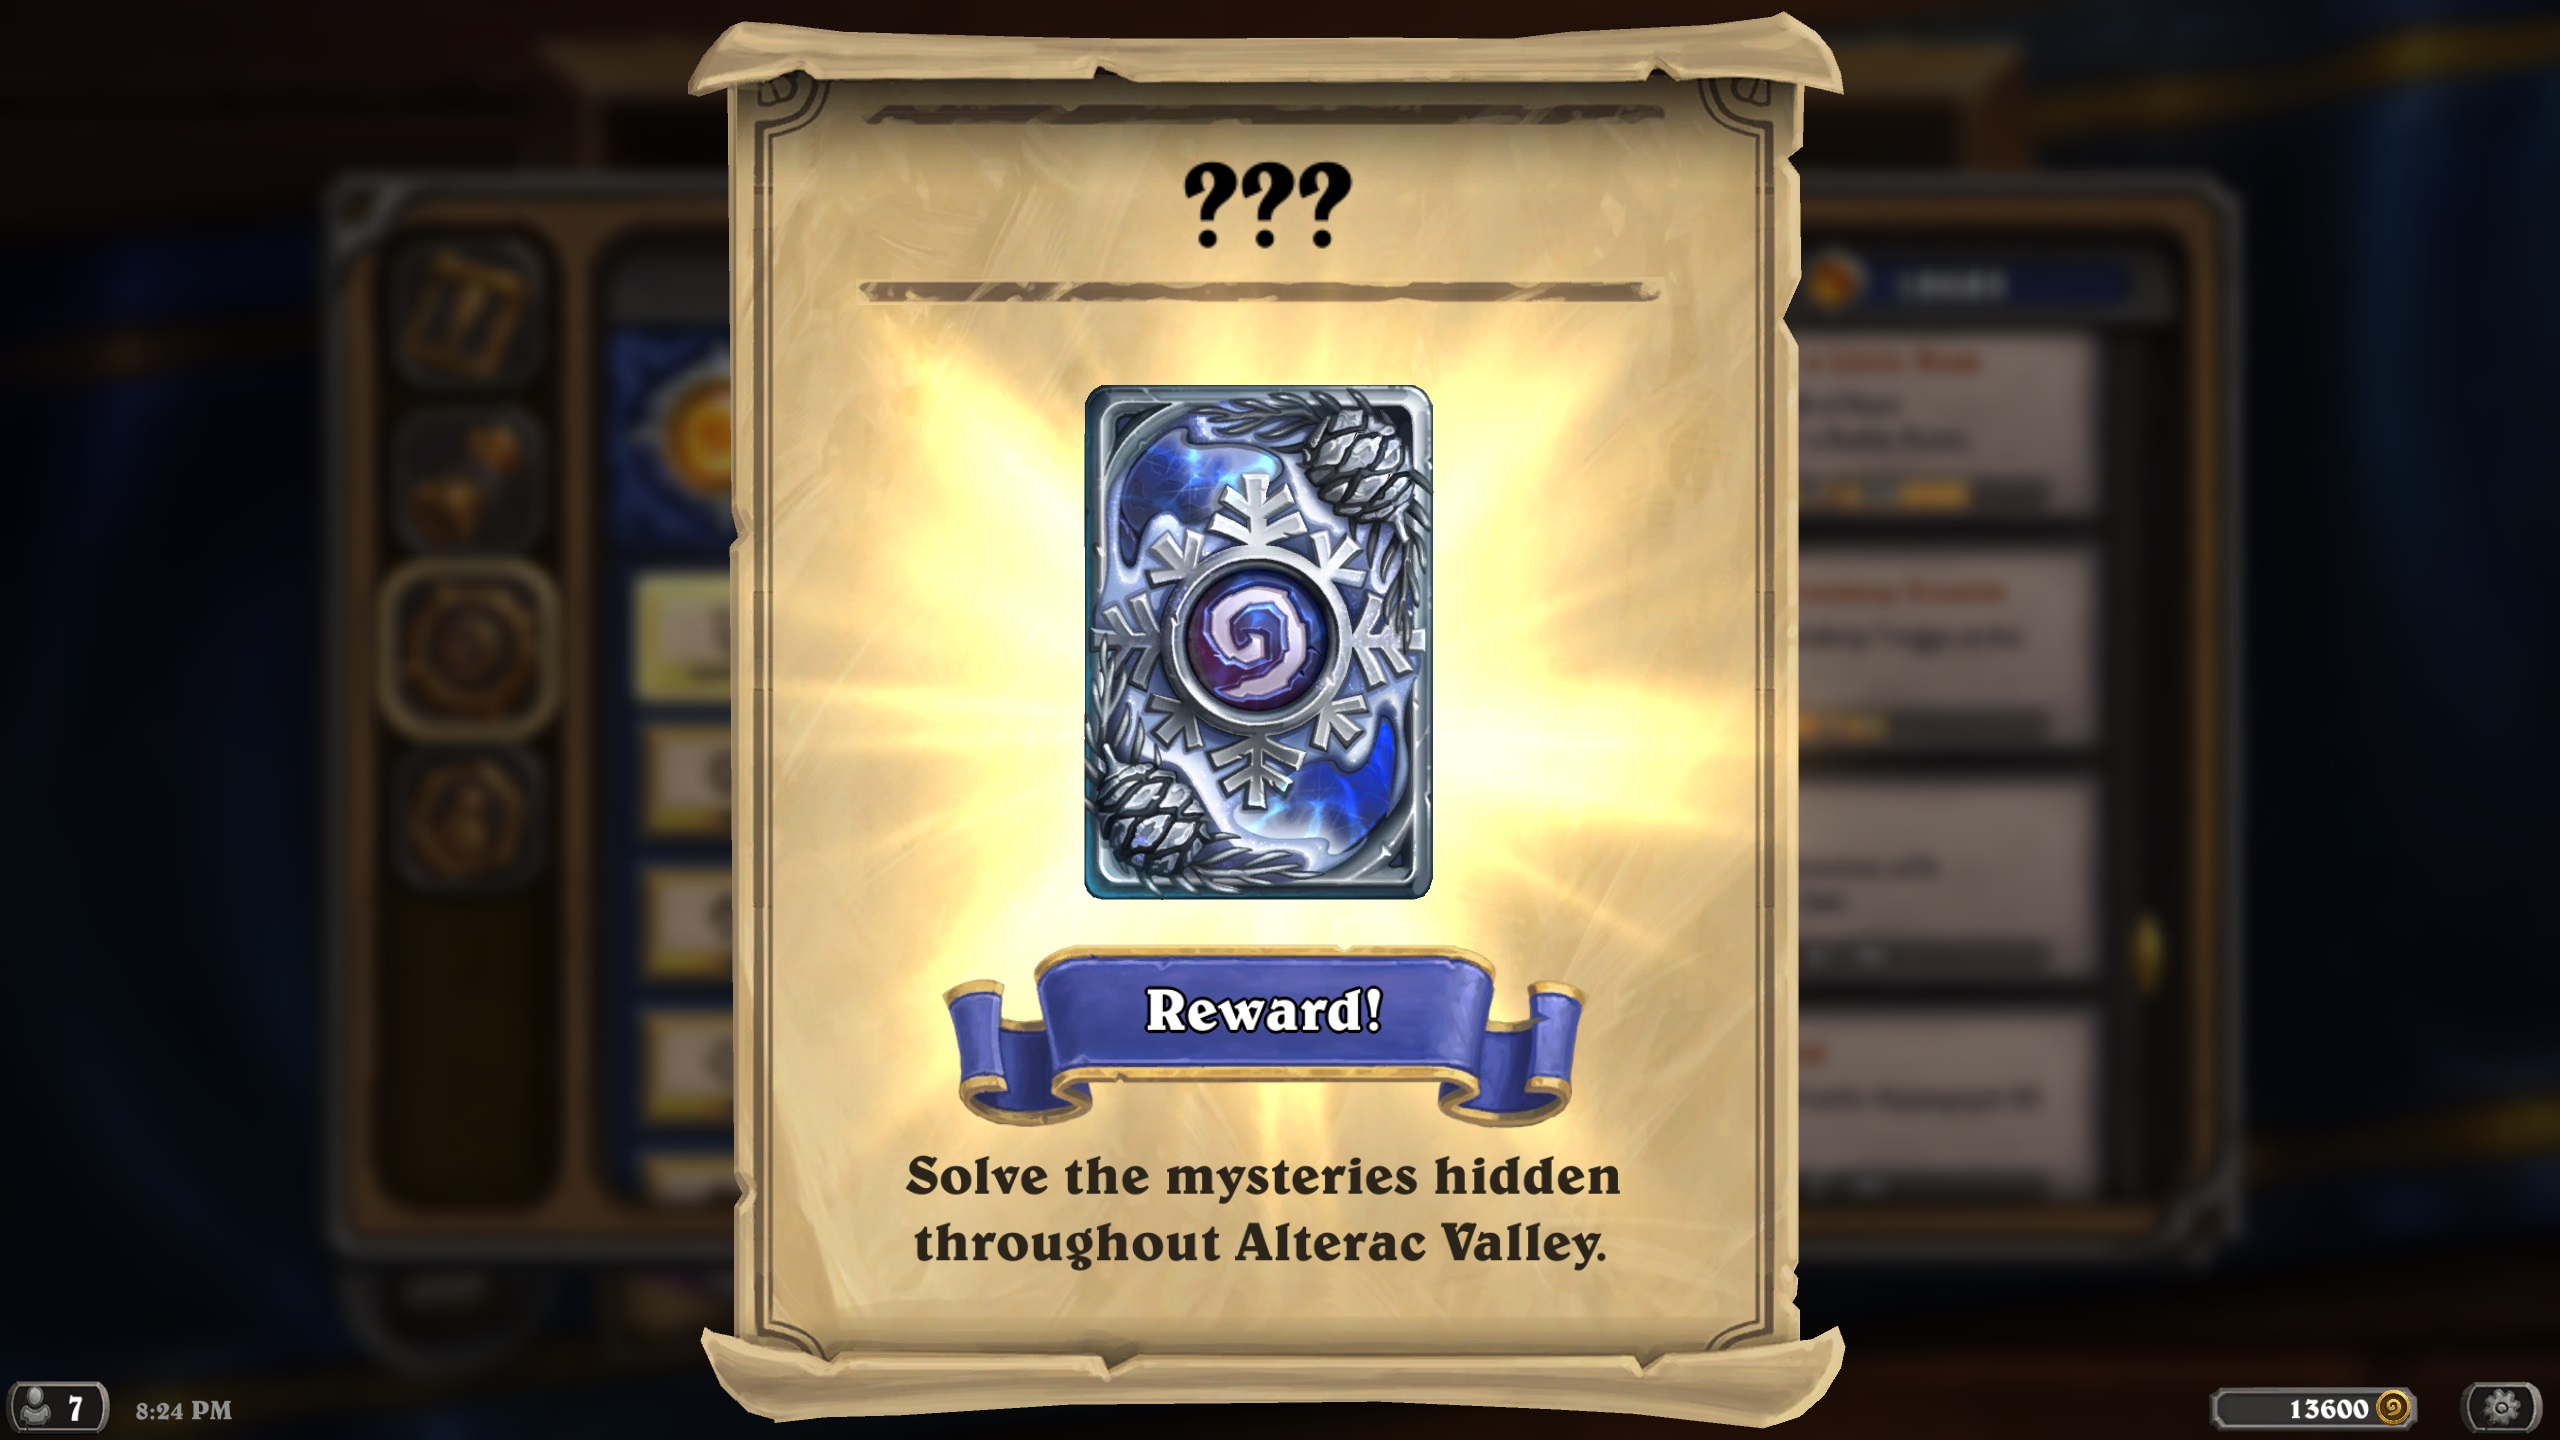
And what do you know – another one was just released in the latest patch. You can find it under the Alterac Valley gameplay section in achievements, and it’s probably the most difficult one yet! This time the card back is called “Shimmering Snowflake” and in order to get it, we have to “solve the mysteries hidden through Alterac Valley”.
All images and solutions were based on the amazing community effort, mostly from the WoW Secret Finding Discord server. You can join them here!
If you prefer the guide in video form, check out Old Guardian’s channel on YT:
How To Start The Puzzles
All of the puzzles are started through Book of Mercenaries solo adventures – Cariel, Kurtrus and Xyrella to be more precise. Unlike the previous ones, you don’t need to prepare any custom decks, you just need to find a “hidden button” and press it.
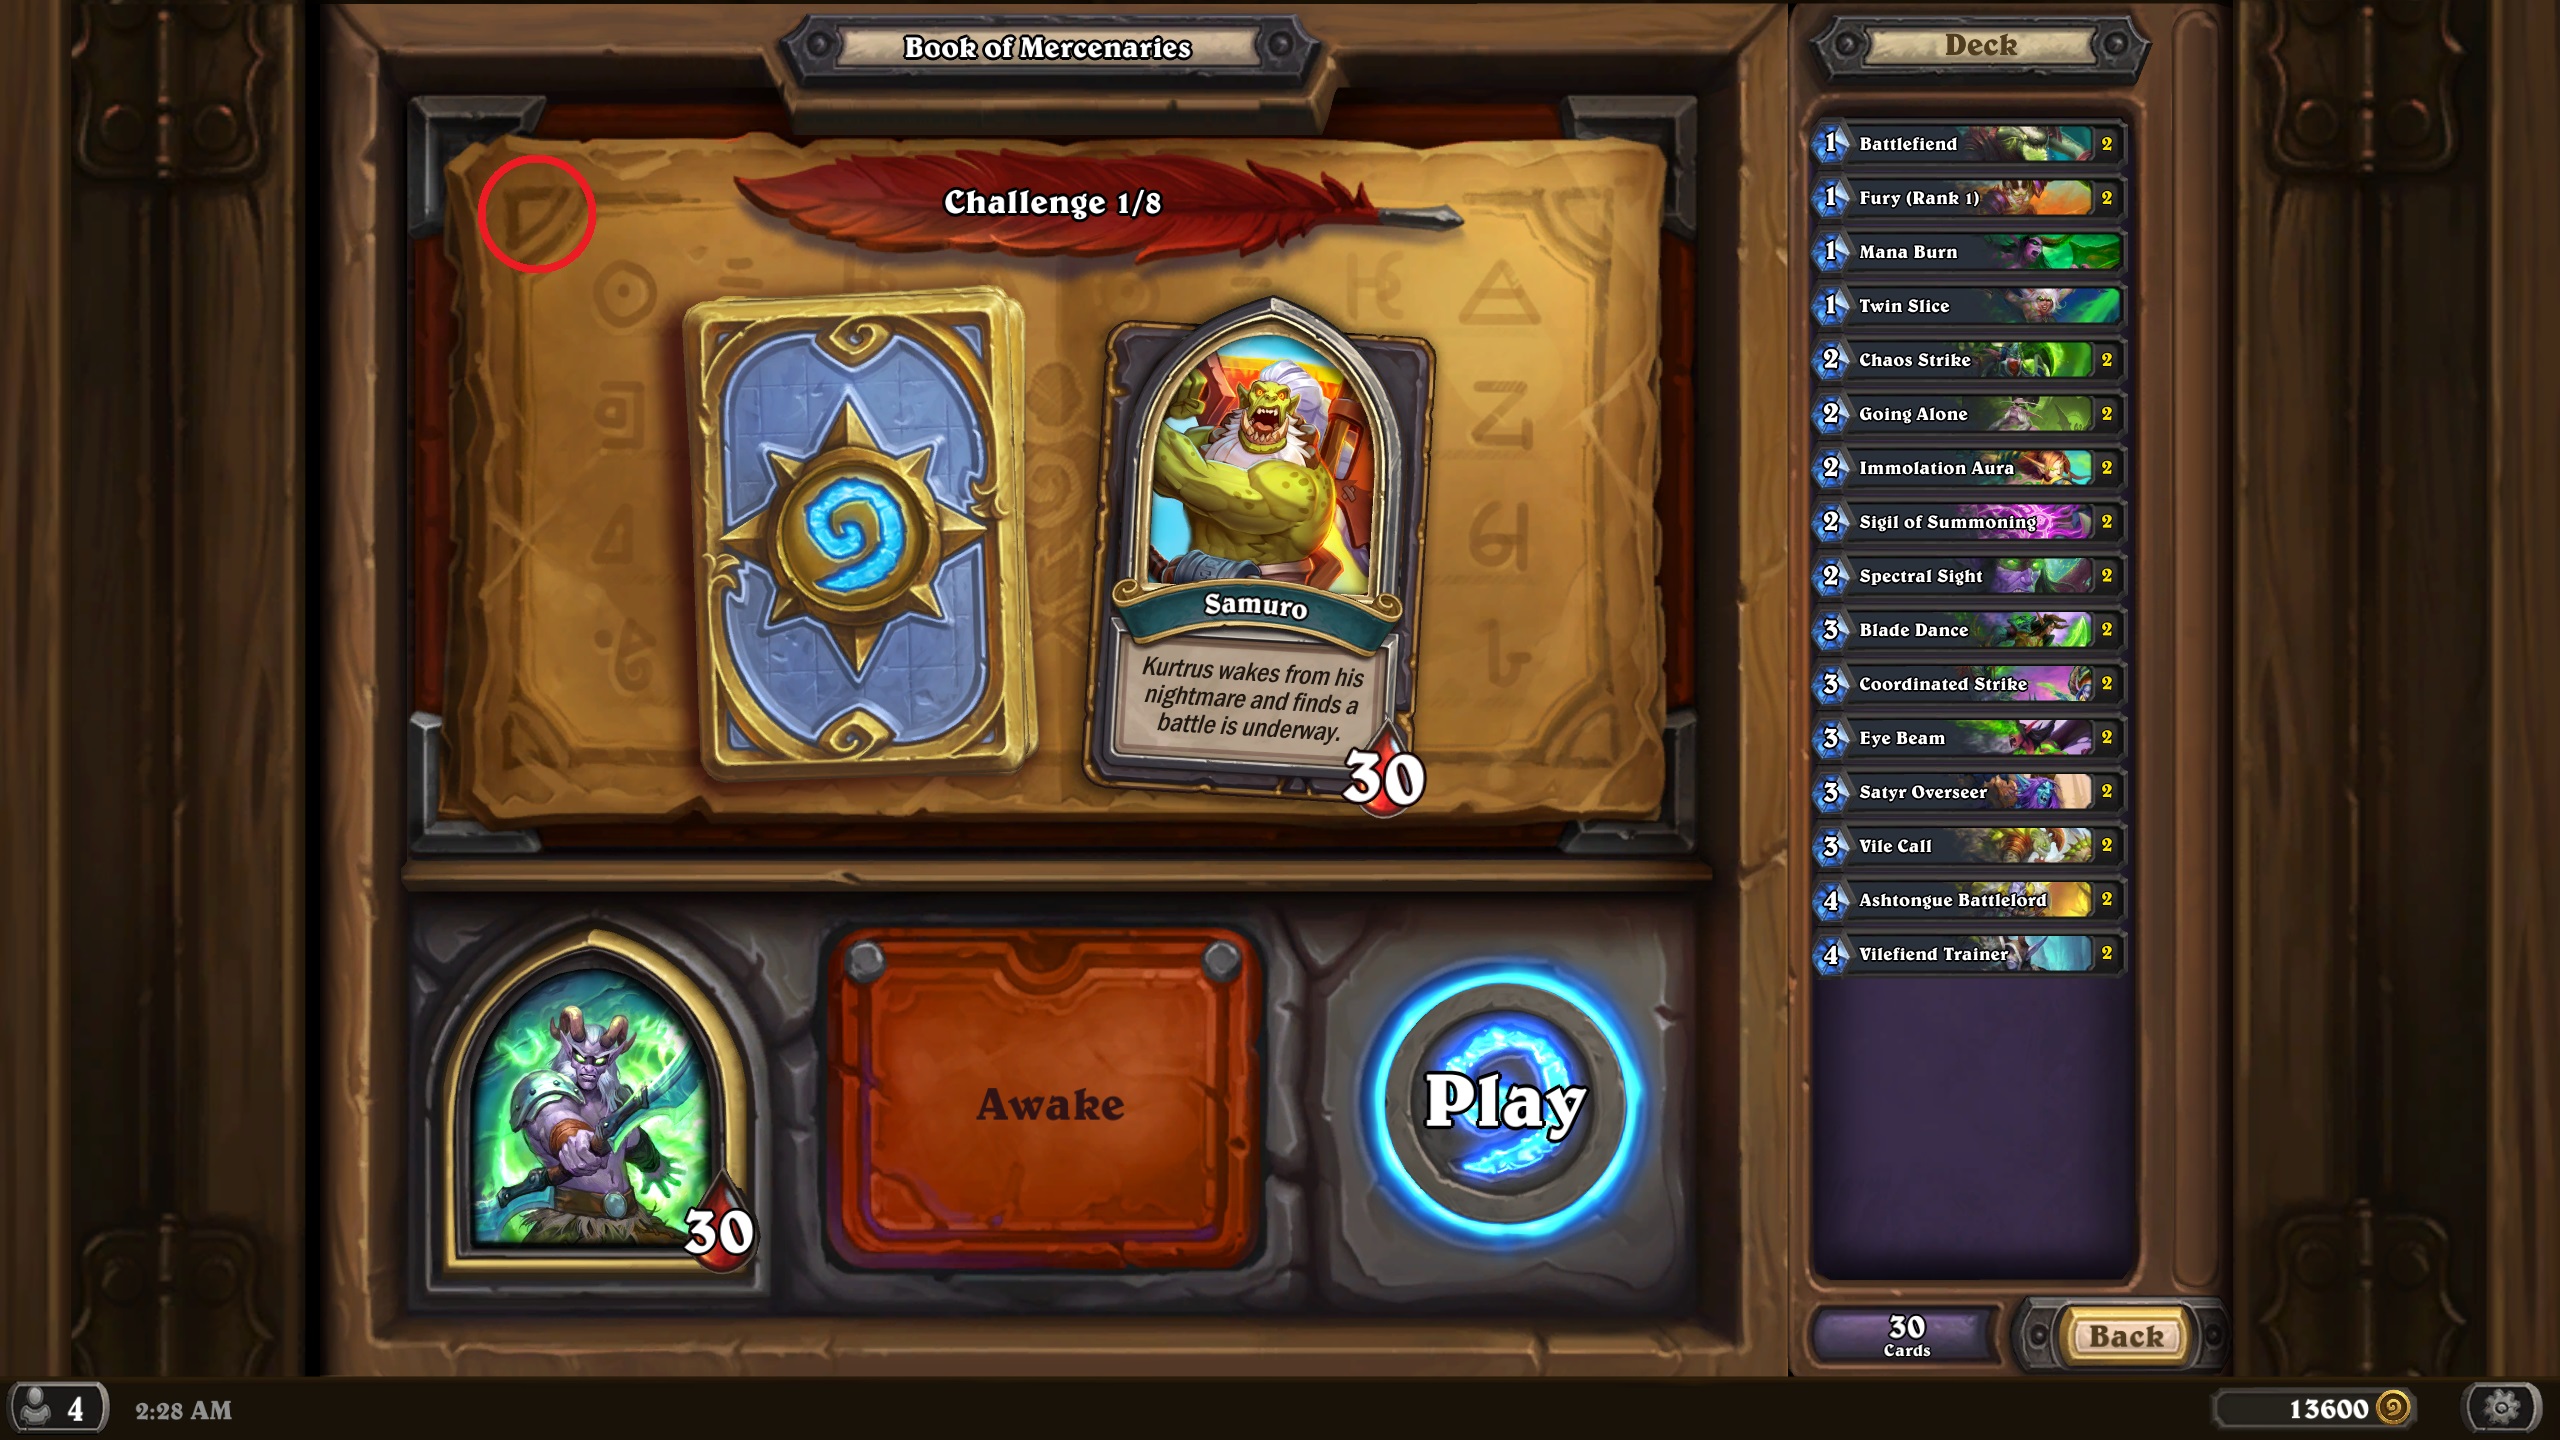
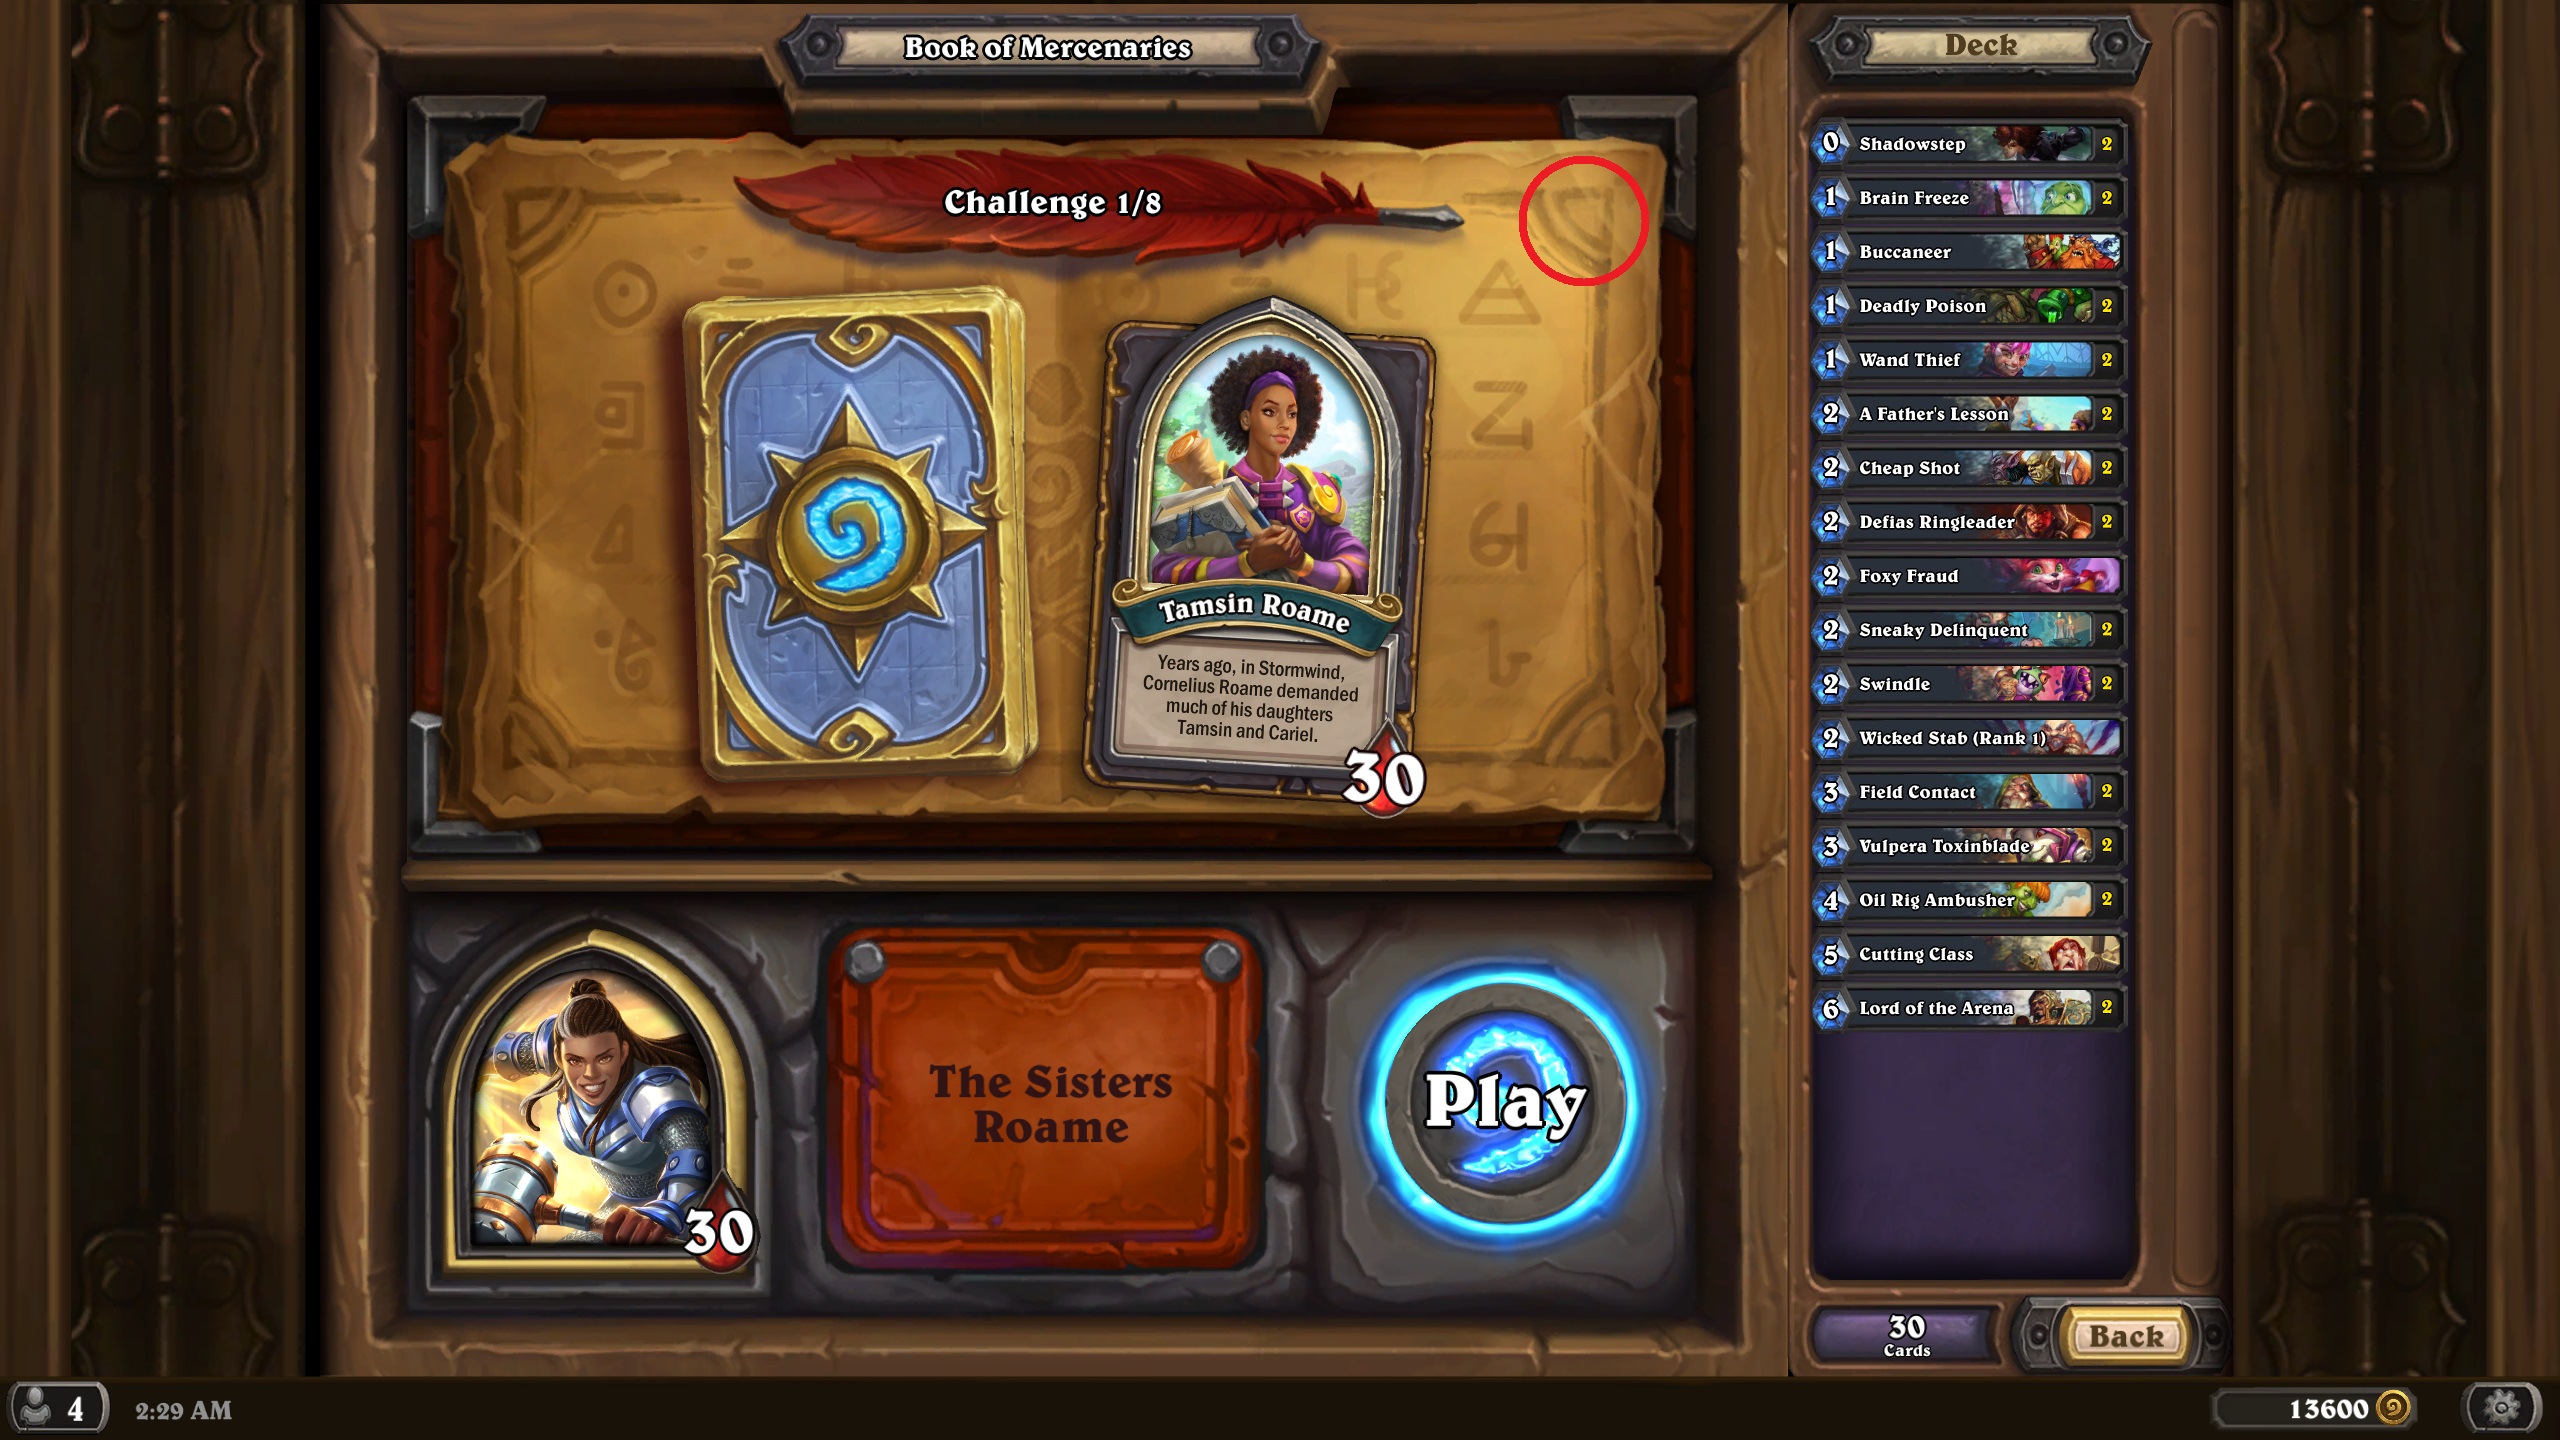
In the game’s main menu, go to “Modes” -> “Solo Adventures” -> “Book of Mercenaries”. Then pick Cariel, Kurtrus or Xyrella, depending on which puzzle you want to start with (a word of warning – Cariel’s the longest one by far). In order to start the puzzle, you have to click on the triangles in one of the corners of the parchments showing your current Challenge.
It’s a top-right corner for Cariel, a top-left corner for Kurtrus, and a bottom-left corner for Xyrella (I’ll post images under each puzzle so don’t worry). You have to wait for the dialogue to finish before they become clickable.
Puzzle #1 – Kurtrus
The solution is based on this Google Doc.
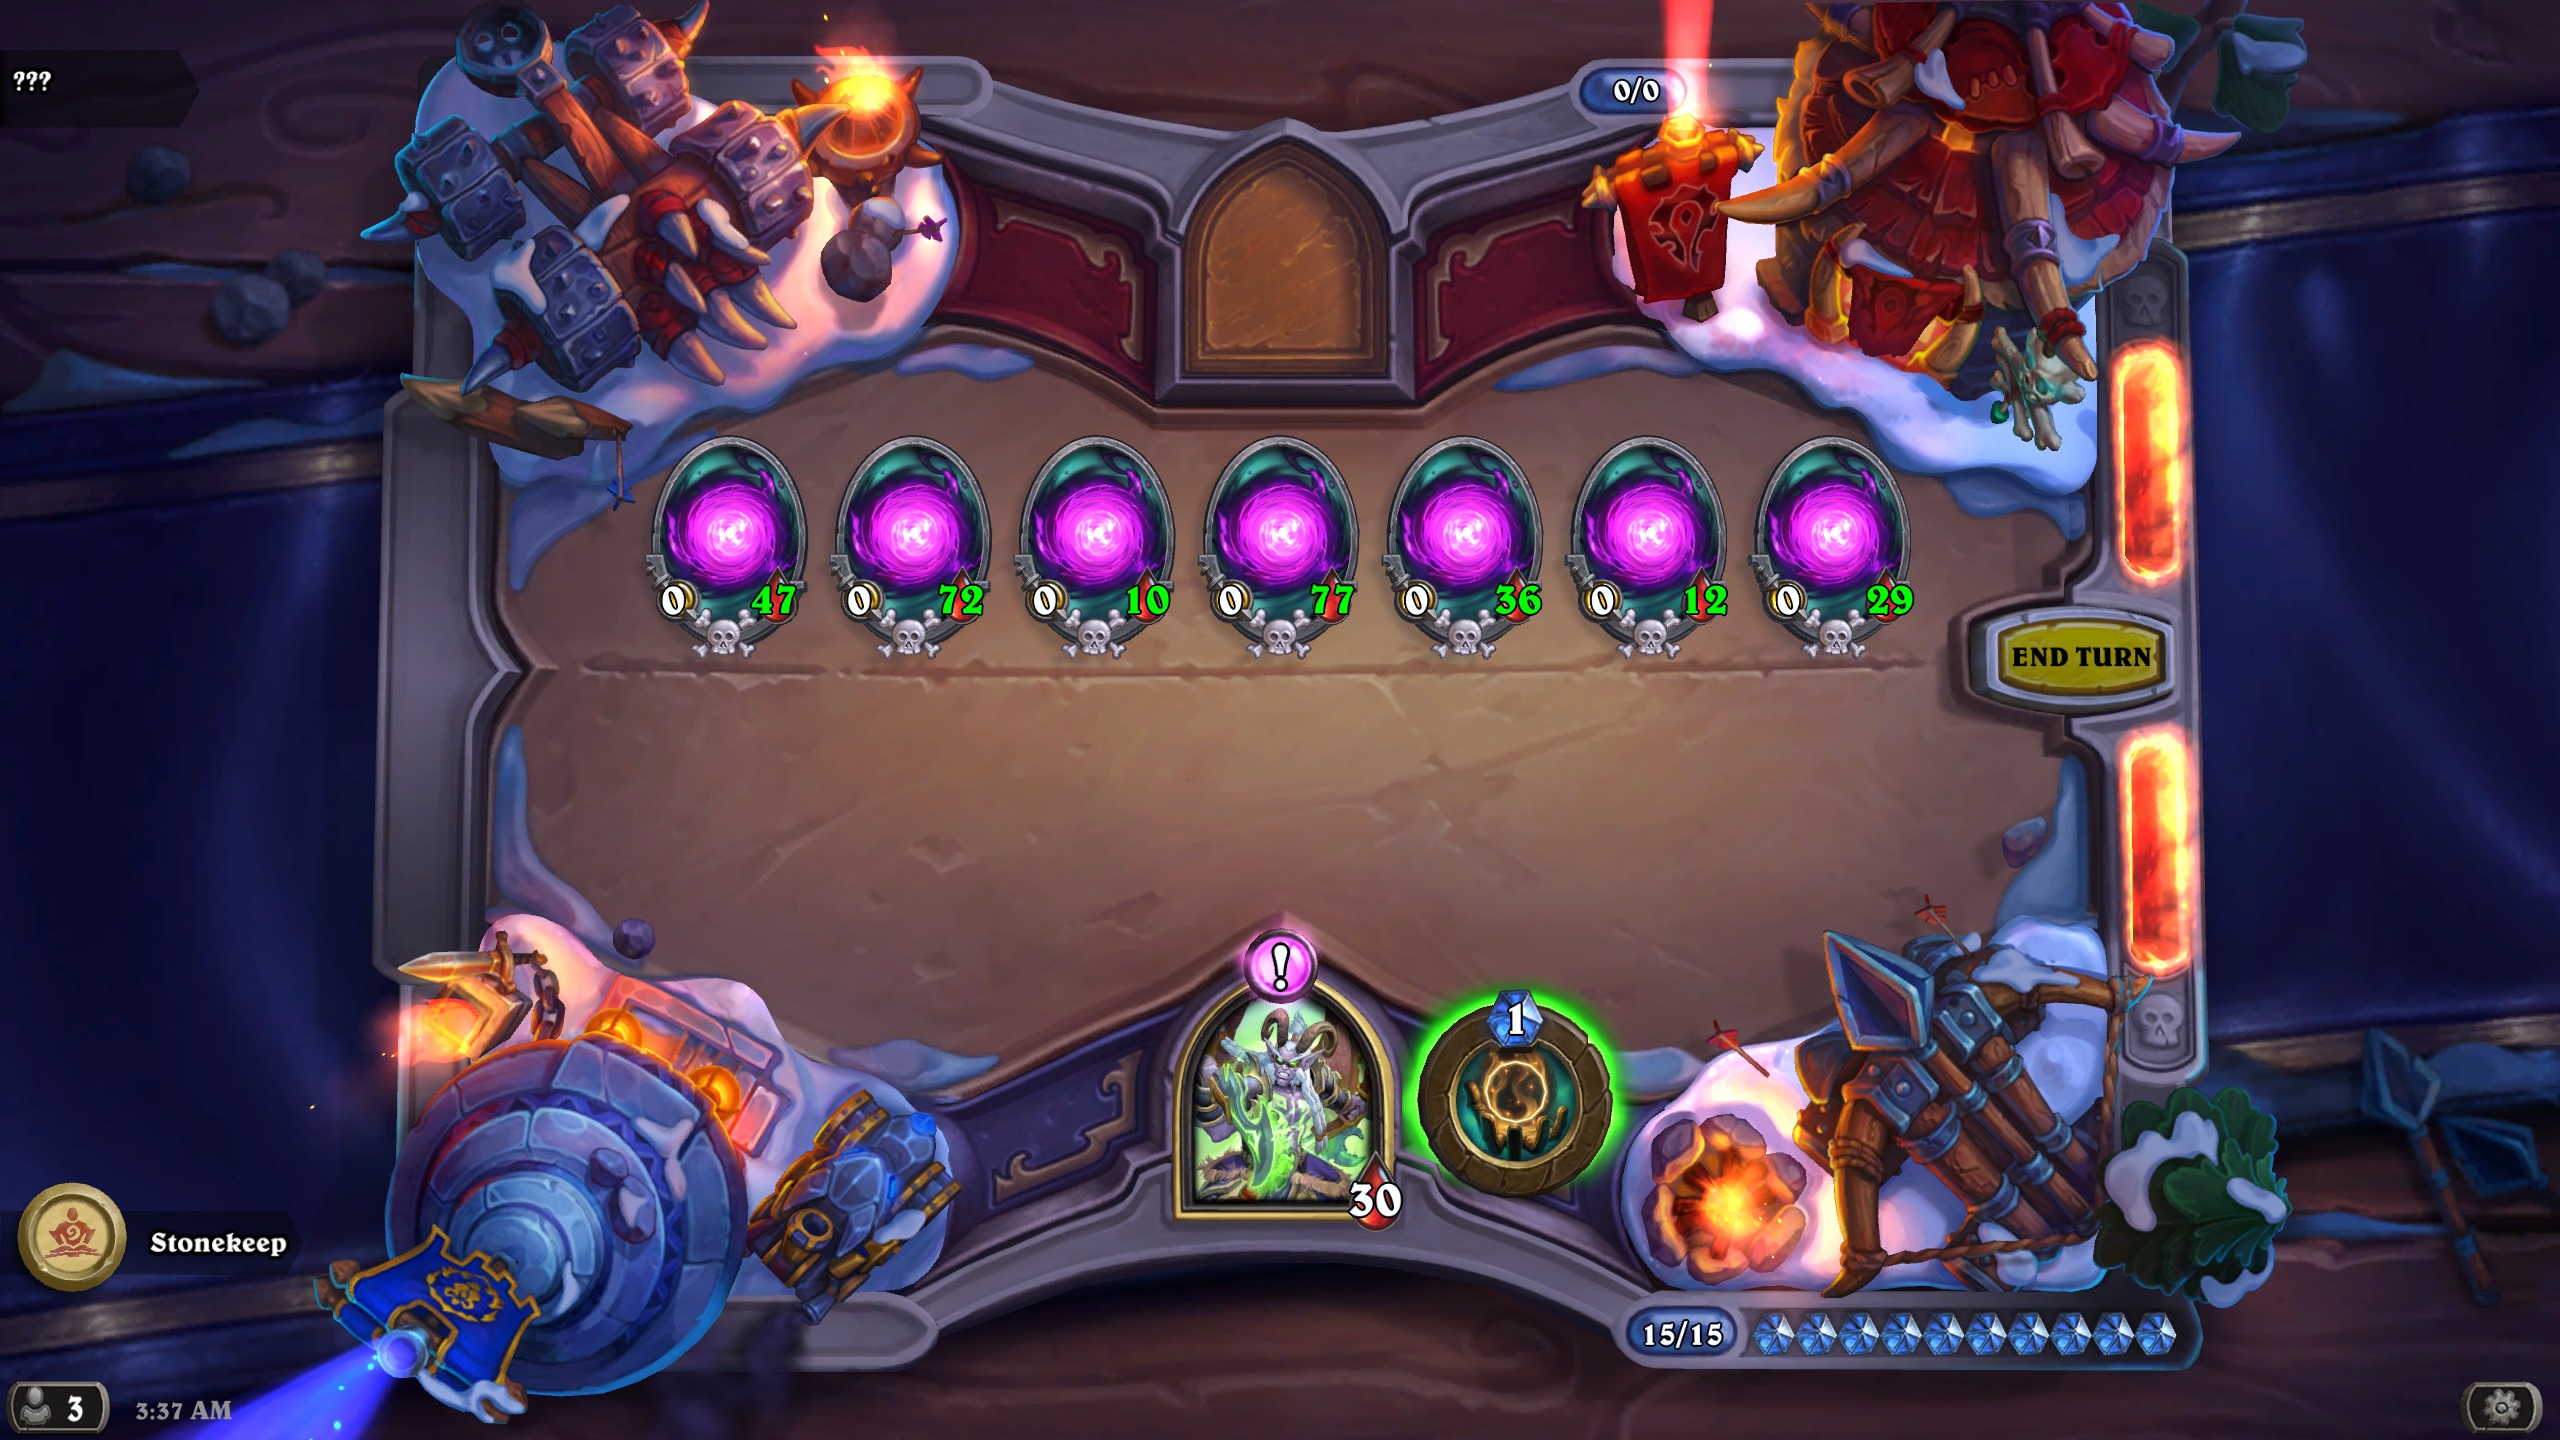
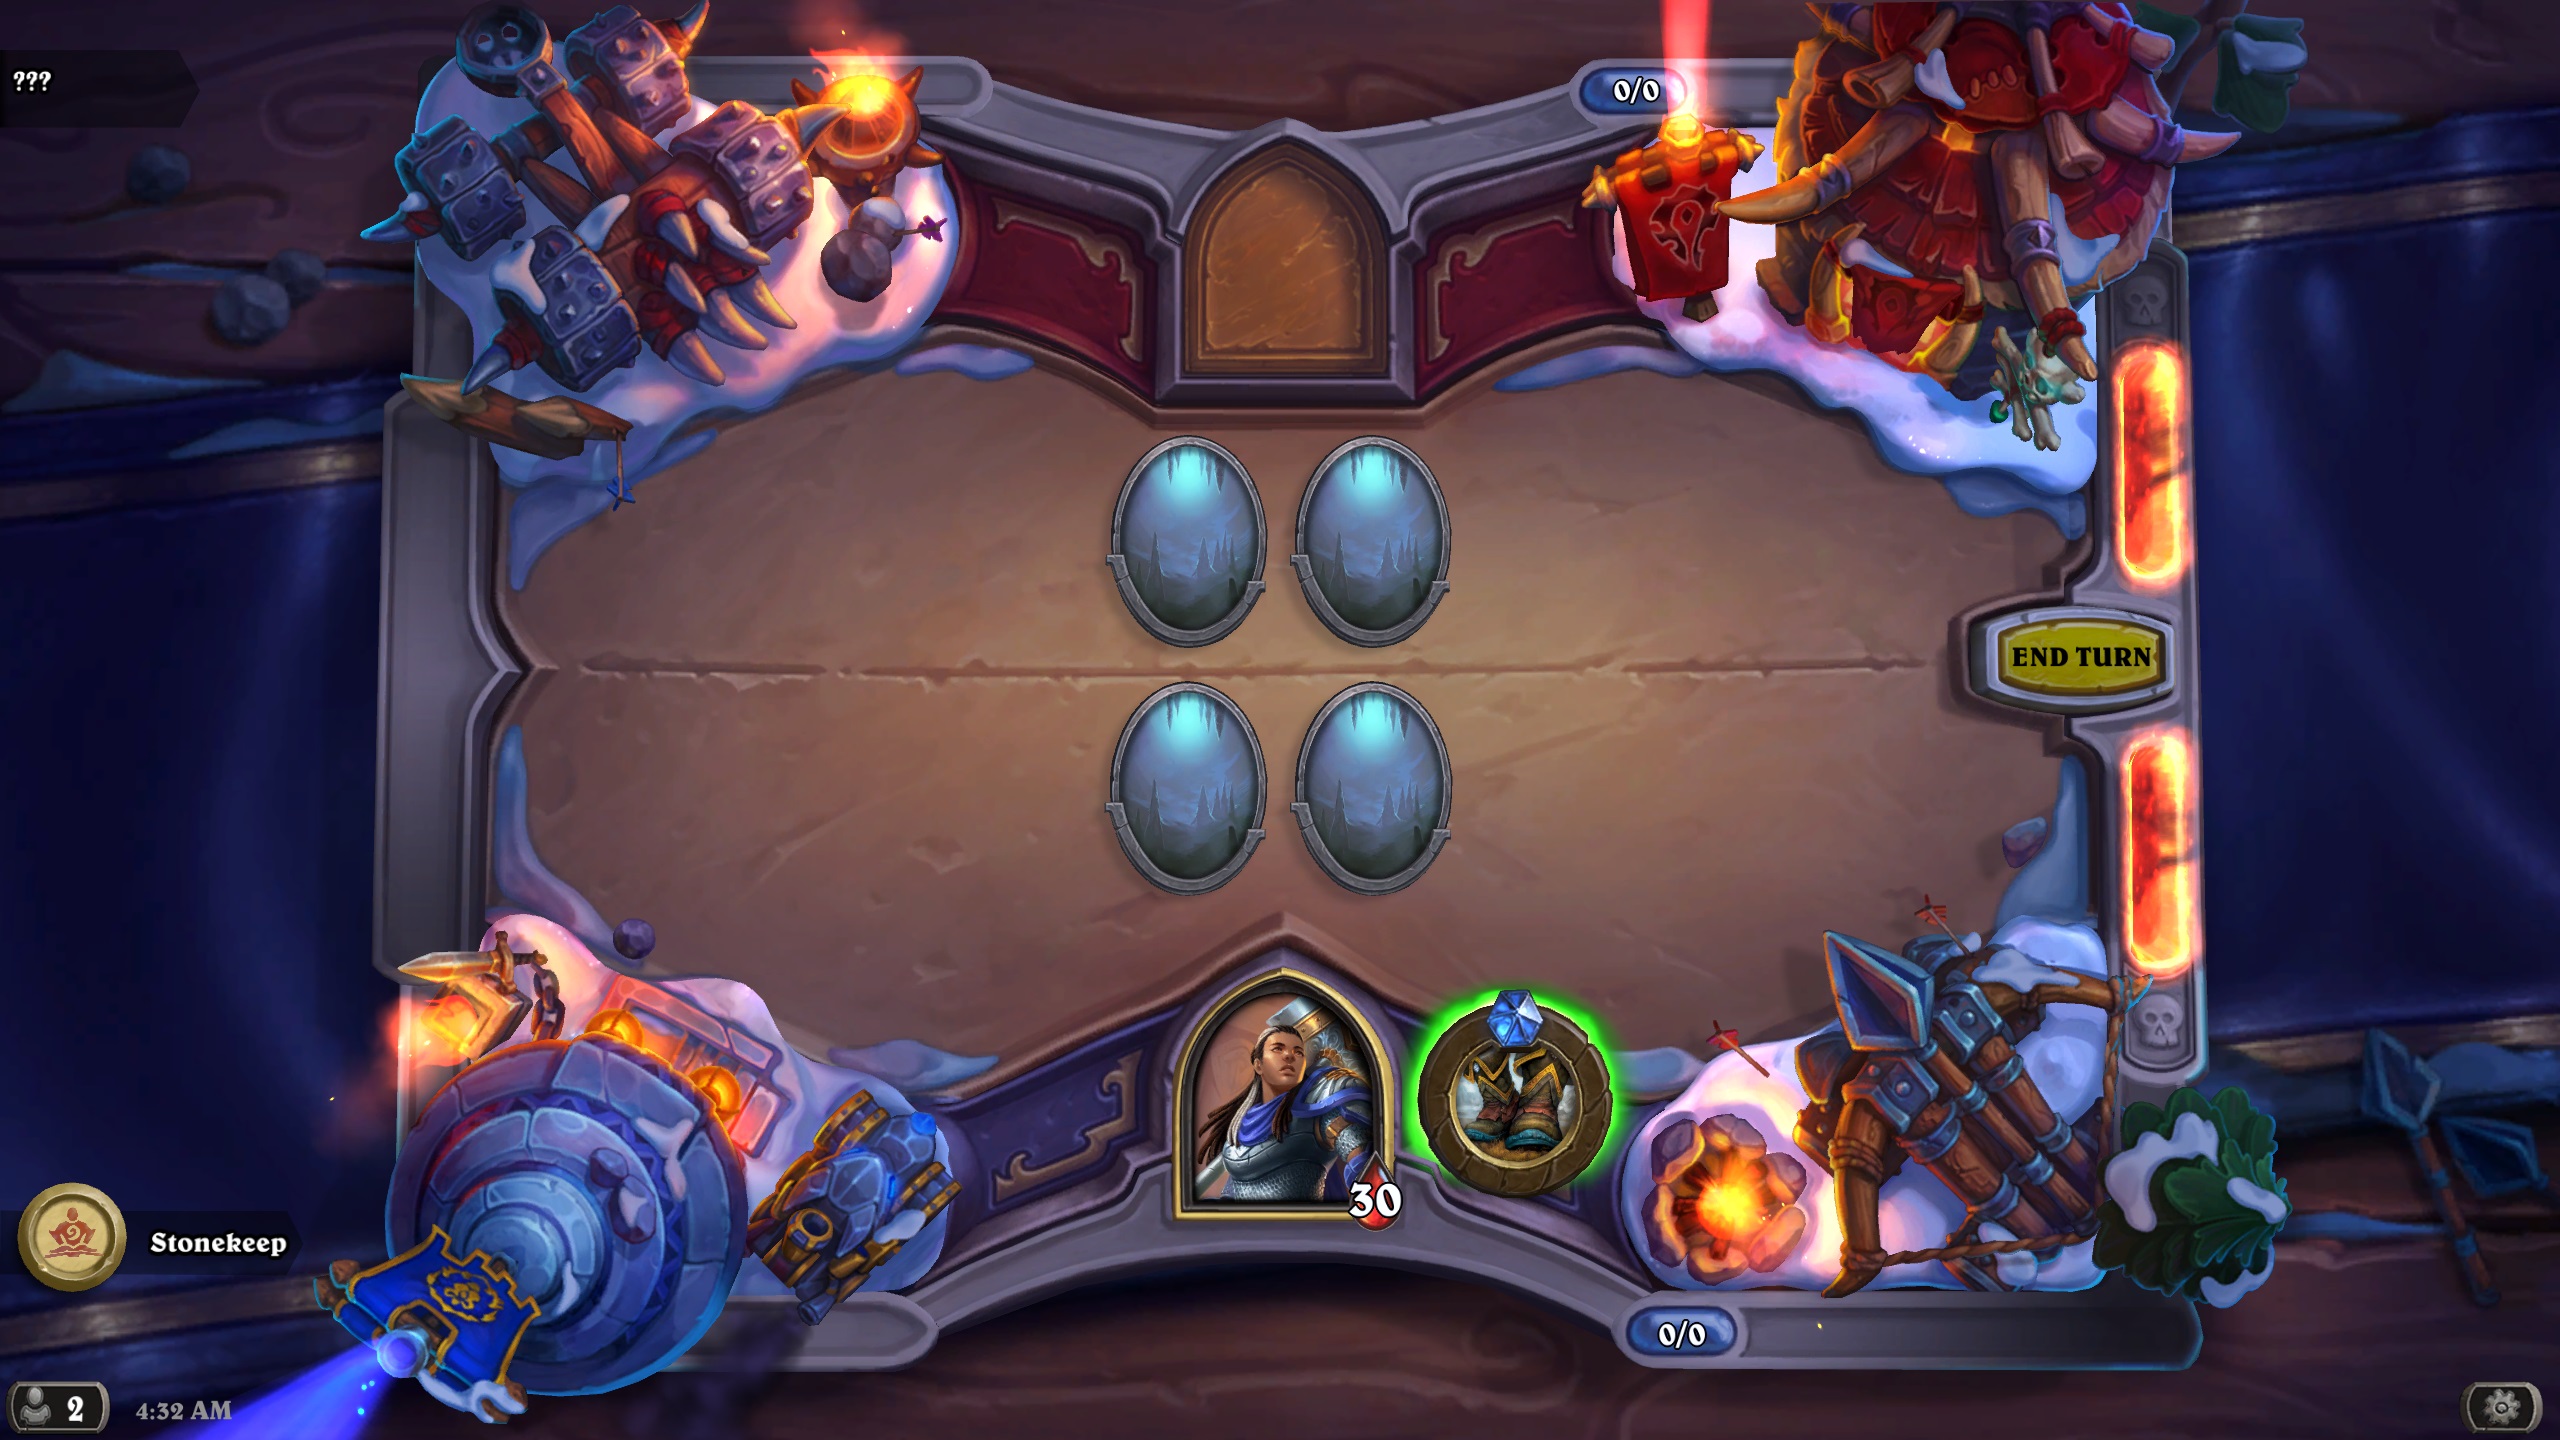
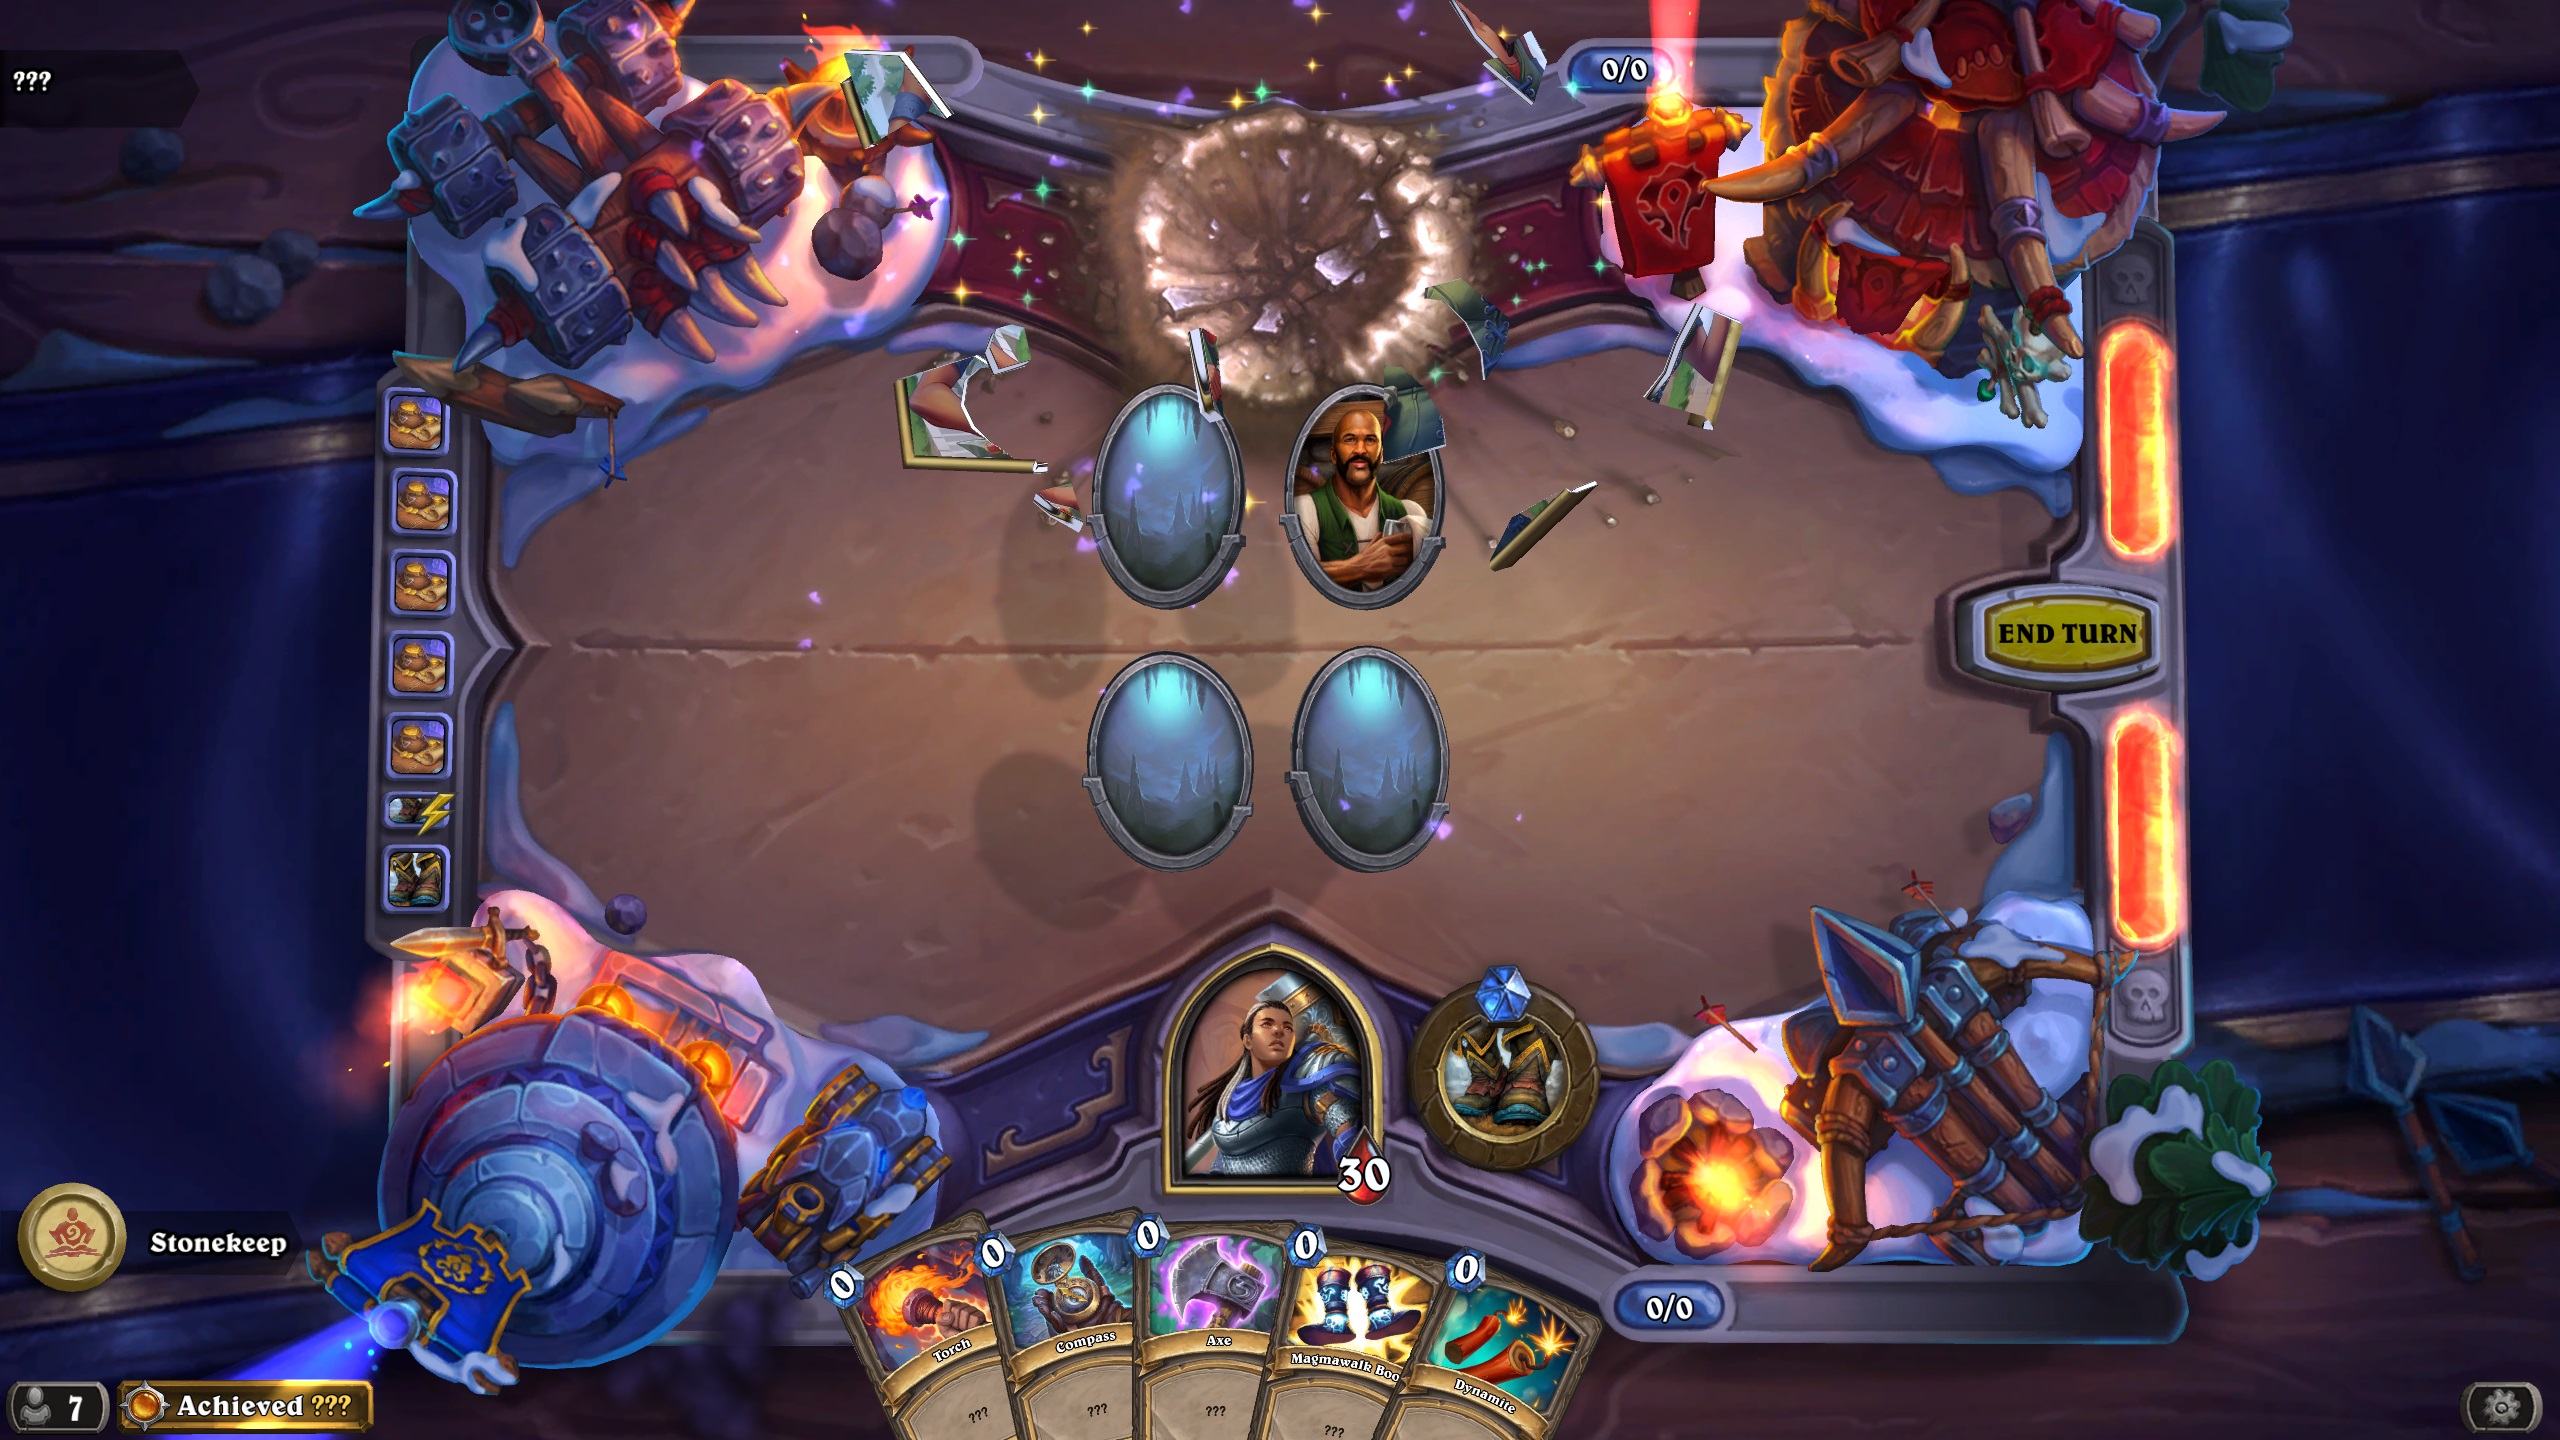
In Kurtrus’s puzzle, you have to go through 20 turns while keeping your minions (balls of energy) alive. In order to keep them alive, you can use your Hero Power, but the issue is that it has limited uses – you can only use it 15 times. So first you need to know which minions are closest to death and how fast they’re dying in order to prioritize the most endangered ones. However, you should not be fooled by minion’s health – low health minion can actually be in a good shape while a high health minion might be close to dying.
If you want to avoid doing some unnecessary math, read the entire solution before doing the puzzle (I’ll talk about a calculator later).
When you first open the puzzle, write down the health of each minion on your board. Then open this spreadsheet and, based on their health, check what their position is. You no longer care about their HP, only their position numbers are relevant. That is the important part – if any of them falls to position 1, the puzzle is over and you have to restart.
For example, here’s my board state (from the image above) and position of each minion:
1st – 47HP – Position 48
2nd – 72HP – Position 74
3rd – 10HP – Position 11
4th – 77HP – Position 78
5th – 36HP – Position 89
6th – 12HP – Position 54
7th – 29HP – Position 30
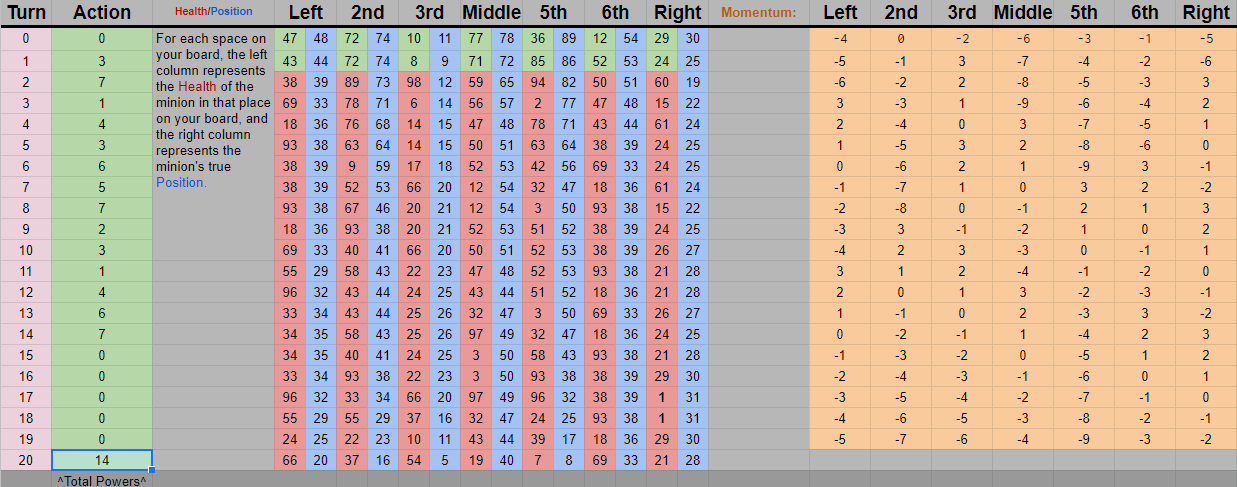
Now, the second important part is to find out the “momentum” of each of your minions, so how quickly their position falls. In order to do this, you want to pass the turn without using your Hero Power. Now do the same thing as you did before – write down HP of your minions and find out what their position is.

Again, in my case, here’s how things looked after passing the first turn. Based on those two numbers, I can now calculate the momentum of each minion (either manually or using a calculator – keep reading to learn more). 1st one was Position 48 and now it’s Position 44, so its momentum was -4. But since the momentum decreases by 1 each turn, its current momentum is -5. It means that after I pass the turn, it will drop from Position 44 to Position 39. Then the momentum will once again go down -6, and the next time I pass turn it will be Position 33… And so on, and so on. Here’s my board state from the example above:
1st – 43HP – Position 44 – Momentum -5
2nd – 72HP – Position 74 – Momentum -1
3rd – 8HP – Position 9 – Momentum -3
4th – 71HP – Position 72 – Momentum -7
5th – 85HP – Position 86 – Momentum -4
6th – 52HP – Position 53 – Momentum -2
7th – 24HP – Position 25 – Momentum -6
In order to counter that, you want to use your Hero Power. Your Hero Power resets the Momentum of the minion you target to +3, so it will take way longer for them to die.
There are two ways to approach that puzzle. The first one is to figure it out yourself. It’s honestly not very hard. You generally want to use Hero Power on a minion with the lowest Momentum (one that’s falling the fastest) in order to get the most of a reset, unless there’s another minion with really low Position that’s about to die – then prioritize it instead. It’s honestly not that difficult once you figure out what’s going on, but the “problem” is that you have to calculate 20 separate turns manually so it takes a while and it’s easy to make mistakes.
The other way is using a calculator. Open the spreadsheet I already linked and make yourself a copy of it. Then proceed to the “calculator” tab and input all of the minion HP from before and after you ended your turn. It will automatically calculate their current Position and Momentum. It will show exactly how long it will take for them to die if you don’t use your Hero Power. Now in the “Action” column, skip Turn 0 (since you didn’t do anything during that turn) and keep adding Hero Powers starting from Turn 1. Input 1-7 depending on which minions you want to target and it will show you how it will affect how long it takes them to die.
For me, all it took was to “target” the minion that was closest to death. It took me 14 Hero Powers to keep them all in check. But if things don’t to so smoothly for you, you can always experiment – that’s the beauty of the spreadsheet, you can try different things without committing. Here’s how my spreadsheet looked like in the end:
Now, after you’re done with the spreadsheet and it has confirmed that all of your minions will survive until the end, all you need to do is use Hero Powers on the correct minions in the correct order for the next 15 turns. Then pass a few more turns and – if everything was done correctly – the puzzle will be finished. Good job!
Puzzle #2 – Xyrella

The solution is based on this Google Doc.
Xyrella’s puzzle is a 2×2 Rubik’s Cube that you need to solve. Each of the minion tribes represents one color and you first need to find out exactly where they are placed on the cube and then solve it.
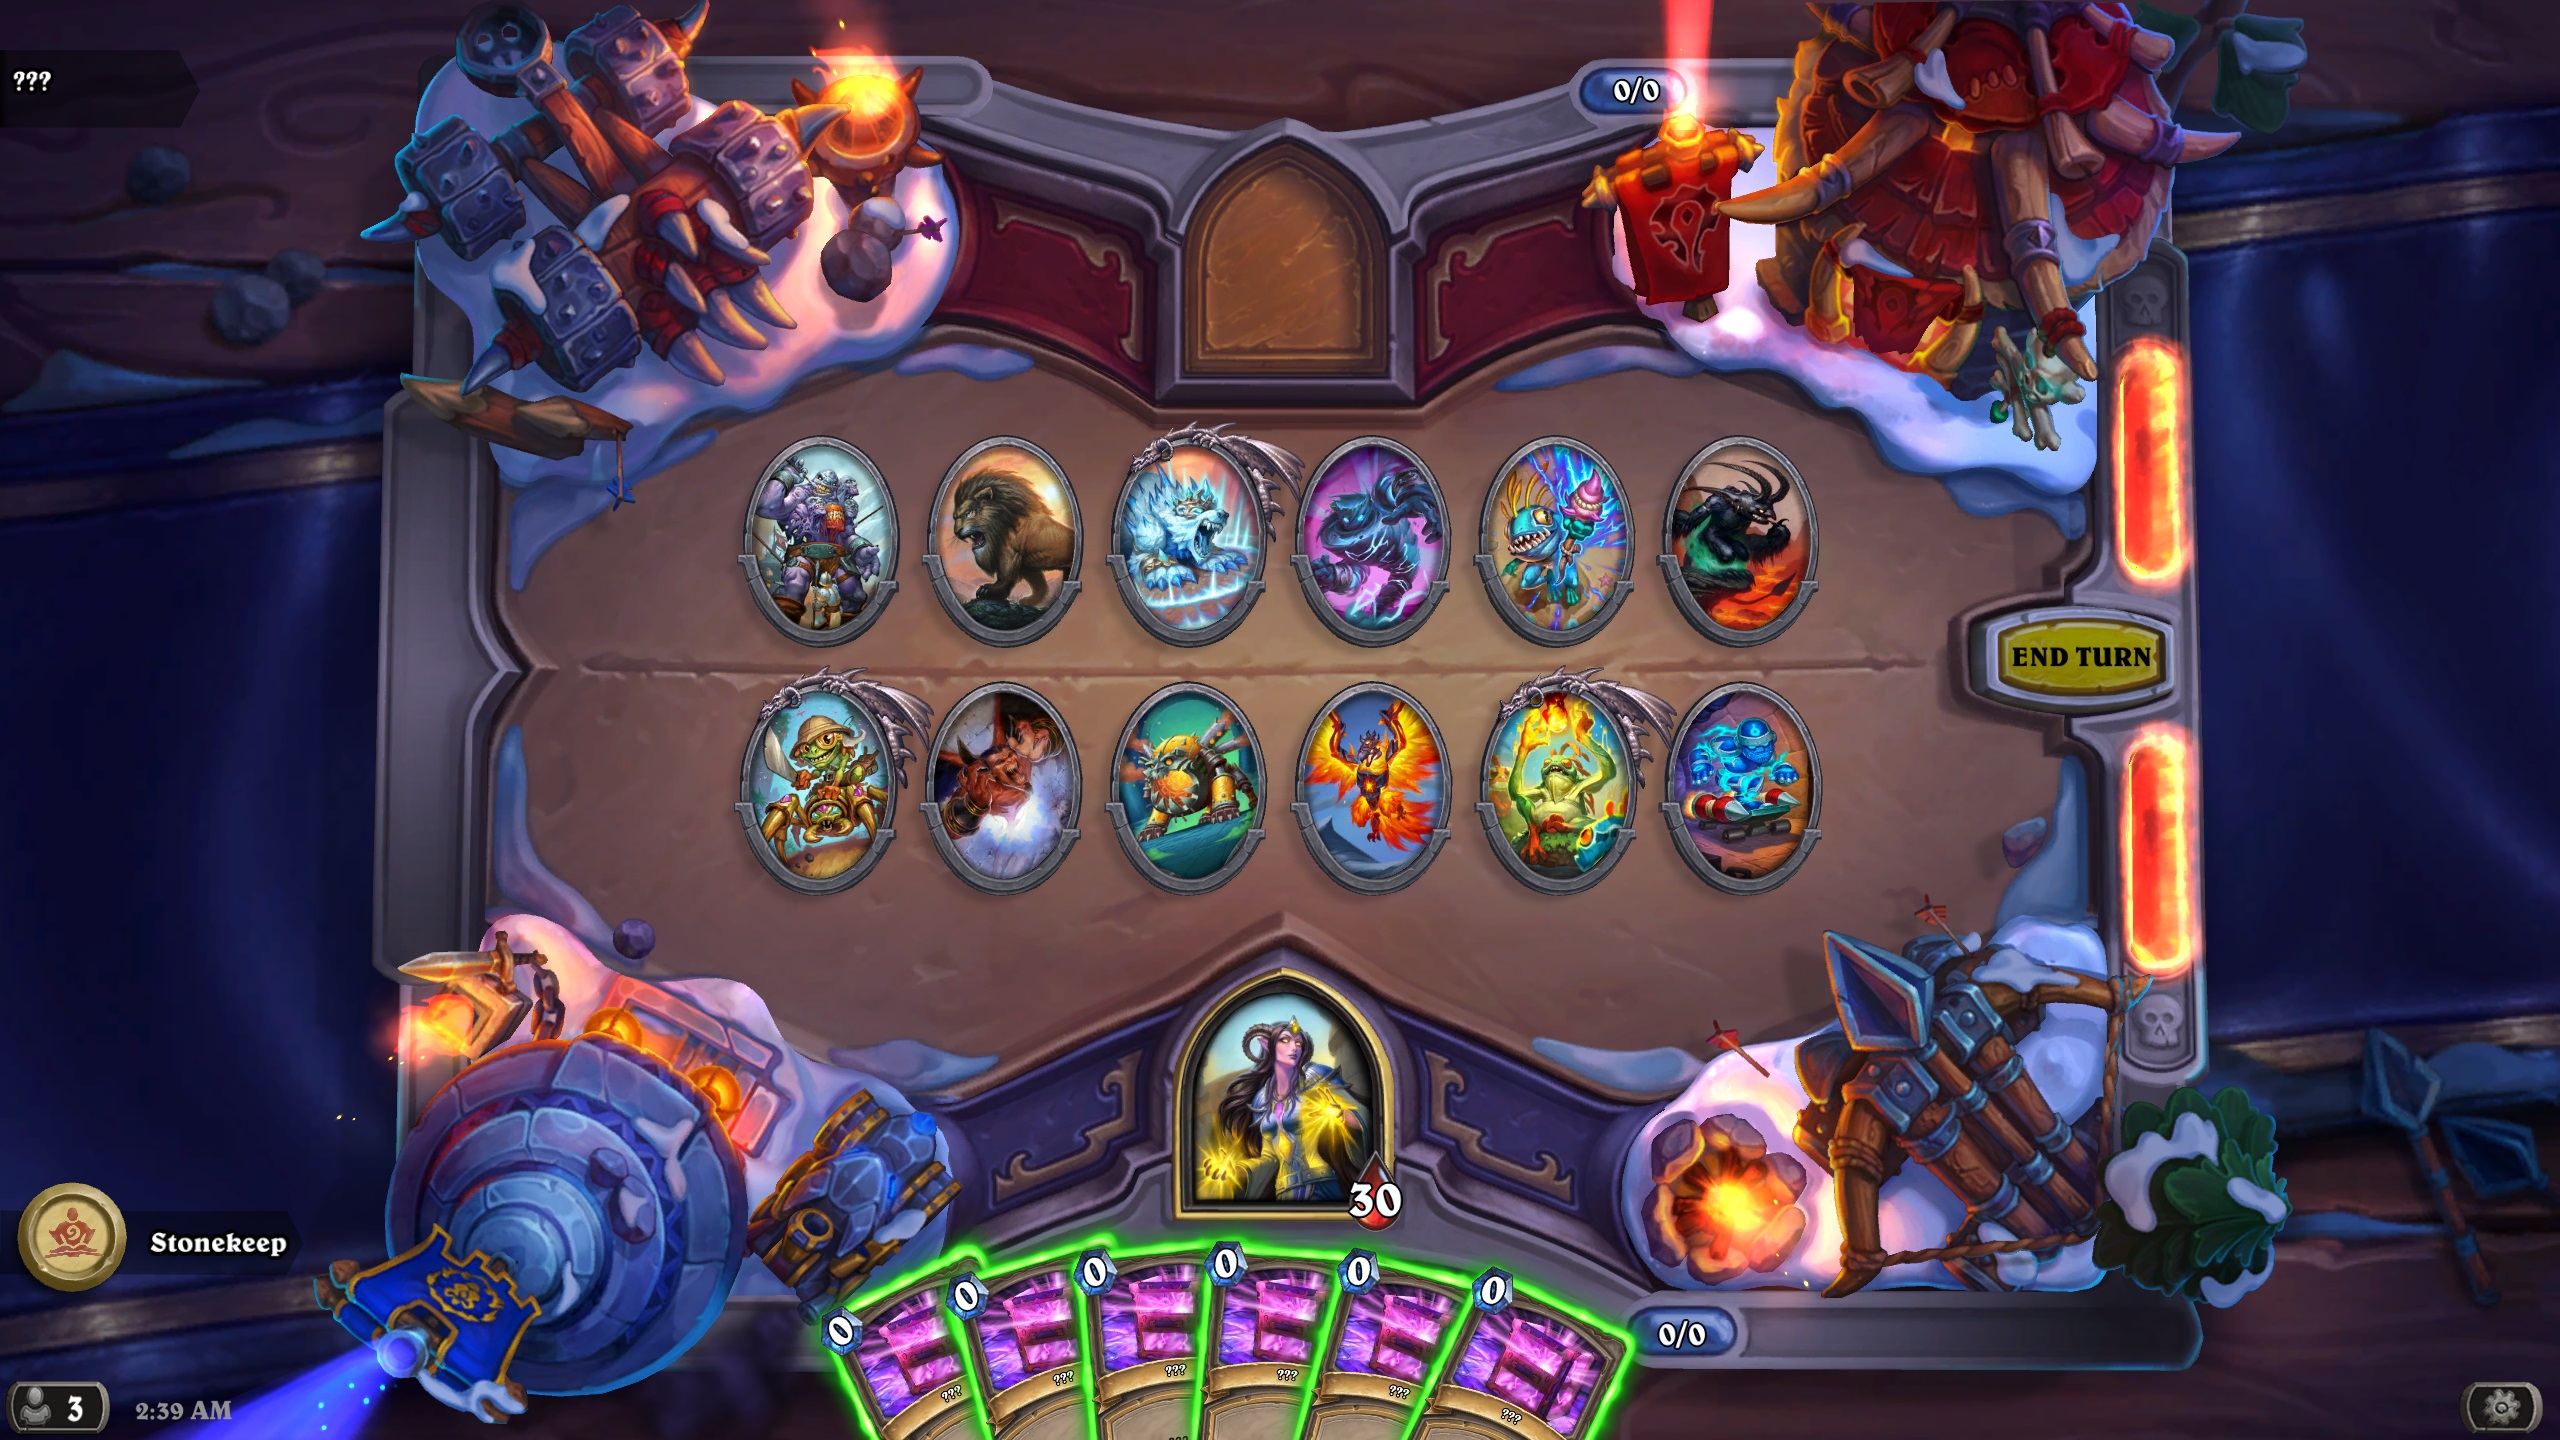
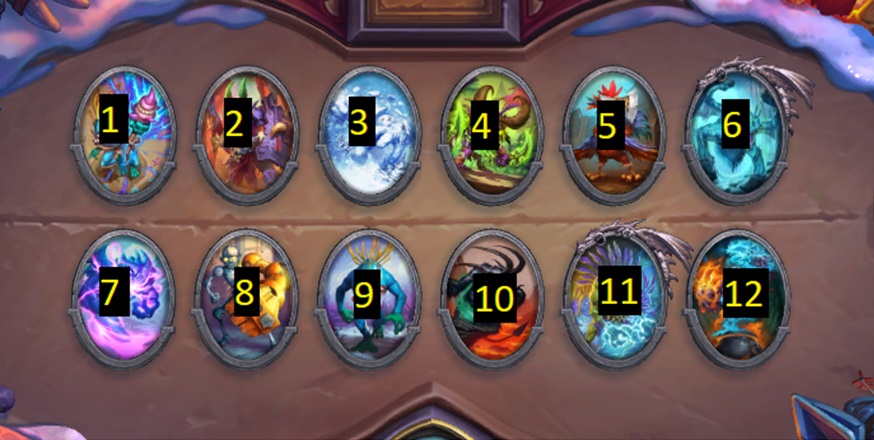
My recommendation is to open a notepad or use pen and paper. Write down numbers 1 to 24 and a minion tribe next to each number depending on what is on your board. The first 12 are very easy – they are the minions you see on your board when you launch the puzzle. Don’t use any cards in your hand yet. The first minion on the board (starting from the top left) is number 1, the second is your number 2 etc. Exact minions are irrelevant, you only care about their tribes. So, in the example above, it would go something like that:
1 – Demon
2 – Beast
3 – Elemental
4 – Elemental
5 – Murloc
6 – Demon
7 – Murloc
8 – Demon
9 – Mech
10 – Elemental
11 – Murloc
12 – Mech
Keep in mind that’s just an example based on my puzzle – it’s random so you will see different minions in different combinations.
And here’s a visual guide if you found my explanation confusing. Again, write down minion types you see ON YOUR BOARD, not the ones from images.
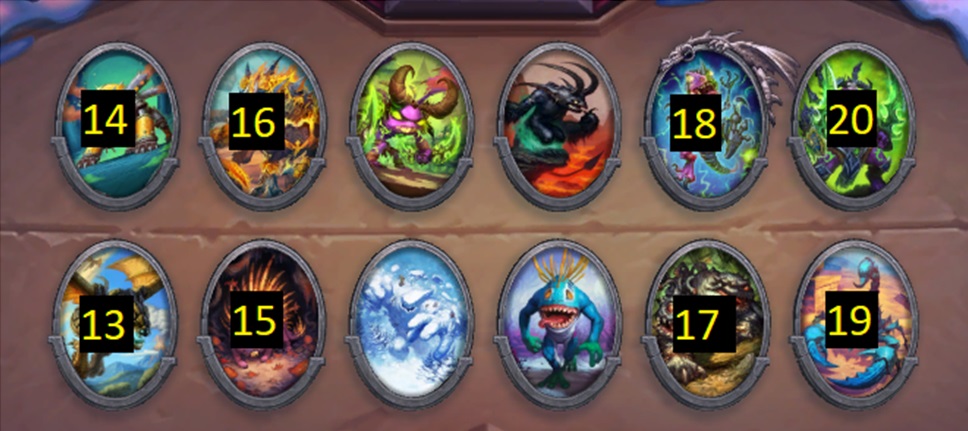
In order to find numbers 13 to 24, you need to play a few cards in your hand:
- 1st card 1 time.
- 2nd card 3 times.
Now minions 13-20 should be visible in the spots on this image. Write down their tribes.
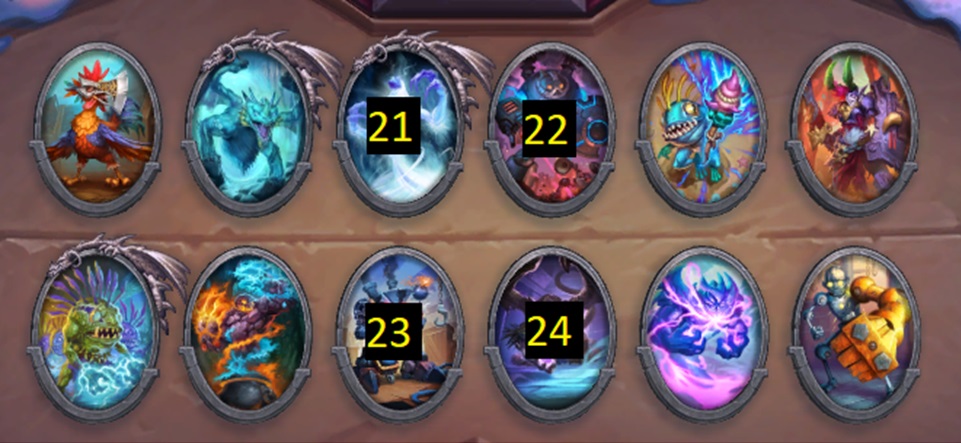
Now only 21-24 are left. In order to find them play cards from your hand:
- 1st card 3 times.
- 2nd card 1 time.
- 3rd card 2 times.
- 4th card 2 times.
Now the last four tribes should be visible in those positions:
After you have all of the minion tribes written down, you want to assign each tribe a color – Red, Green, White, Yellow, Blue and Orange. It will be useful when using the Rubik’s Cube solver, which obviously doesn’t accept Hearthstone minion types as a possible options. Following my example above, you could – for example – assign Red to Demons, Green to Beasts, White to Elementals, and so on.
Before you proceed with the solution, you need to reset your board to the starting state. In order to do that, play the following cards:
- 3rd card 2 times.
- 4th card 2 times.
After you do that, you want to open the 2×2 Rubik’s Cube solver, click the “Edit” button and start inputting your Colors in the order I’ve listed above, in the places shown on this image:
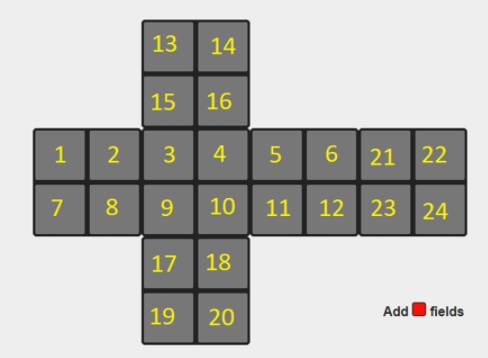
So, again, in my case “Red” were Demons, so I had to put them in slots 1, 6, 8 (and in my case 15). Then you want to do the same for each other minion tribe. After you’re done and you fully filled the Cube, just click “Solve”. Now you have a full list of moves you have to do and each card in your hand represents one of the letters on the solution.
- F’, F2 and F mean using 1st card 1, 2 and 3 times respectively.
- B’, B2 and B mean using 2nd card 1, 2 and 3 times respectively.
- U’, U2 and U mean using 3rd card 1, 2 and 3 times respectively.
- D’, D2 and D mean using 4th card 1, 2 and 3 times respectively.
- L’, L2 and L mean using 5th card 1, 2 and 3 times respectively.
- R’, R2 and R mean using 6th card 1, 2 and 3 times respectively.
Remember – if a solution’s step is just a letter (e.g. F), you have to use the related card 3 times. If it’s a letter with 2 (e.g. F2), you have to use it 2 times. If it’s a letter with ‘ (e.g. F’), you have to use it 1 time.
When you complete the final step in your solution, that should be it – Xyrella’s puzzle is done.
Puzzle #3 – Cariel
The solution is based on this Google Doc.
So, first of all, a word of warning. This puzzle is LONG. And I mean VERY, VERY LONG. The fact that you have to do most of the things yourself and can’t follow a step-by-step guide means that it’s hard to say how long will take you exactly. But I would say that you should prepare at least two hours or maybe even more if you aren’t good at that kind of thing (I’ve heard it took some people 3-4h). The good news is that you can quit at any time and then when you launch the game again, you should reconnect right where you left, so you don’t have to complete it all in one go. (Update: Keep in mind that’s only how it’s SUPPOSED to work, and I can confirm that I could reconnect after playing for over an hour and I’ve seen other players also reconnecting. But it’s Hearthstone so you can never predict how it will act and something might bug out, crash etc. and not let you back into the puzzle. So it would always be safest to complete it in one go if you can.)
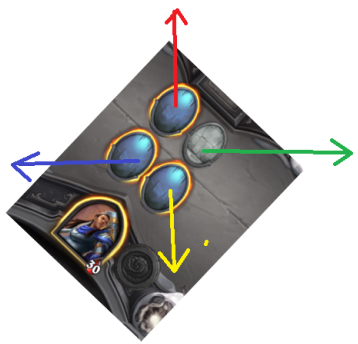
Cariel’s puzzle is basically another maze, but unlike the ones from previous puzzles, it’s way, WAY bigger. The basic rules are simple – you use your Hero Power to move in one of the four directions. For the sake of mapping, players agreed that:
- Top-left minion is moving up.
- Top-right minion is moving right.
- Bottom-left minion is moving left.
- Bottom-right minion is moving down.
This image should illustrate it better:
You don’t need to click your Hero Power every time you want to move. It will continue being active, so you just can just keep clicking on the direction you want. Sometimes it will “bug out” after a while and you will need to press it again – don’t worry when that happens, it’s normal. Some of the actions will require you to stop moving – in order to do it, click on your Hero Portrait, it will cancel the “move” action.
Now, the whole puzzle has three phases. The first phase is a small dungeon that looks the same for everyone, which is nice, because it lets you get used to the controls and how it all works before you are on your own. The second phase is a bigger dungeon you go to after breaking through the wall. There are 8 different ones and which one you spawn in is random, tied to your account (so no matter how many times you restart, you will spawn in the same one). You can’t tell which one you will spawn in, so you will have to figure it out on your own. Once you know which dungeon it is, you have to find an exit and move to phase 3 – “open world”.
Bob waits for you in the very center of this world. The goal is to bring him 20 pieces of Gold. However, the issue is that each of the dungeons contains only 5 Gold, so you will have to make trips to a few different ones (besides your starting one) in order to get all the necessary Gold. You’re also limited by your hand size – you can’t keep all of the Gold at once, which means that between each dungeon, you will have to make a trip back to Bob. How many Dungeons you need to visit depends on whether you want to play it risky or not (more about that later).
Now that you know your goal, let’s start actually progressing towards it. Open the World Map and pick any of the dungeons. It doesn’t matter which one you focus on at first, because the center part of every dungeon is the same for everyone. Personally, I opened the map on the second monitor and clicked on the pink square – that’s the spot everyone starts on. Now, I calculated that I need to move 1 square bottom – so I did it on the map and immediately did the same move in game. Then three squares right – the same thing. I moved my “marker” by three squares in the excel sheet (map) and then did the same thing in game. This way I could keep track of where I am at any time. If you’re lost, it might be pretty difficult to find where you are at times, especially when you’re just starting – so be sure to do the same moves on the map and in game.
Your first order of business is collecting a few items that will let you traverse better. At the beginning, you can only travel through white squares (caverns). The treasures you’re looking for are marked yellow on the map – you first want to go to the one marked 1, then 2 etc. Each one contains Gold Coins (the ones you need to take to Bob) and some special items. The first treasure contains Torch, which will let you pass through the Darkness (purple squares). It will also give you Compass, but… I honestly don’t know what it’s for. I think it’s just to fill your hand, you can use it to make a fireworks effect and that’s it. The second treasure contains Axe that will let you chop down the Trees (Green markers). In order to chop down the trees, you need to cancel your movement (click on the Hero), select Axe, then click on the tree to chop. It won’t automatically move you to that square, only open the path for you. The third treasure contains Magmawalk Boots that… do what the name suggests, let you walk through Magma (Red markers). Those three items will let you traverse anywhere on the map, you can now take different shortcuts etc. so maneuvering the whole maze should be easier. Now, the fourth chest contains Dynamite. It’s the vital item that will let you break some walls and exit your initial dungeon. Inner walls that are breakable with Dynamite look slightly different than the outer walls. Here’s a screenshot showing the difference:
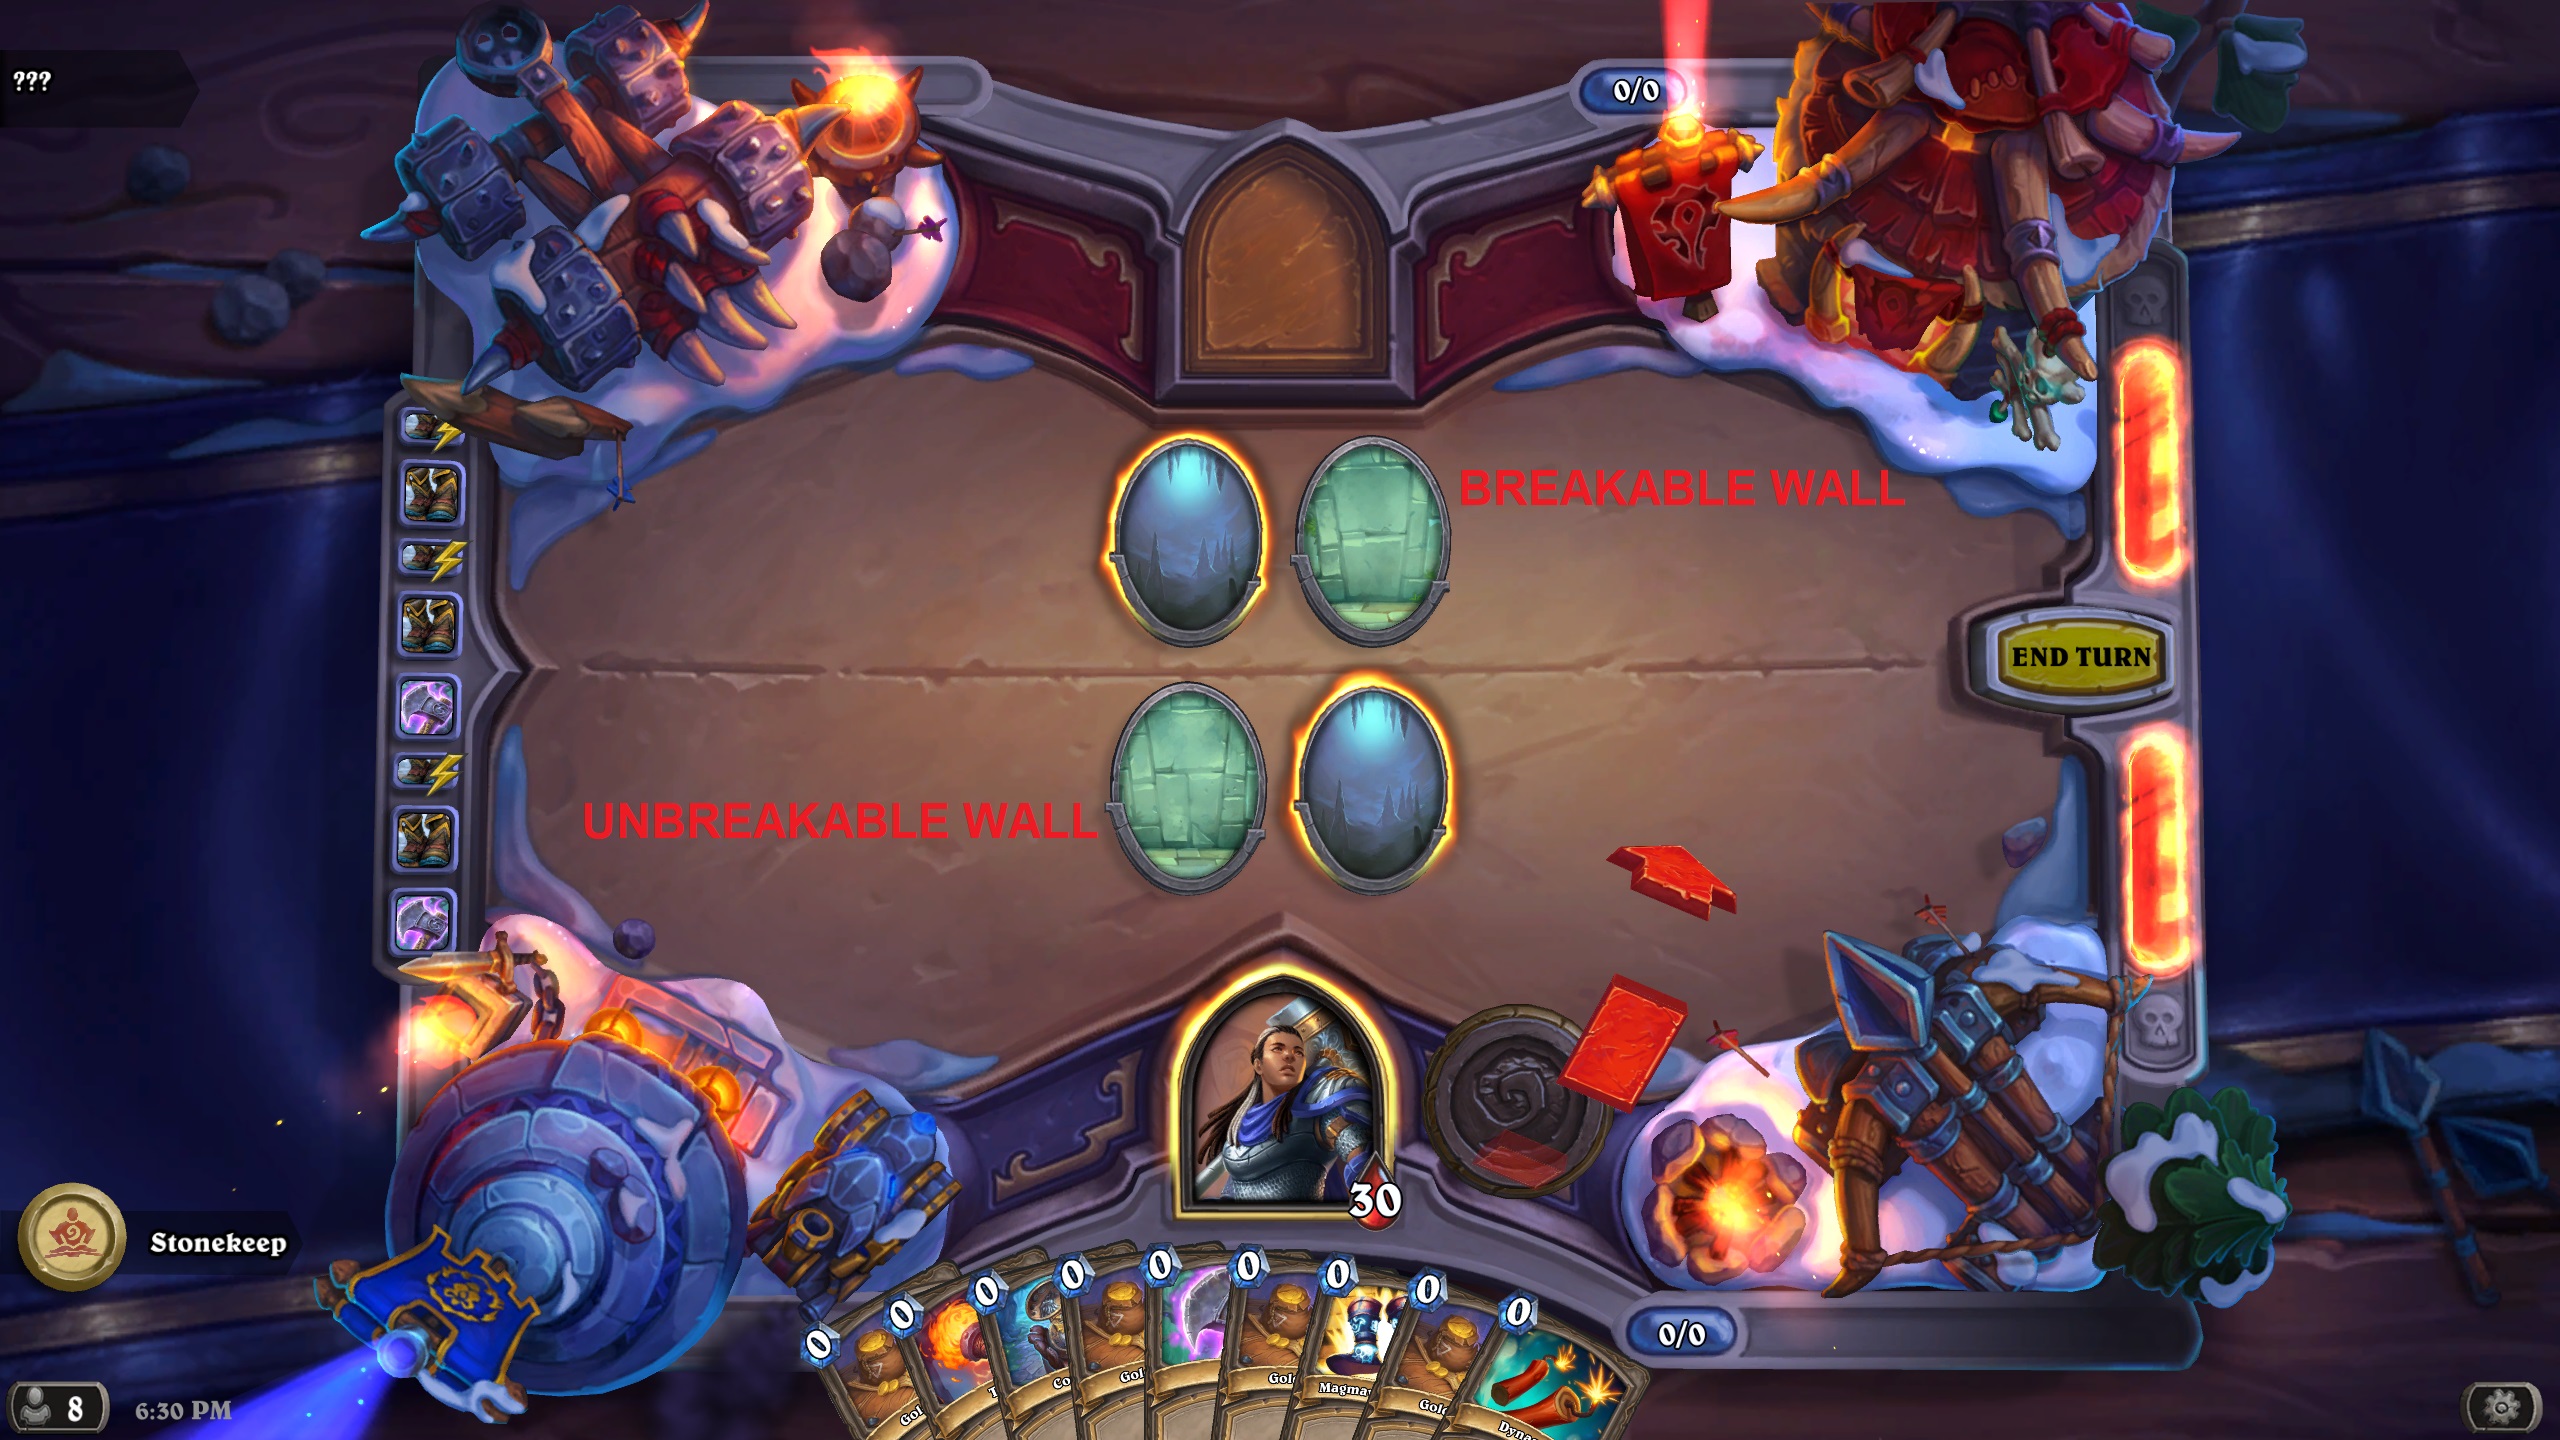
After you collected all of those items, you want to go to the slightly darker yellow (orange?) square marked “5” – that’s the wall you need to break. Look at the image above and make sure to pick the correct wall – they have small differences (e.g. look at the top part). Keep in mind that unlike other items, each Dynamite has only a single use and you don’t have any spares at the beginning. Double and even triple check that you picked the correct wall before throwing it.
Now that you’ve done it, you’re entering Phase 2 – the outer dungeon. Here your first order of business will be finding out which of the 8 Dungeons you are in. Move one step at a time and compare what you see on your screen with maps of 8 dungeons. If what you see doesn’t match, you can now ignore the dungeon because you know that you’re not in it. Keep doing it until you have it narrowed down to one – just make sure to keep track of how many steps you took to not get lost. I did it by taking 4 steps right (counting from the breakable wall) and then going a few steps up. After each step, I compared what I see on my screen to each of the dungeons, and if something didn’t match I narrowed it down. After heading right until I hit a wall, and then taking a few steps up and noticing magma on the left side, so I knew that I’m in Dungeon 8 (bottom-right).
After you figured it out, you want to find another treasure in the “outer” dungeon – it’s marked in yellow on the map, but this time without any numbers. It will give you another Gold and Dynamite, so you can now exit the dungeon. In order to do it, navigate to another dark yellow/orange square, now on the outer circle of your dungeon. After you get there, break the wall with Dynamite and you’re free.
Now you’ve entered Phase 3 – open world. Your first goal is to go to the very middle of the map and find Bob. What I recommend here is navigating by 10 steps at the time. For example, move 10 steps up on the map, then do the same in game. If you want to be even more careful, you can e.g. move by 5 steps, but it would make things even longer and you don’t need to be THAT precise yet (finding Bob is easy). My point is that you don’t want to stay “okay, now I’ll go 50 steps up”, because you can miscalculate it much easier than going in smaller increments. How small you want them to be is really up to you and your confidence.
After you found Bob, give him the 5 pieces of Gold you’re holding (just drag Gold from your hand onto Bob). Now chop down one of the trees south-west of him – there’s a treasure hidden behind it (it’s, once again, marked yellow on the map). It will give you an extra Gold piece and a stick of Dynamite. Make sure you gave Bob your Gold first because if you’re out of hand space when you need to pick a Dynamite, the game is over and you need to restart. You can give that extra one Gold to Bob and set on a journey to other Dungeons. Don’t throw Dynamite at Bob… It’s probably obvious, but make sure you don’t misclick, because throwing Dynamite at him will kill him, so you lose even if you have spare Dynamite.
Now things are getting even harder because you need to find hidden entrances to other Dungeons – the same ones you used to exit your starting one. However, the “problem” here is that while they look different from the inside, they are the same as any other wall from the outside. That’s why you need to carefully, and I mean VERY carefully trace your steps. While I normally tracked every 10 steps when traversing through the open world, when I got to a dungeon wall (the one containing doors), I only moved 2-3 steps at the time to not make any mistakes. Pick one of the dungeons and head into it. I started in Dungeon 8 (bottom-right) and then I picked Dungeon 5 (middle-right). But the choice is really up to you.
What you need to do is find the exact square containing hidden wall, throw Dynamite at it (if it breaks – then you got the right one) and enter the dungeon. After you entered it, go to the “outer” chest to pick another Dynamite stick. After you picked Dynamite, you want to find another hidden door – this time to the “starter dungeon”. This hidden door also looks exactly the same as any other wall, so be careful. Once you’re inside, walk around the initial dungeon and collect the treasures. Each treasure chest will contain Gold + Dynamite. If you need more hand space, you will have to throw away the extra Dynamite sticks. Your items will take 4 hand slots, so you only have 6 left. When looting the first dungeon (not counting your starting one), I recommend sticking to 4x Gold + 2x Dynamite, which means leaving one treasure behind (this gives you SOME insurance in case things go badly).
After you looted your first Dungeon, go back to Bob. At this point, he has 10 Coins, so you have two scenarios. Play it safe – visit 3 more Dungeons, bringing 4 Gold pieces from the first two and then the last 2 Gold pieces from the final one. OR play it risky and get 5 Gold pieces from two more Dungeons. Playing it safe means that you keep an extra Dynamite stick like you did (4x Gold + 2x Dynamite). This way even if you “waste” one Dynamite because you messed up and picked the wrong wall, you will still have a second stick you can use. Playing risky means that you keep no spare Dynamite – you only have 1 at the time, so if you screw it up, that’s game over. Well, not completely. You technically have one treasure left in the first dungeon you looted after breaking out into the open world. So even if you make a mistake, you can backtrack to that Dungeon and pick up one extra piece of Dynamite. But that will take A LOT of extra time. Again, the choice is up to you – I didn’t keep any spares, but I played it super safe and made sure that I am where I think I am. Here’s the path I took in the end: I started in Dungeon 8 (bottom-right), then went to Dungeon 5 (middle-right), then Dungeon 3 (top-right), then Dungeon 4 (middle-left). If I kept a spare, I would need to visit an extra Dungeon.
In the end, no matter which method you pick, after visiting every dungeon, go back to Bob and give him the Gold you found. A few Dungeons later, the puzzle will be finished! It took me over 3 hours to finish it, but I stopped every now and then to take notes for the guide. I estimate that it would take me around 2h if I just played through it, but I took the risky method – safe one would take me at least an extra 30 minutes. As you can see, the puzzle takes A LOT of time.
Finish
And that’s it! After you completed all three puzzles, you can now open Achievements, go into “Gameplay” -> “Fractured in Alterac Valley” tab and then claim your “???” achievement with a shiny, new Shimmering Snowflake card back. Good job, especially on the
Once again, massive shoutout to the WoW Secret Finding Discord server, but also the Chinese community, who figured out big parts of the puzzles (like mapping out dungeons in Cariel’s puzzle). It’s a huge effort and there’s no way a single person could do all of that.
i just finished the achievement using this guide.
thanks a lot stonekeep!
what i did not see at first is that all dungeons have the initial map at their center.
maybe i overlooked it in the guide, but before realizing it i was very confused with step 2 (find out in which dungeon you are)
Many thanks for the excellent guide and kudos to the amazing secret finding community. Also, personally I like a lot that this time around solving the puzzles for us mere mortals involved a bit more effort than just following a step-by-step guide. A little bit of elbow grease makes the reward sweeter as far as I’m concerned.
A few notes on the Cariel puzzle (by far the most fun):
1. Navigating the open world (and finding the breakable walls) turned out a lot easier than the guide cautioned. In most cases I could find Bob or my next destination just by spamming one direction till I hit a wall, then follow it till the next corner, and only having to count carefully from there. It still took me a good 2 hours, but reduced the mental load a lot.
2. I took the “risky approach” (5 gold from each dungeon and wasting dynamites with reckless abandon), but I still needed to visit 3 dungeons in total. After giving Bob my entry dungeon loot + the tree Coin, I returned twice with 5 coins and I still had to go to a 3rd(4th technically) dungeon for another 5, although the puzzle completed before I could give him all 5 of the last haul (not sure if it was on the 3rd or 4th, I was spacinf out by that point.)
I started it and I agree, it’s the most fun (one could even dare to explore by oneself) so far.
Only problem I have: I am trying to do it on my phone and I cannot make my movement action stop 😀 clicking on the hero portrait will just open the emote menu…
I did stop somehow in the past, but atm i don’t know. Will have to close HS and restart, I fear…
luckily I found the right reddit comment.
So anyone trying to do this on the phone/mobile:
to stop moving, select one of the 4 directions (preferably a direction that’s a dead end, like a wall or a tree), then drag/slide to the hero portrait.
If you can’t decide which of the other dungeons to do:
Some seem to be easier/nicer than others. Avoid middle left, upper left and middle right, they tend to be more tedious (trees blocking the path) or confusing (x-crosses, trees instead of walls….). I would rank them #6, #7 and #8.
Upper right is nice, but getting the dynamite right on spot is … a bit risky. I would not do it as the first dungeon. #5 for risk, otherwise it would probably make #2.
Very nice for both finding the entrance and getting through are the upper middle (#2) and the lower right (#1). Unless you came from one of these I would recommend those.
Lower left has a nice entrance and is generally nice, too – but there’s plenty of walking to be done, as the entrance is far. Still, this is #3.
Lower middle is my #4.
map dungeon #4 (lower middle as you say) seems buggy, I can’t go past the tree in (156,CV) as I find a wall.
Working around to get to darkness down on left side but another unexpected wall in (169,CN)…
My main problem with this achievement is the card back itself. The Phoenix card back we got for the Barrens puzzle was awesome and regal. The “Gift of Elune” for Stormwind was decent, but nothing special. But this?… It looks like carved with a hatchet. Or most likely an ice axe.
idk what are you talking about, this cardback is awesome, look at its animations in-game. (imo it’s the best puzzle card back and one of the most beautiful in the game). silver cones, blue animated background, big snowflake and snow are shimmering, center sparkling with colours. I spent about 4 hours solving all these puzzles and while it didn’t feel great I think it was worth this cardback.
BIG thanks for the guide, especially for Cariel. While I’m still in middle of doing it, I noticed that one sentence in here could be little “misleading”. The sentence I’m talking about is “At this point, he has 10 Coins,”. You should probably mention that this depends on if you take safe or more risky route, because if you keep 1 dynamite, Bob would have 11 gold, not 10. Not sure if this matters at all, but I wanted to mention it anyway.
So unless I’m wrong here, aren’t pure white squares (with borders) supposed to be path? Because if yes, some parts of the map are wrong.
White are 100% path inside the initial dungeon. Outside of the initial dungeon, only blue are 100% confirmed path. People didn’t draw the entire dungeon map and whites are the ones they didn’t try out because it wasn’t necessary.
So after you leave your initial dungeon, it’s safest to travel only on the blue ones, but a lot of the white ones are path too.
“The good news is that you can quit at any time and then when you launch the game again, you should reconnect right where you left, so you don’t have to complete it all in one go.” So this was a lie. Got disconnected at the end, progress lost.
I’m sorry about that, but it wasn’t a lie. That’s how it’s supposed to work. That’s how it worked for me (I played it over two days – I quit after getting to Bob for the first time and then reconnected in the same place) and for many other players too from what I’ve seen. But the game can always bug out, act up or something, hence the word “should”.
That said, I’ll edit the guide and make it clear that it’s safer to do it on one go because the game can always do something unexpected.
i just finished the achievement with this guide (thanks a lot stonekeep), but it has definitely to be done in one go, because the “reconnecting to your last game” never works in practice.
the client crashes and you have to start the whole achievement from square one.
He should have 10 Coins because you should play your first dungeon (after your starting one) safe 100% of time and it doesn’t impact the progress.
Because of the 1 extra Coin from behind the tree you can play one Dungeon safe and it won’t impact the number of dungeons you need to go to. And it makes most sense to play the 1st one (not counting your starter) safe because then you have an “emergency” dynamite there if you screw something up in later ones.
Thanks for share this. <3 Hard to understand initially, but a piece of cake after read your note twice. 😀
Thanks so much for this! The clarity of this guide is unrivaled. I was greedily waiting to see if there would be a guide on this site before starting the puzzles, but this was written much faster than I expected!
The juggling thing was confusing – are the health values just an arbitrary code that was cracked to find position values?
Thank you, I tried my best to explain the puzzles in a way that would help me complete them. All the early guides are amazing and I build my own based on them, but they often miss a lot of details and tips that I have to fill in myself.
Yep, the health was probably meant to confuse players at first and force them to gather a lot of data and find what the “real value” for each of the orbs is. When first entering the puzzle, everyone would assume that health is what is relevant, but it’s just used to hide another number.