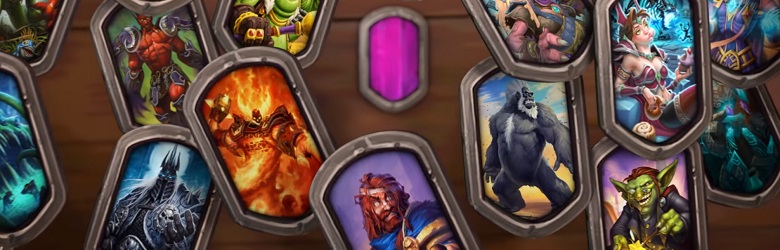
Gone are the days when Battlegrounds players could just click through same standard curve decisions over and over again in the early turns of the game. Now, the standard curve is just one of many options as the game matures and new strategies are discovered. In fact, most heroes now aim to spend a lot of time on Tier 1 to buff up their board and get to their Buddies quicker.
Standard Curve
The basic curve is what we’ve all used back in the day, even if it is not super relevant at this stage of the Battlegrounds experience. It is a good starting point for newcomers since it’s more straightforward and it can still be viable for heroes who don’t use mana for their Hero Power.
Buy a minion on turn 1, preferably one with a token or something that’s worth selling (meaning Sun-Bacon Relaxer or Sellemental, not Deck Swabbie), then level on turn 2 to Tavern Tier 2. Then, with five gold, you ideally want to sell your token and buy two synergistic Tier 2 minions. Back in the day, it was even considered OK to just sell your Tier 1 minion for the power level increase. If the shop is trash, you can either roll twice and buy once or transition to the “3 on 3” curve, even though that basically means a first-class ticket to “top eight land” in the current metagame.
On six gold (meaning turn 4), just buy twice. Next up, level for four and buy one minion for three gold. From then on, the game opens up: you can either buy twice and roll twice (with some buys and sells thrown into the mix), or follow the fast version of the curve and instantly level to Tier 4 after selling something. Again, this setup is not very efficient nowadays as you will fill up your Buddy Meter much more slowly than your opponents, which is a massive handicap right now in Battlegrounds.
In fact, getting the highly impactful Buddies online (and the large focus on tempo) means that the currently most important curve to consider is the…
Shinese Curve
Also known as Warrior Curve, Chinese Curve or Shiny Curve, the idea is always the same: stay on Tier 1, get a big board, then catch up on the Tier deficit by leveling twice in the same turn. This nifty little strategy allows you to maximize tempo and board-based combat early on, securing wins in the early encounters and juicing up your Buddy Meter in the process.
You want to maximize your purchases until turn 5 (7 gold), at which point you’re looking to sell a token, then level straight to Tier 2 and then to Tier 3 on the same turn. You follow this by immediately leveling to Tier 4 on turn 6 (8 gold), catching up to the standard curve while having a much wider, if comparatively weaker board. Tokens are still very useful to have (and you’re definitely looking for something sellable to fill out your 5-gold turn), but your main goal here is to look for valuable doubles and early triples to potentially spike into one of those snowball-y game-winning Tier 4 units the turn after upgrading to Tier 3. (Hello, Avenge keyword!)
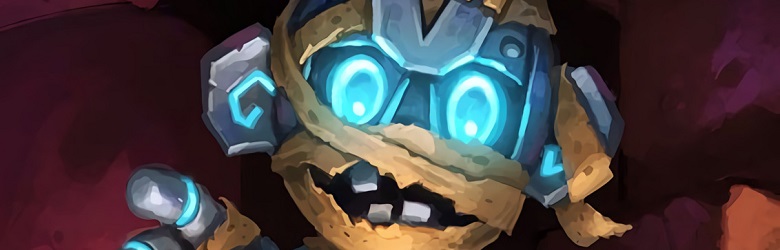
If Mechs are open, Micro Mummy is a very good pick-up, because it can snowball your board, making your T1 minions trade better. Acolyte of C’Thun is also great simply because of its combat prowess: it does a lot of legwork in filling up your Buddy Meter and can divert two attacks for the price of one minion slot. Early on, when most players are likely following this strategy, it is extra great as it can reliably take out two regular minions.
Ideally, you have some sort of advantage to build on by turn 7, be it a strong Tier 4 minion courtesy of an early triple you’ve found or an overwhelming lead in the buddy race. Either can shape your strategy going forward in the current metagame.
Jeef Curve
The Jeef Curve is your emergency valve for those scenarios when the Shinese Curve is not ideal because of the lobby composition of an awful shop. If you don’t have enough economy units available or couldn’t find an early token, you can take a slightly different approach to the “stay on Tier 1 for a while and go from there” strategy.
This way, you’ll be spending three turns on Tier 1. Here, the goal is to buy powerful individual minions. Find one token (or Deck Swabbie) to sort out your finances, but everything else needs to be powerful stuff. Thankfully, since you’re specifically playing this to make up for the lack of tokens, it just about covers every other scenario. If you don’t get Micro Mummy, or Acolyte, or (mehhh…) Evolved Chromawing or a token, that’s just rotten luck.
So you made it to turn 3 and got a nice selection of strong minions, winning your battles along the way. Good job, now is the time to level up! Buy one last Tier 1 minion to say goodbye, sell your economy unit and make your way to Tier 2.
Here, you have multiple choices. You can play it slow and buy two minions, then do the same buy-sell-level dance on turn 5, making your way to Tier 4 by turn 6. You can also power-level your way there by leveling on turns 4 and 5 at a significant tempo disadvantage. There is also a way to split the difference: level immediately to Tier 3 on turn 4, then buy twice on Tier 3 before proceeding to Tier 4 when you have 8 gold to work with.
Yogg Curve and Rafaam Curve
These two heroes are the most emblematic of their respective strategies, but really, it’s all about the cost of the Hero Power. For Heroes with powerful 2-gold abilities that you want to constantly use, the Yogg Curve is your friend. For everything else, there is MasterCard, or, erm, the Rafaam Curve.
The Rafaam Curve is super straightforward since you want to Hero Power on every turn (except the first one). This means you will only reach Tier 2 on turn 4 but with a large enough army on your side to provide a tempo benefit. Then, you normally go for back-to-back Tavern Upgrades while also sprinkling in the Hero Powers. There is also the option to go slower, delaying the level-up to turn 6, but that means you won’t be able to use your Hero Power as you make your way to Tier 4 for two consecutive turns.
For the Yogg curve, the math is a bit more annoying to juggle. The simpler option is to level on turn 2, leverage your Hero Power to sort out your 5-gold turn, then tier up and use it again on turn 4. Next up, you use your Hero Power, sell something and buy two other minions to juice yourself up and get enough resources to justify leveling again on turn 6. The more aggressive approach is to delay leveling by one turn early on to get a wider board: by only going to Tier 2 on turn three and buying twice on Turn 4, you’re set for back-to-back Tavern upgrades while also using your Hero Power on both occasions. Both approaches can get you to Tier 4 by turn 6.
3 on 3 and 4 on 4 curves
These ideas are all about leveling fast and stabilizing from there. They are very counterproductive in the Buddy meta. Still, they are well worth keeping in mind:
“3 on 3” is the Galewing setup: you start out with the standard curve but sell your starting minion on turn 3 and immediately level to Tier 3 – hence the name. Unless you have some very specific benefit for being on Tier 3 on turn 3, this is not a good idea when everyone else is running around looking for Buddies.
“4 on 4” requires a token start, or else the math doesn’t work out. You buy the token minion, then level on the next turn, then sell the token and level, then level to Tier 4. You’re butt naked but with great potential! Shame it will be near-impossible to realize – you will be down on health and tempo, your buddy meter will be nearly empty. It’s sort of a very high risk, moderate reward game plan, definitely not something you want to do in order to win consistently (but it can lead to some fun games if you pull it off).
This guide needs updating in regards to the Shinese Curve method as Acolyte of C’thun mentioned is now a Tier-2 minion with the latest update.
So I’ve been trying the Shinese Curve method and it is hit and miss. A LOT of RNG which can go in your favor or lead to an epic failure. My biggest issue has always been I get so tunnel vision on buying minions, I forget to upgrade the tavern past 3. Even more so with the upgrade from 4 to 5 being so costly. However, I am trying to get to 5 as soon as I have the gold as I feel there is a certain advantage of being one of the first getting Tier 5 (or 6 if creating a triple once on tier 5) minions.
Been waiting for battleground guides like this also would like to see viable endgame setups for each tribe.